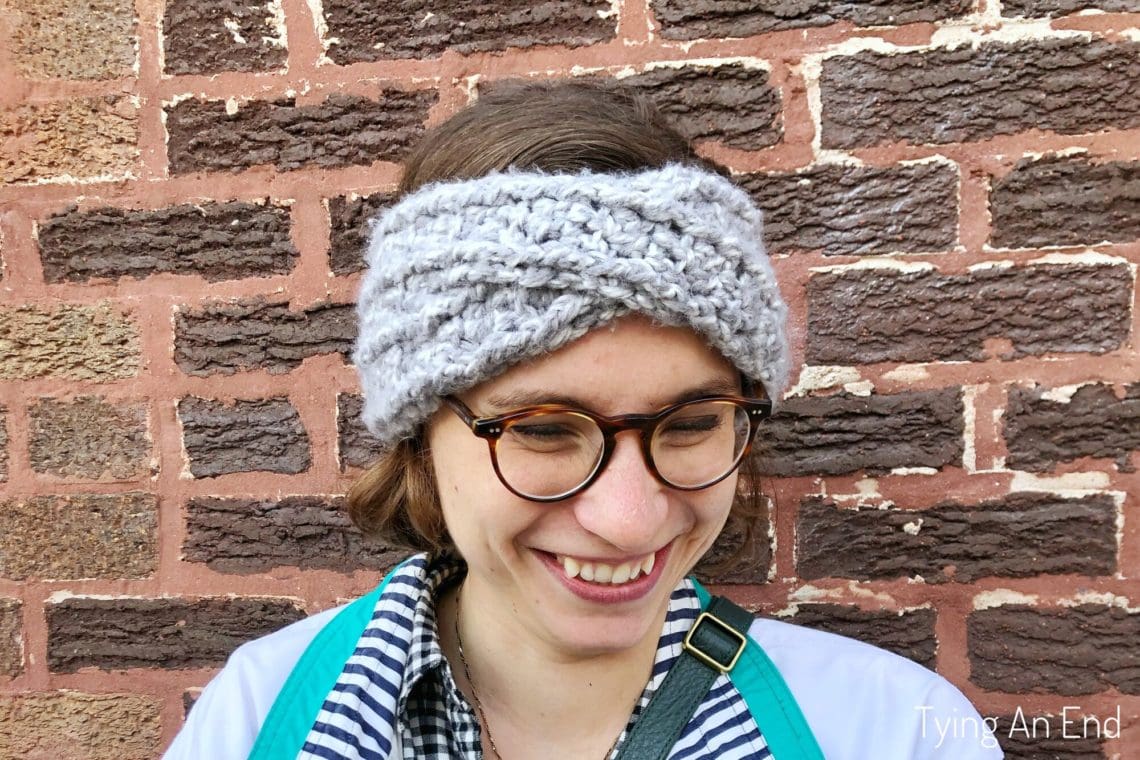
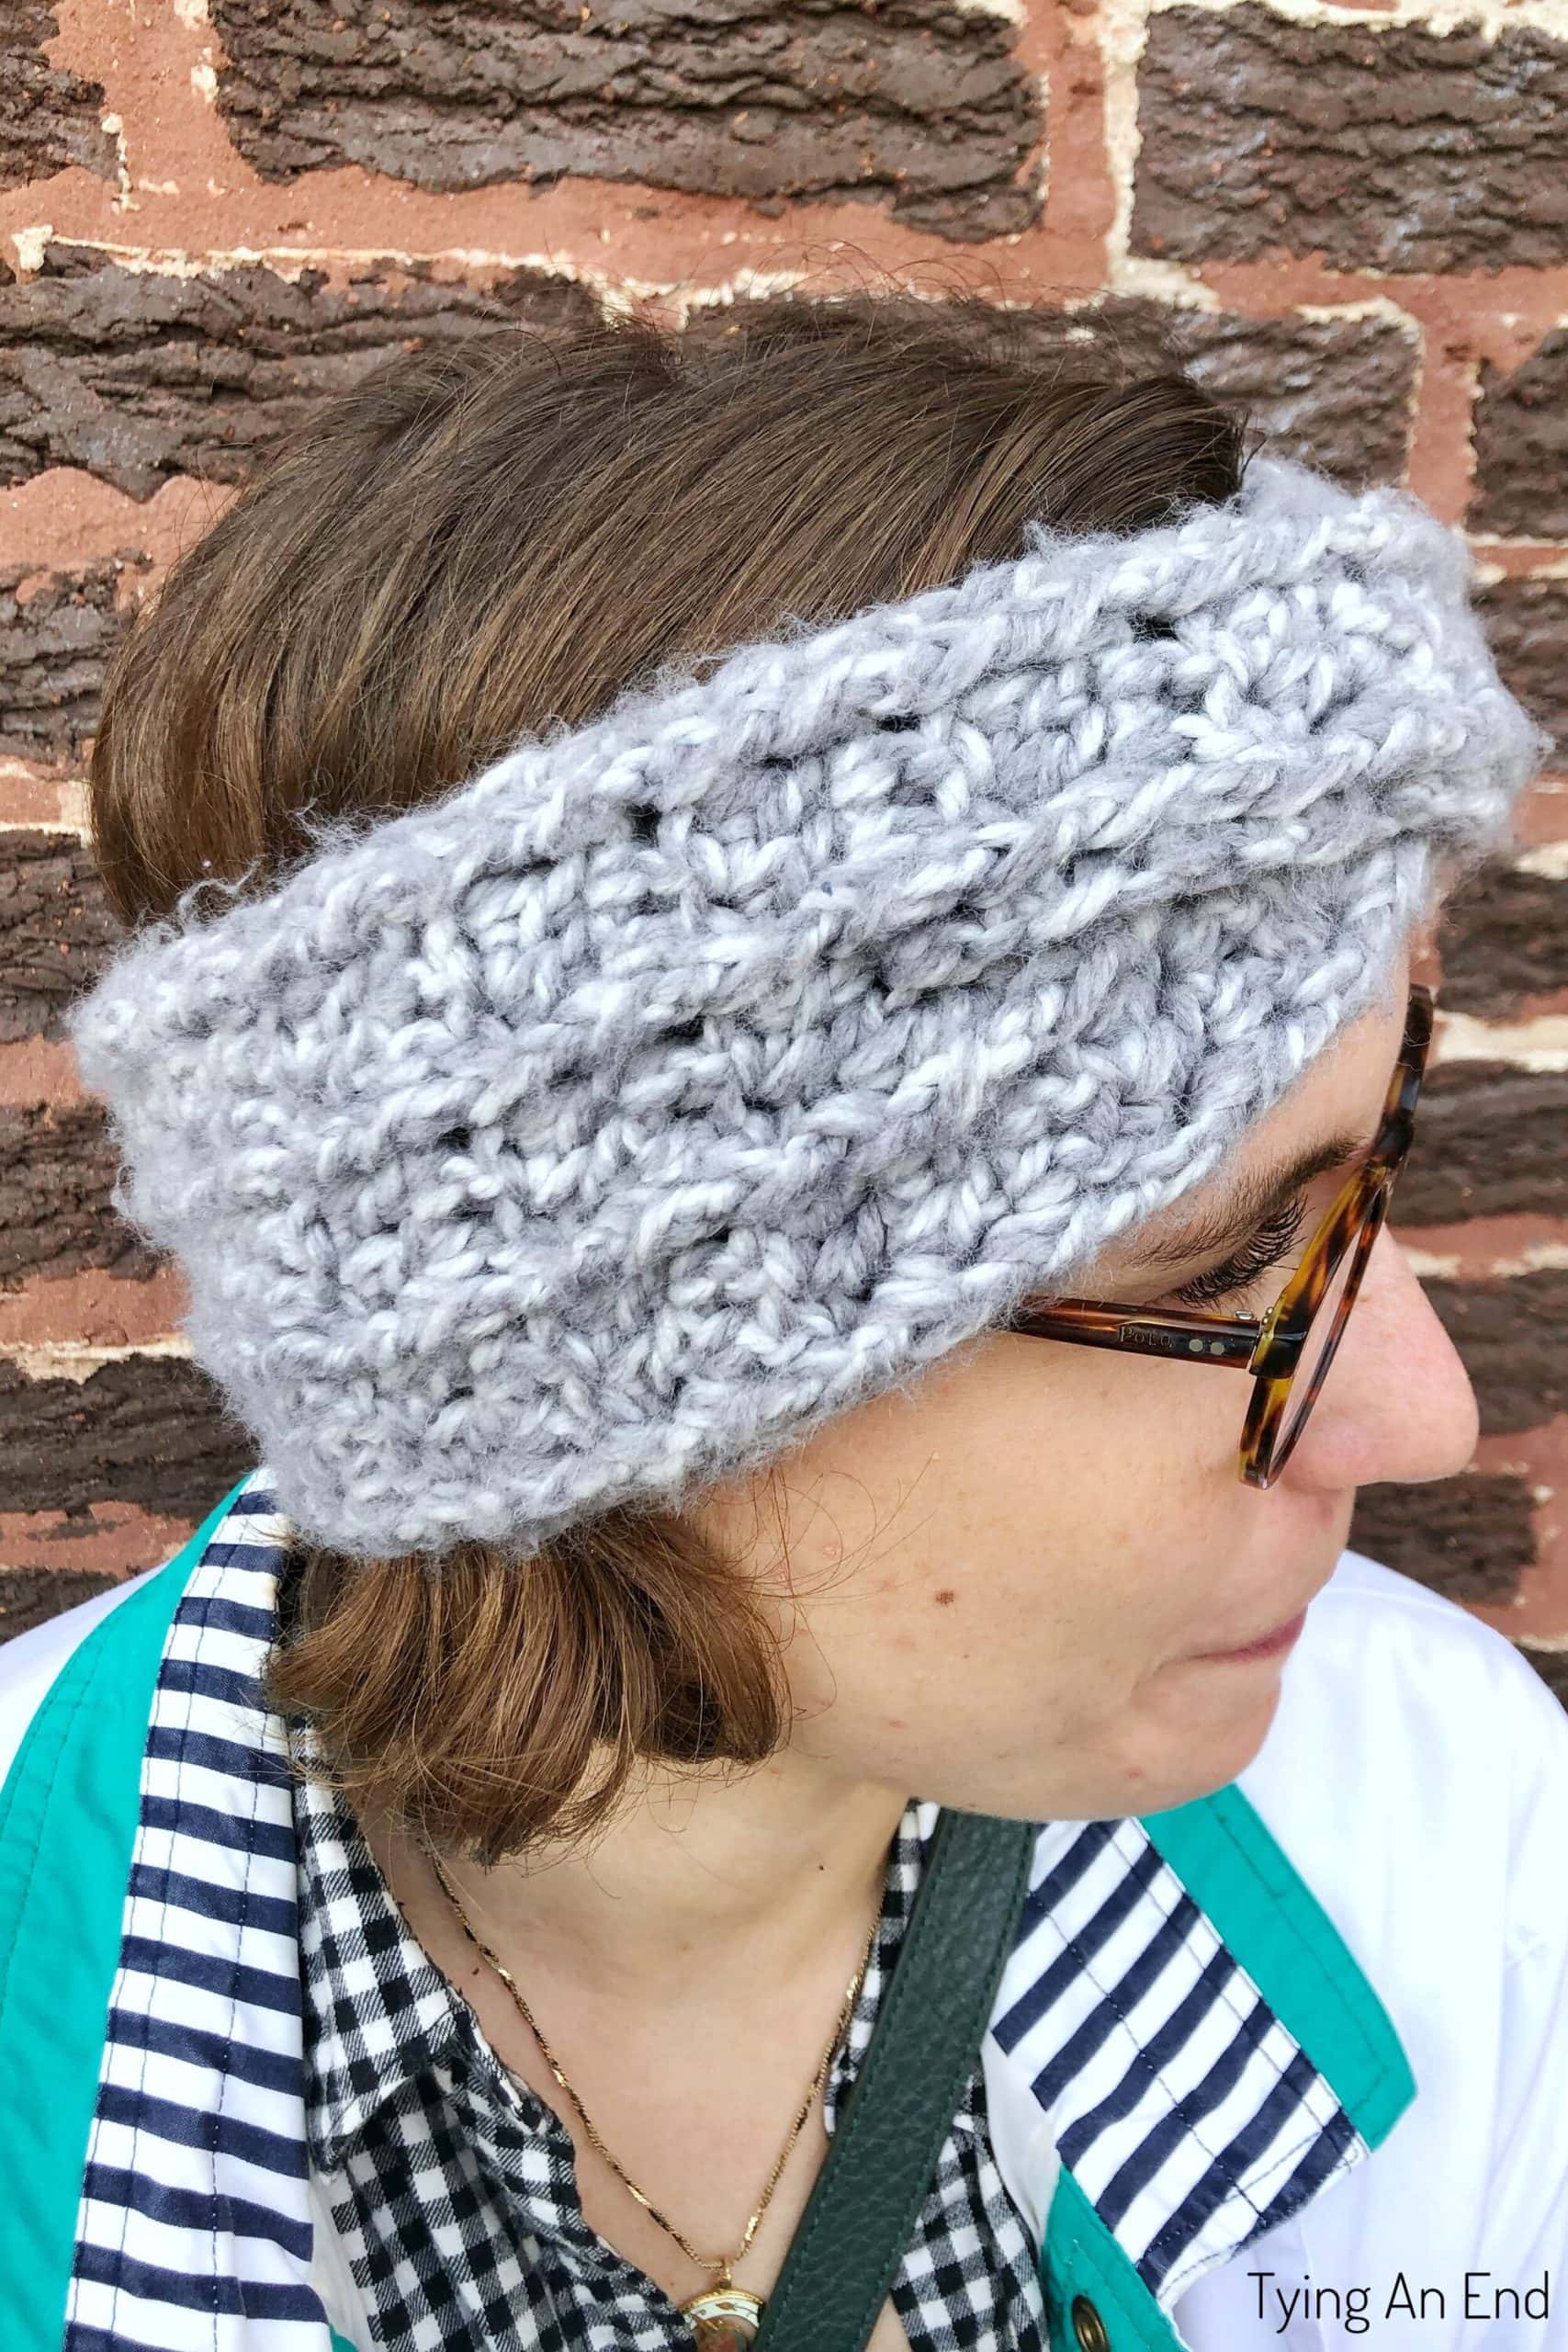
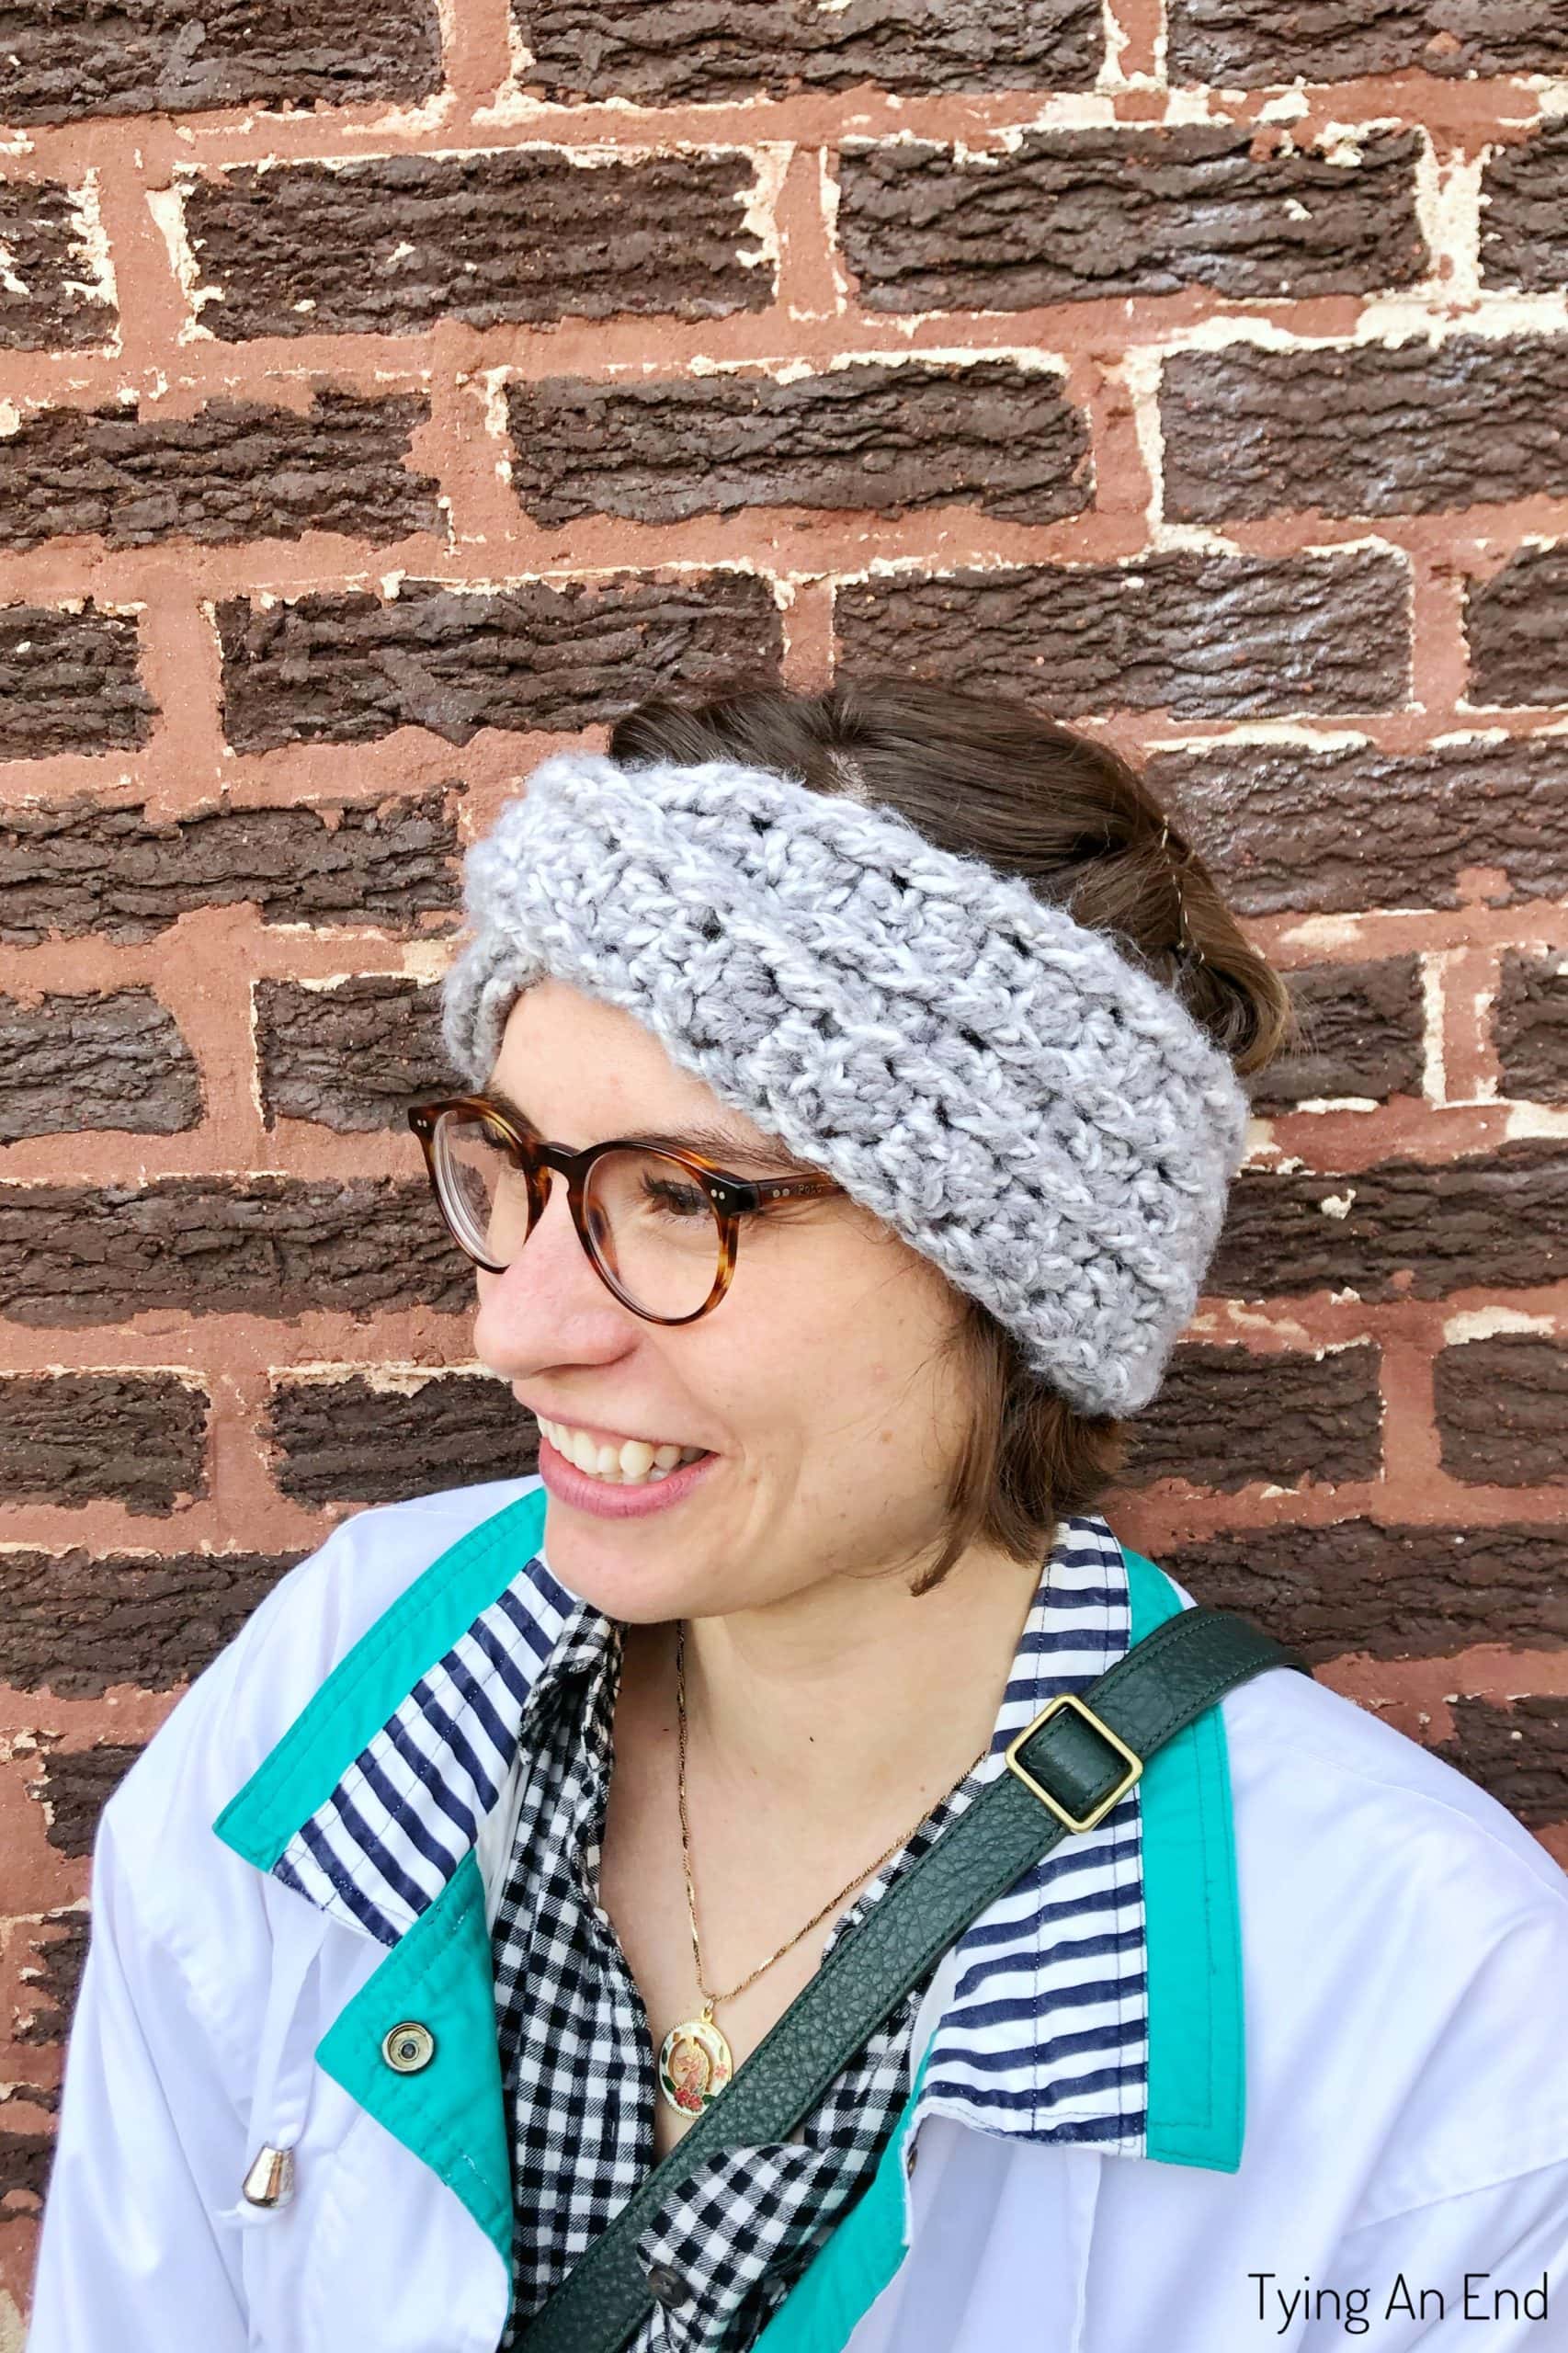
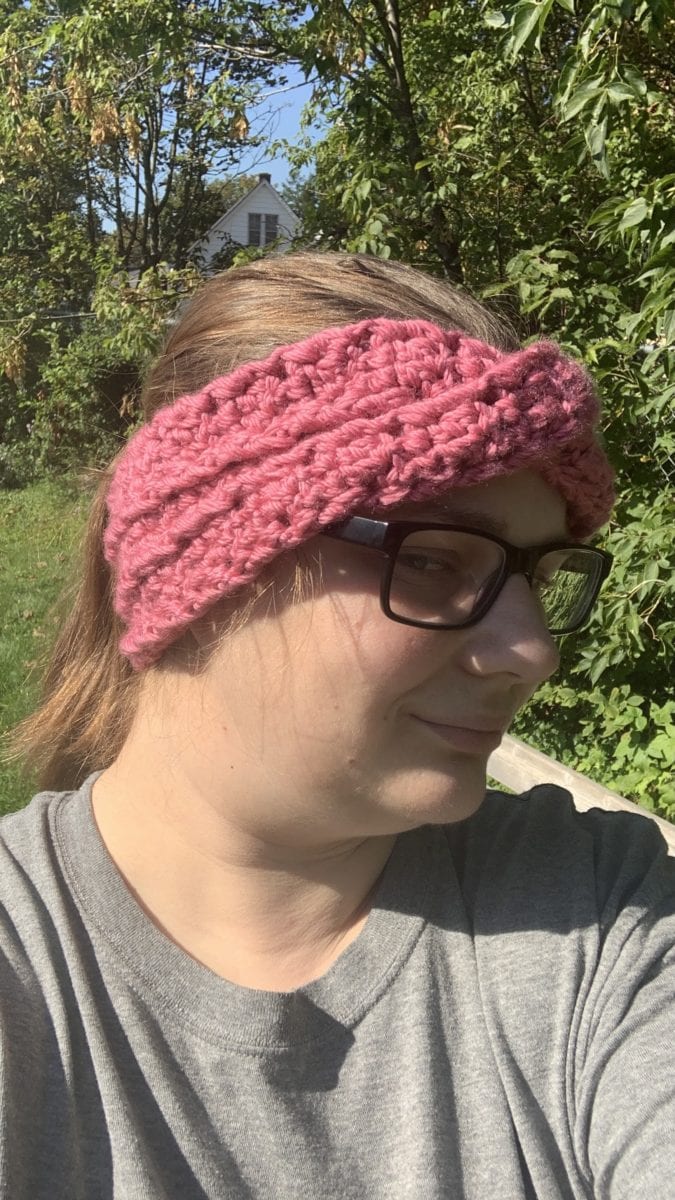
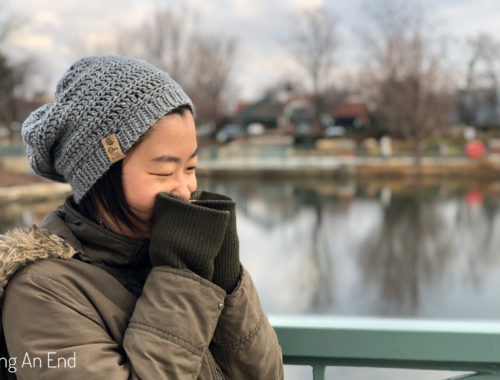
Nadia Twisted Headband
Get ready for fall weather! A headband is the perfect way to keep your ears warm without messing up your hair. Subtle touch of details of lines sure gives a nice addition to your look. Get the free Nadia Twisted Headband crochet pattern below or you can purchase ad-free, printable PDF on my Etsy, Lovecrafts, or Ravelry!
Disclosure: This post contains affiliate links. If you make a purchase through one of those links I receive a small commission. It’s an easy way to support this blog at no additional cost to you.
This design is something I made few years ago for my best friend along with Chunky Wrist Warmer. I just quickly made it, without jotting down how I made it. Because I loved the look, I really wanted to put it into writing. I finally did it, and I hope you like it!
Pin it now, crochet later
Inspiration
One of my best friend’s birthday is in the fall, so I wanted to make crochet fall/winter accessories. She knows I crochet a lot, knows the value of the handcraft items, and support what I do! Love Crochet Throw Pillow is actually first gift I made for her, so she knows what I can make ✌️
She often told me that her hands get really cold easily, so fingerless mittens would be good for the fall weather. There I gave birth to Chunky Wrist Warmer (one of my popular pattern now!). After I made it, I had decent amount of yarn left, so I quickly made something that can be paired with. So I thought of making a headband with a touch of detail. Not too complicated but not too simple design. Back then, I saw so many people making twisted headband, so I thought this would be perfect fit to make! I believe twisted headband was a huge trend in crochet/knit community back then. It’s still popular today, and I’m really happy to have this crochet twisted headband pattern to my design addition!
A Yarn I Used
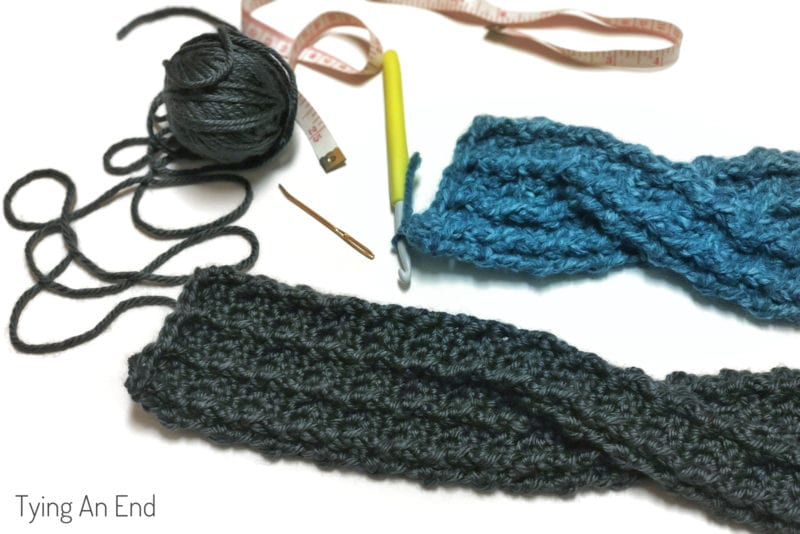
When I made a headband for my best friend, I used Lion Brand Wool-Ease Tonal, which is sadly discontinued. In order to write out the pattern, I had to remake it from scratch. I needed to make it with a yarn that’s available for purchase and not expecting that some people have Wool-Ease Tonal in stock.
I thought of using Wool-Ease Thick & Quick (WET&Q) so I compared to my stock yarn of Wool-Ease Tonal, and you can definitely tell that WET&Q is much thicker. Because I didn’t want it to look too heavy and thick, I decided to go with a yarn that has a same yarn weight. I had some Red Heart Soft Essentials (same yarn weight) left over from making Veronica Cardigan (pattern by TL Yarn Crafts) so I decided to go with that. It is slightly thinner than Wool-Ease Tonal, but it’s still gives you the stitch definition. For a much closer texture to Wool-Ease Tonal, you can try Woolspun (limited time only) and Hue and Me which both have same yarn weight category 5. You can also give it a try with WET&Q if you prefer more bulkiness!
The Look
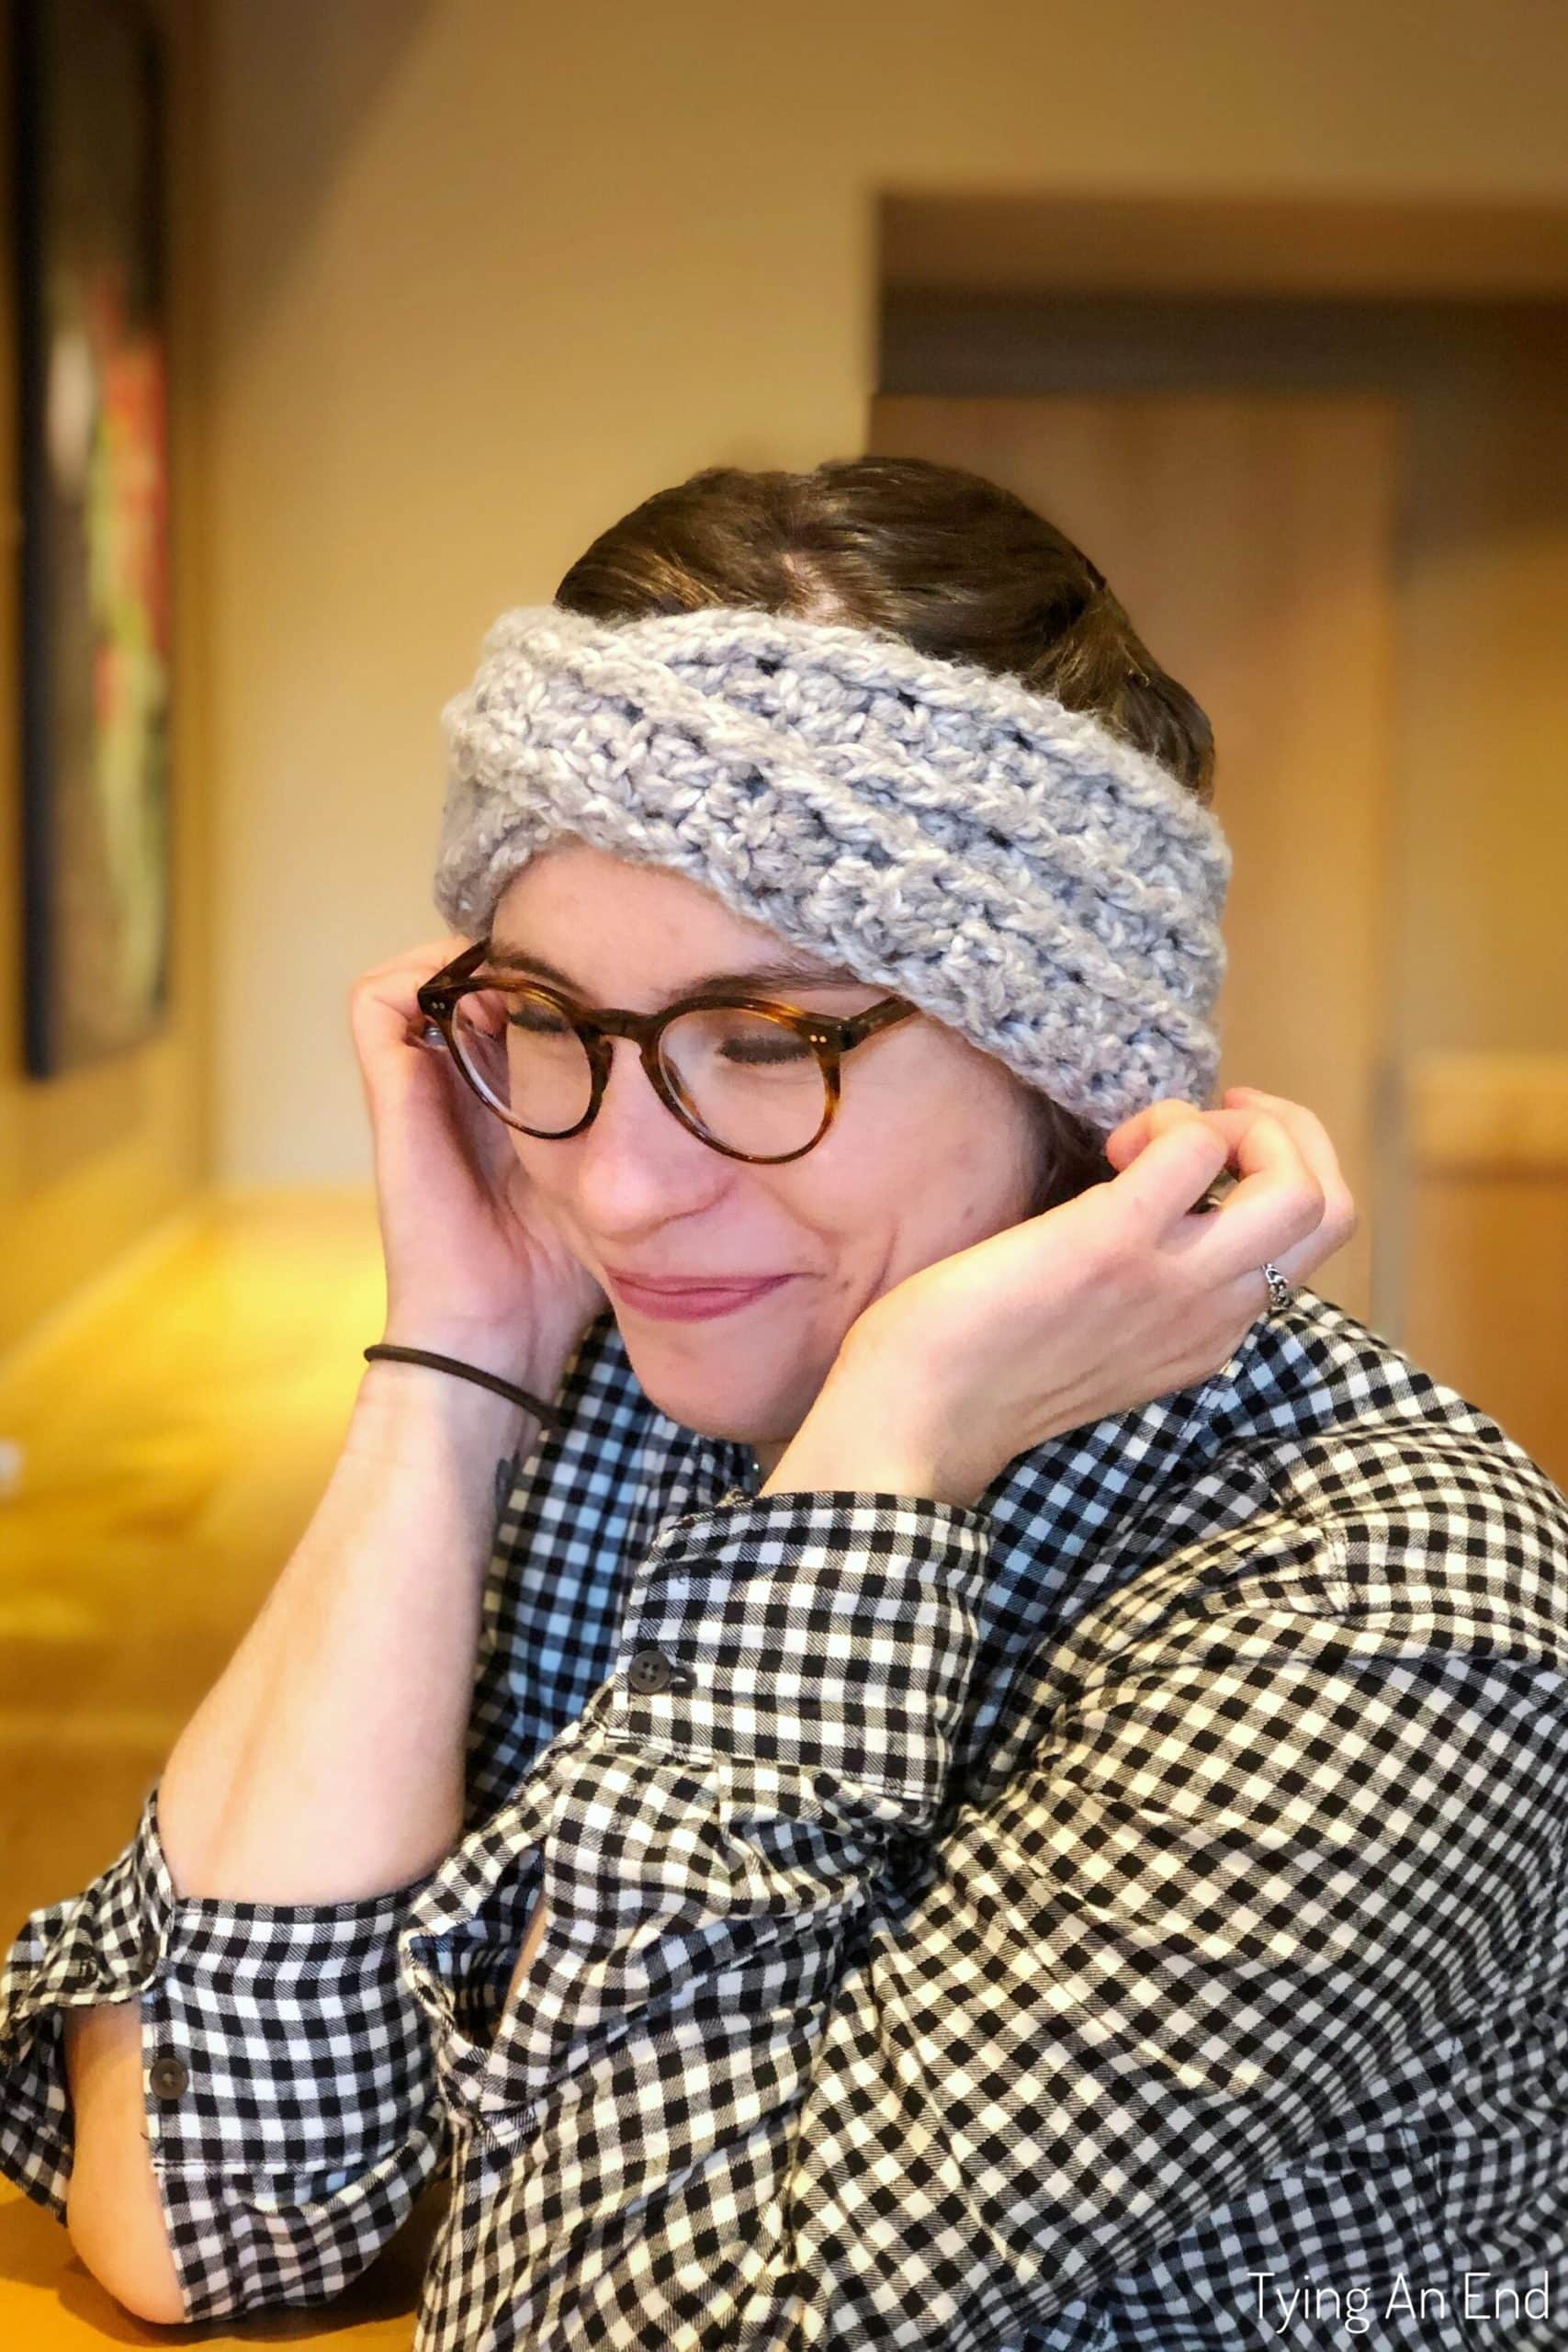
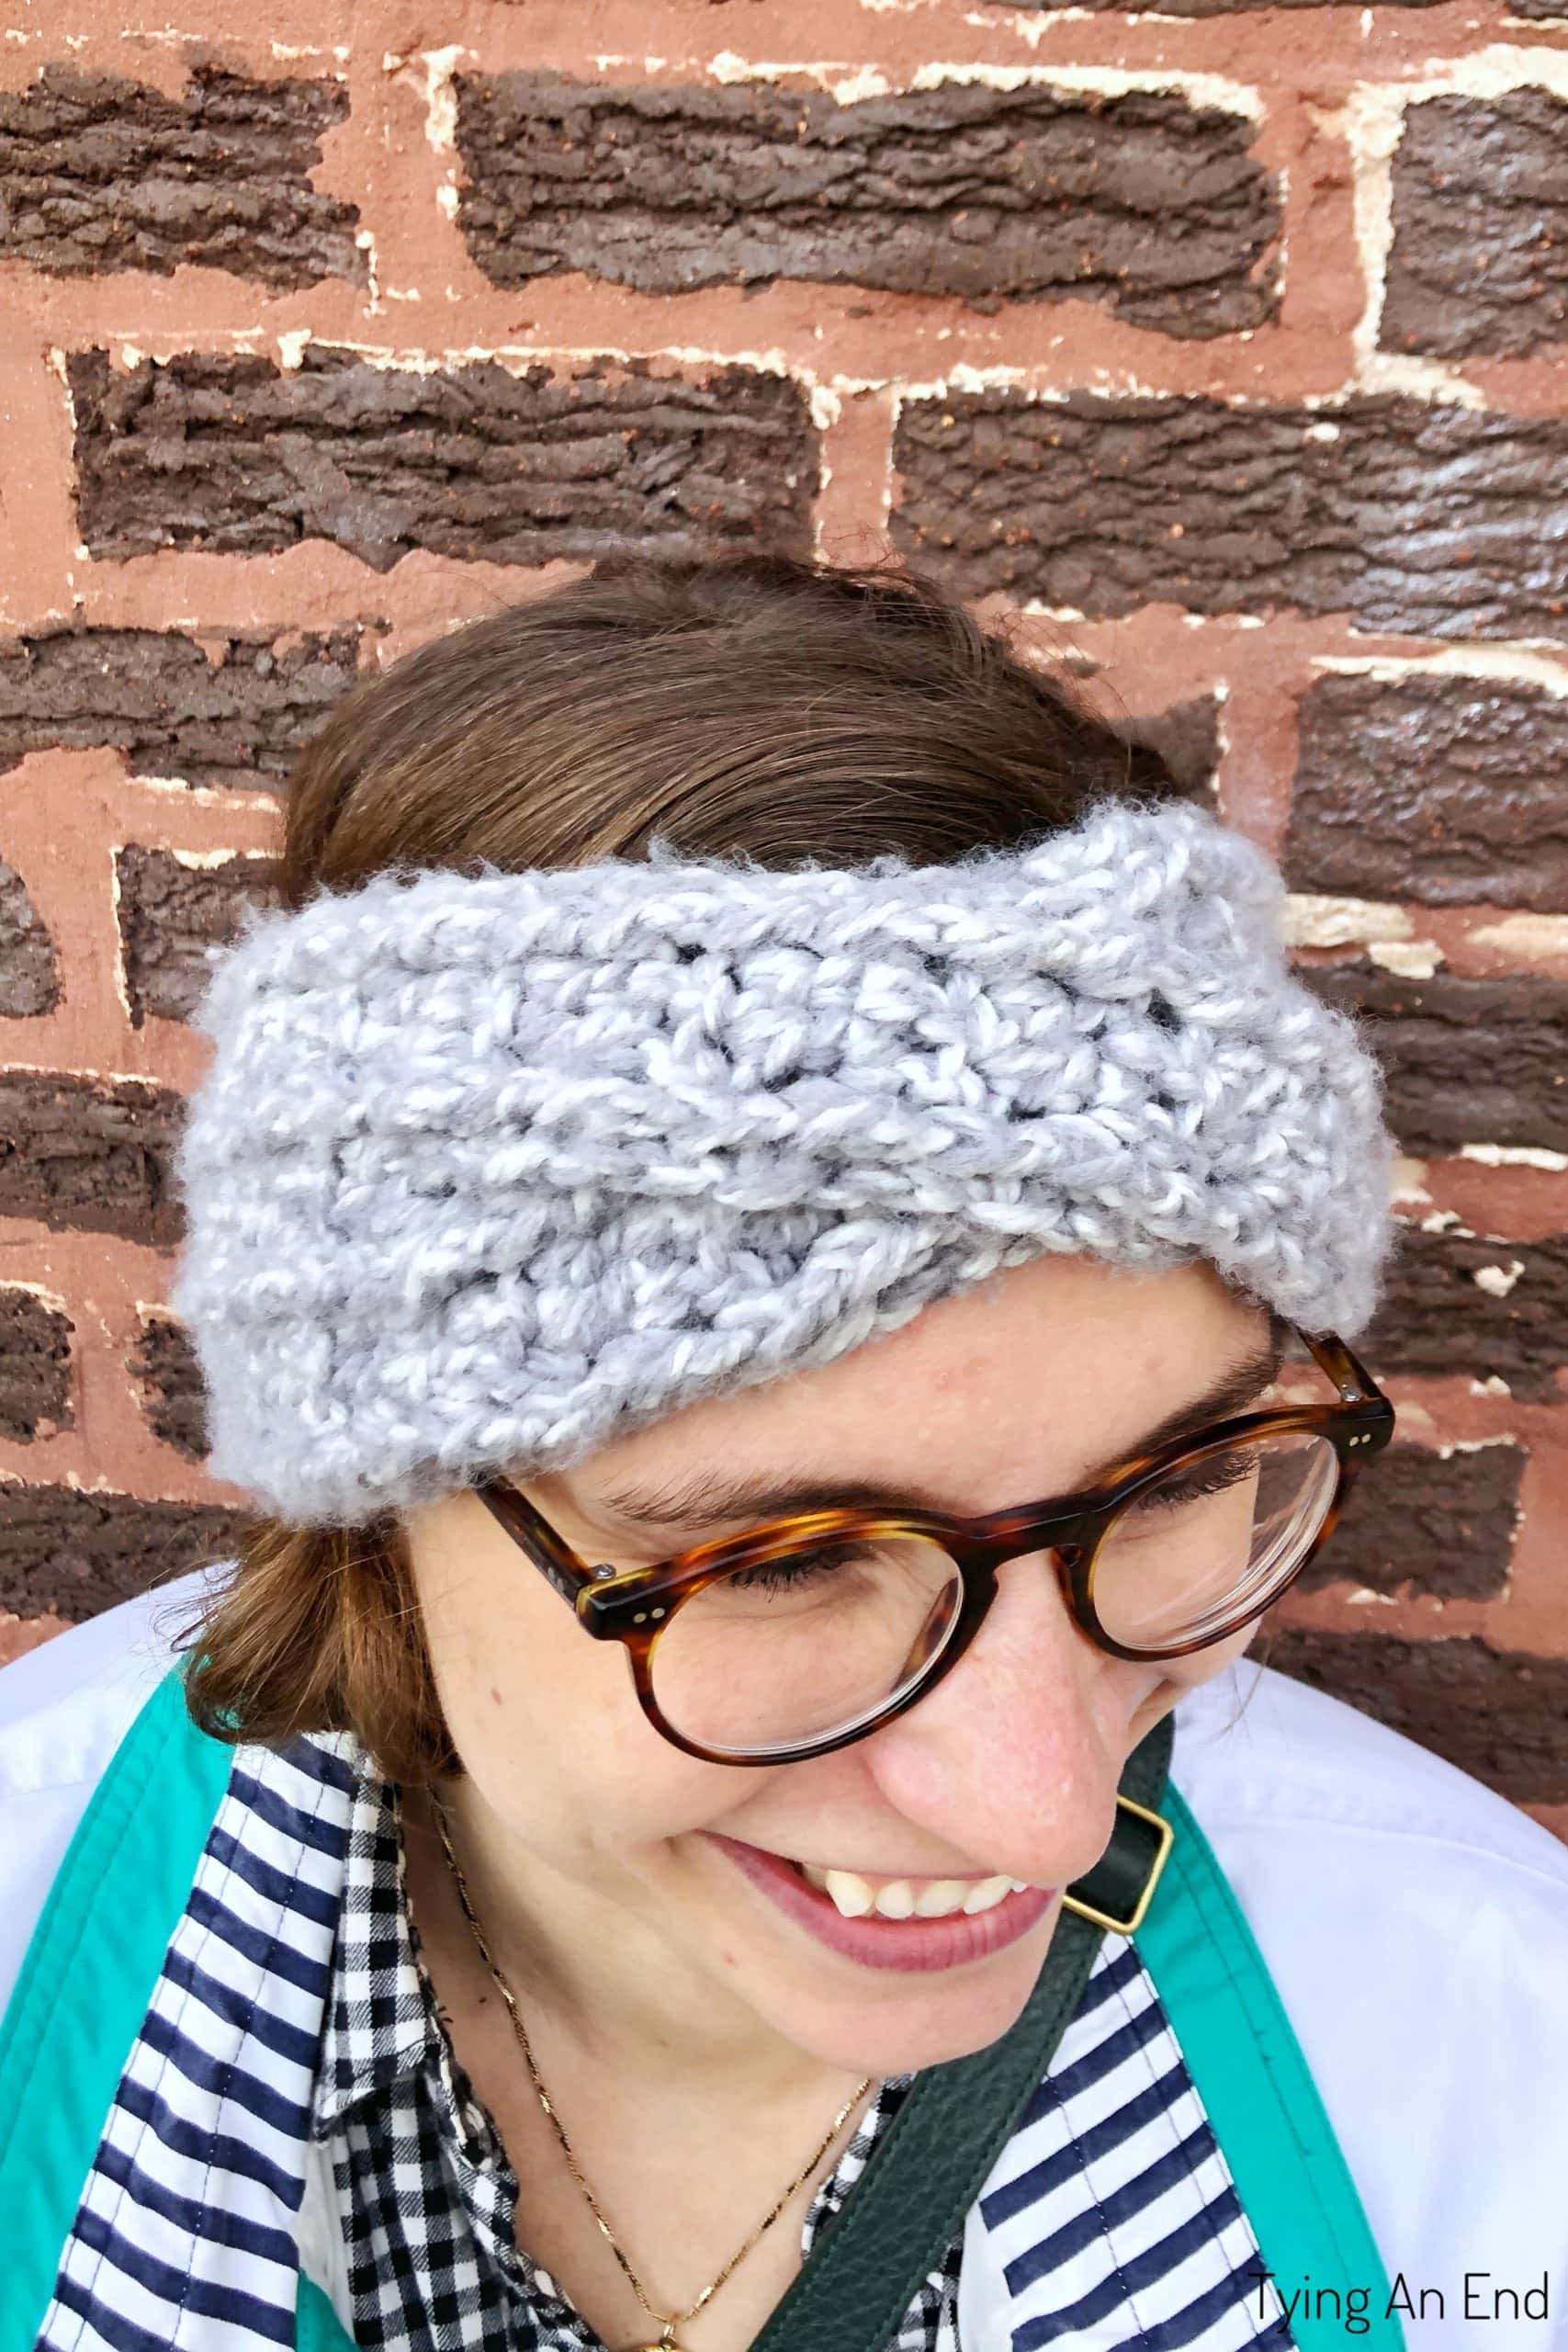
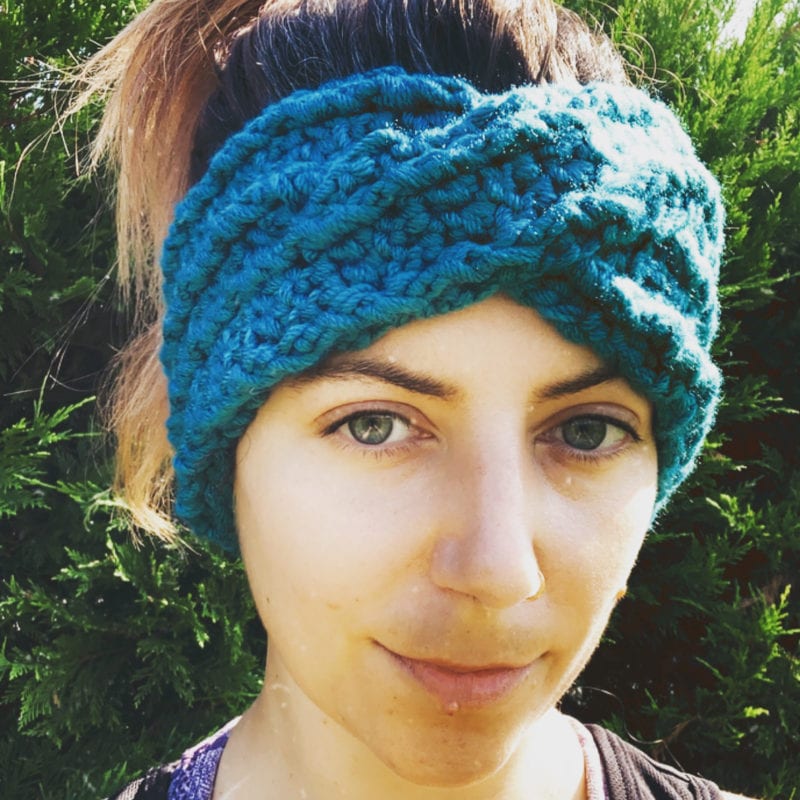
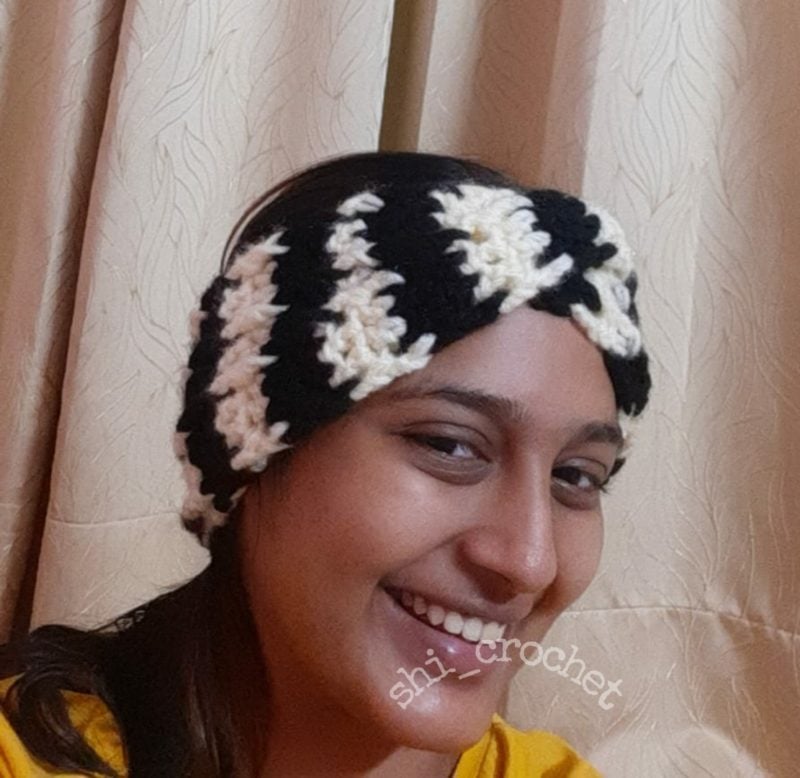
There are 4 lines that go around the headband. The lines bring out that hint of detail on the sides and blend in together on the front. It’s not too stripy, which makes it easier to match with your wardrobe. I love making headband with single color, but multi-color sure will look nice as well! (One of my testers made in black and white!)


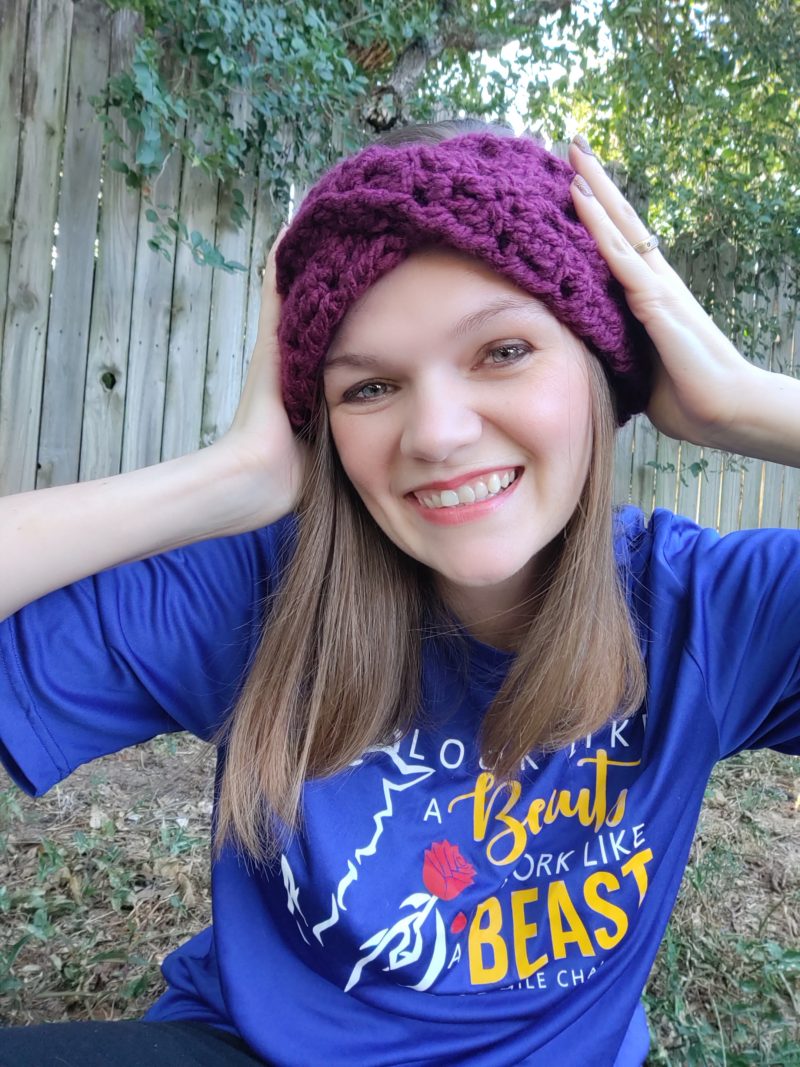
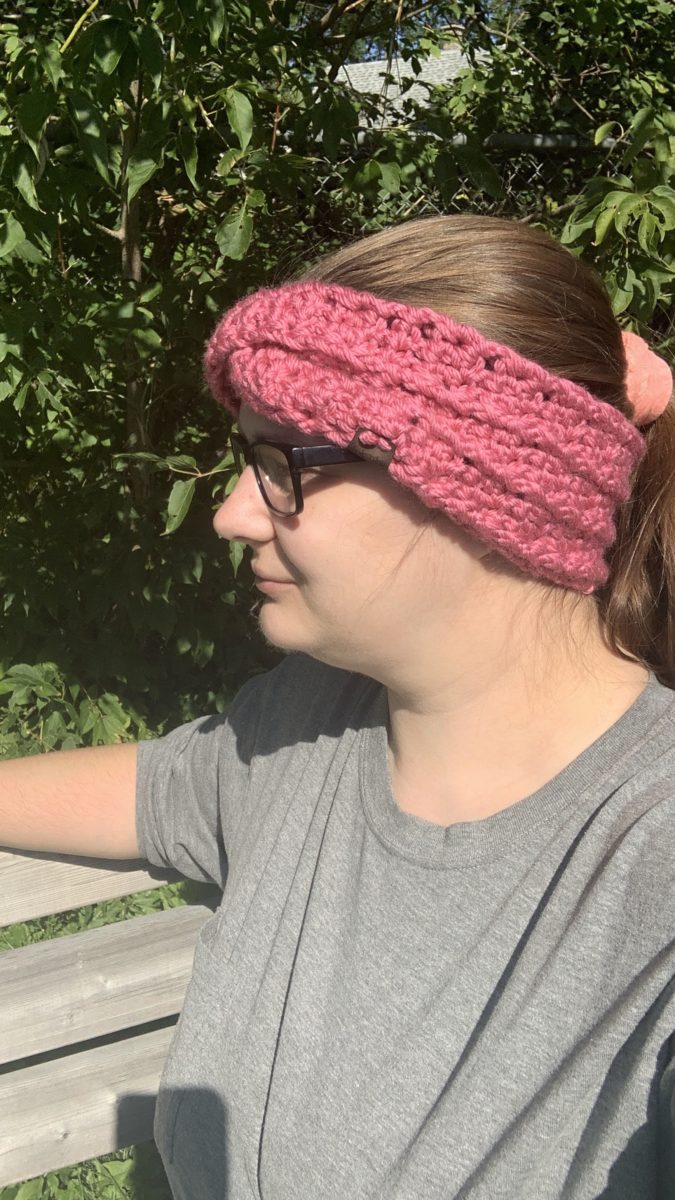
Testers’ Crochet Nadia Twisted Headband
I love all the colors that my testers chose! This pattern can be made in few hours, and one of my tester finished it on the 1st day of the testing! It’s that simple and this would be perfect quick gift idea!
Yarns my testers used:
- Red Heart Soft Essentials
- Vardhaman Magnus
- Premier Yarns Serenity Chunky
- Deramores Studio Chunky
(Thanks to my testers: @amethystmermaid, @untangled.knots93, @the_knotty_crocheter, @shi_crochet)
Grab an Ad-Free PDF
I’ve created nicely formatted PDF, and you can grab yours from my online shops! You can print them out and work on the couch, take notes, work offline, whatever you like!
My Recommended Materials and Tools


NADIA TWISTED HEADBAND
CROCHET PATTERN
MATERIALS:
- Red Heart Soft Essentials [1 skein = 131yd/120m, 5oz/141g, category 5 bulky weight]
- 1 skein of any color
- Yarn used for the headband on the model is Wool-Ease Tonal (discontinued) from Lion Brand
- 7mm crochet hook
- Tapestry needle
- Stitch markers
SIZE:
- Width – approximately 3.75” (9.5cm)
- Length – approximately 19” (48cm), 9.25” (23.5cm) when laid flat
- Fits comfortable for 22”~23” (56cm~58cm) head circumference
GAUGE:
Make sure to check your gauge! I crochet tight, so please use any other hook size if you do not get the same gauge using the provided hook size.
- 6 stitches x 3 rows in DC = 2” x 2” (5cm x 5cm)
PATTERN NOTES:
- Number in [ ] indicates the number of stitches in each row/round.
- Starting faux double crochet (FxDC) of each row DOES count as a stitch throughout the pattern and is treated as DC. You can choose to start each row with FxDC or CH 3.
- Photo tutorial on FxDC can be found on HERE on my blog.
- If you’re not going to start the 1st row of section 1 with FxDC, your foundation stitch is going to be 15 instead of 12.
- ” (type of a stitch) #” means to make an indicated stitch into the next indicated number of stitches.
- Example: if the pattern calls out for “HDC 4”, make 1 HDC in the next 4 stitches.
ABBREVIATIONS (US TERMS):
- CH – chain stitch
- SC – single crochet
- DC – double crochet
- FxDC – faux double crochet
- FPDC – front post double crochet
- BPDC – back post double crochet
INSTRUCTIONS:
– SECTION 1 –
CH 12
Row 1 – FxDC 1. Skip 1st CH from hook. DC in 2nd CH. DC across. Turn. [12]
*If you’re not going to do FxDC: foundation CH is 15, and DC in 4th CH from hook. DC across. Turn. [12]
Row 2 – FxDC 1. (FPDC 1, DC 2)* Repeat * 2 more times. FPDC 1. DC 1. Turn [12]
Row 3 – FxDC 1. (BPDC 1, DC 2)* Repeat * 2 more times. BPDC 1. DC 1. Turn. [12]
Rows 4-13 – Repeat Rows 2-3.
Row 14 – FxDC 1. FPDC 1. DC 2. FPDC 1. DC 1. Turn. Leave remaining stitches unworked. [6]
Row 15 – FxDC 1. BPDC 1. DC 2. BPDC 1. DC 1. Turn. [6]
Row 16 – FxDC 1. FPDC 1. DC 2. FPDC 1. DC 1. Turn. [6]
Rows 17-24 – Repeat Rows 15-16.
Row 25 – Repeat Rows 15.
Fasten off.
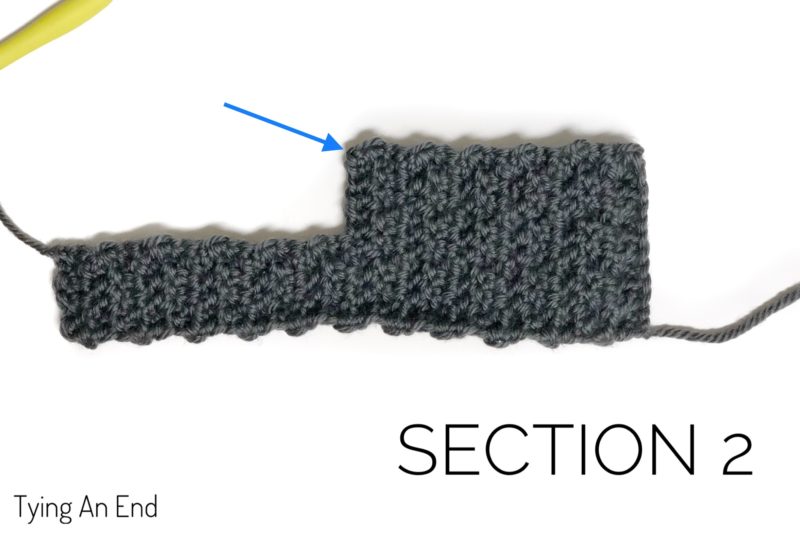
– SECTION 2 –
You will now begin working on the remaining stitch. Make sure your project is facing the wrong side towards you (flat side). Join yarn with SL ST on the last stitch of Row 13 from the previous section.
Row 1 – FxDC 1. BPDC 1. DC 2. BPDC 1. DC 1. Turn. [6]
Row 2 – FxDC 1. FPDC 1. DC 2. FPDC 1. DC 1. Turn. [6]
Rows 3-10 – Repeat Rows 1-2.
Row 11 – Repeat Row 1.
Do not fasten off.
– SECTION 3 –
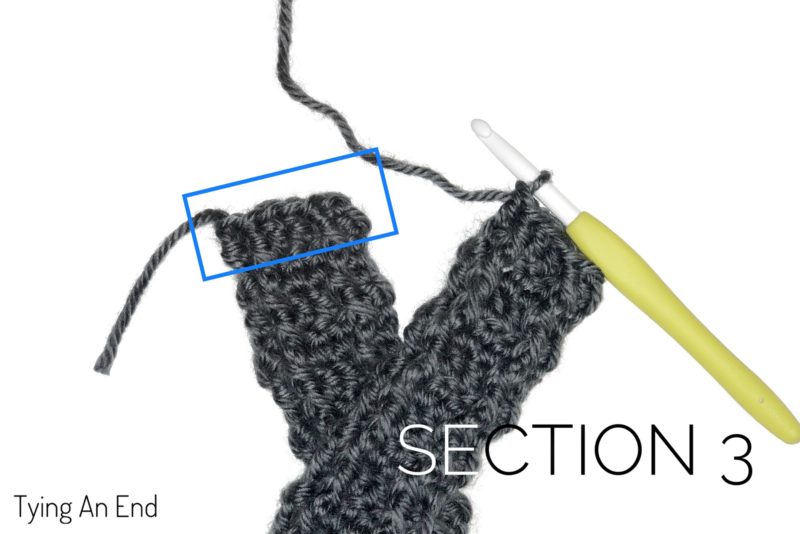
Row 1 – FxDC 1. FPDC 1. DC 2. FPDC 1. DC 1. Cross the section 2 over section 1.
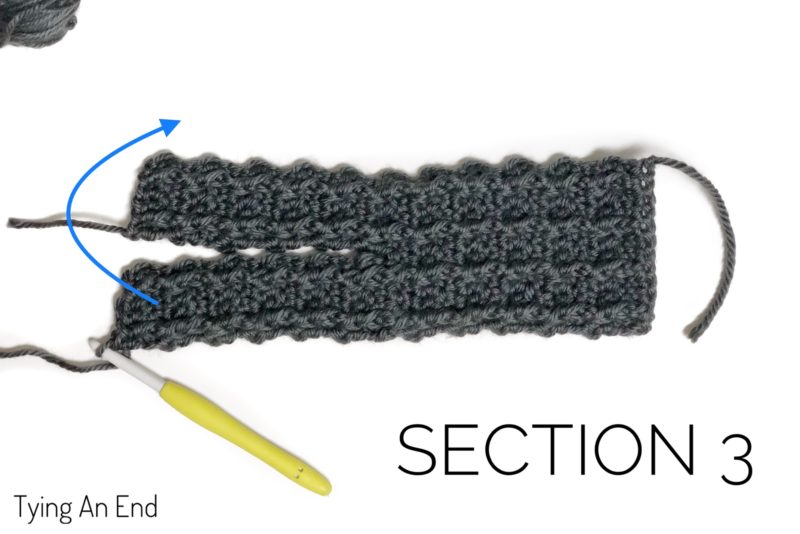
Join section 1 and section 2 together by working the following in the last row of section 1: DC 1. FPDC 1. DC 2. FPDC 1. DC 1. Turn. [12]
Row 2 – FxDC 1. (BPDC 1, DC 2)* Repeat * 2 more times. BPDC 1. DC 1. Turn. [12]
Row 3 – FxDC 1. (FPDC 1, DC 2)* Repeat * 2 more times. FPDC 1. DC 1. Turn [12]
Rows 4-13 – Repeat Rows 2-3.
Row 14 – Repeat Rows 2.
Fasten off.
Join the piece together to form a circle. Use any seaming method you like. Make sure it’s flat.
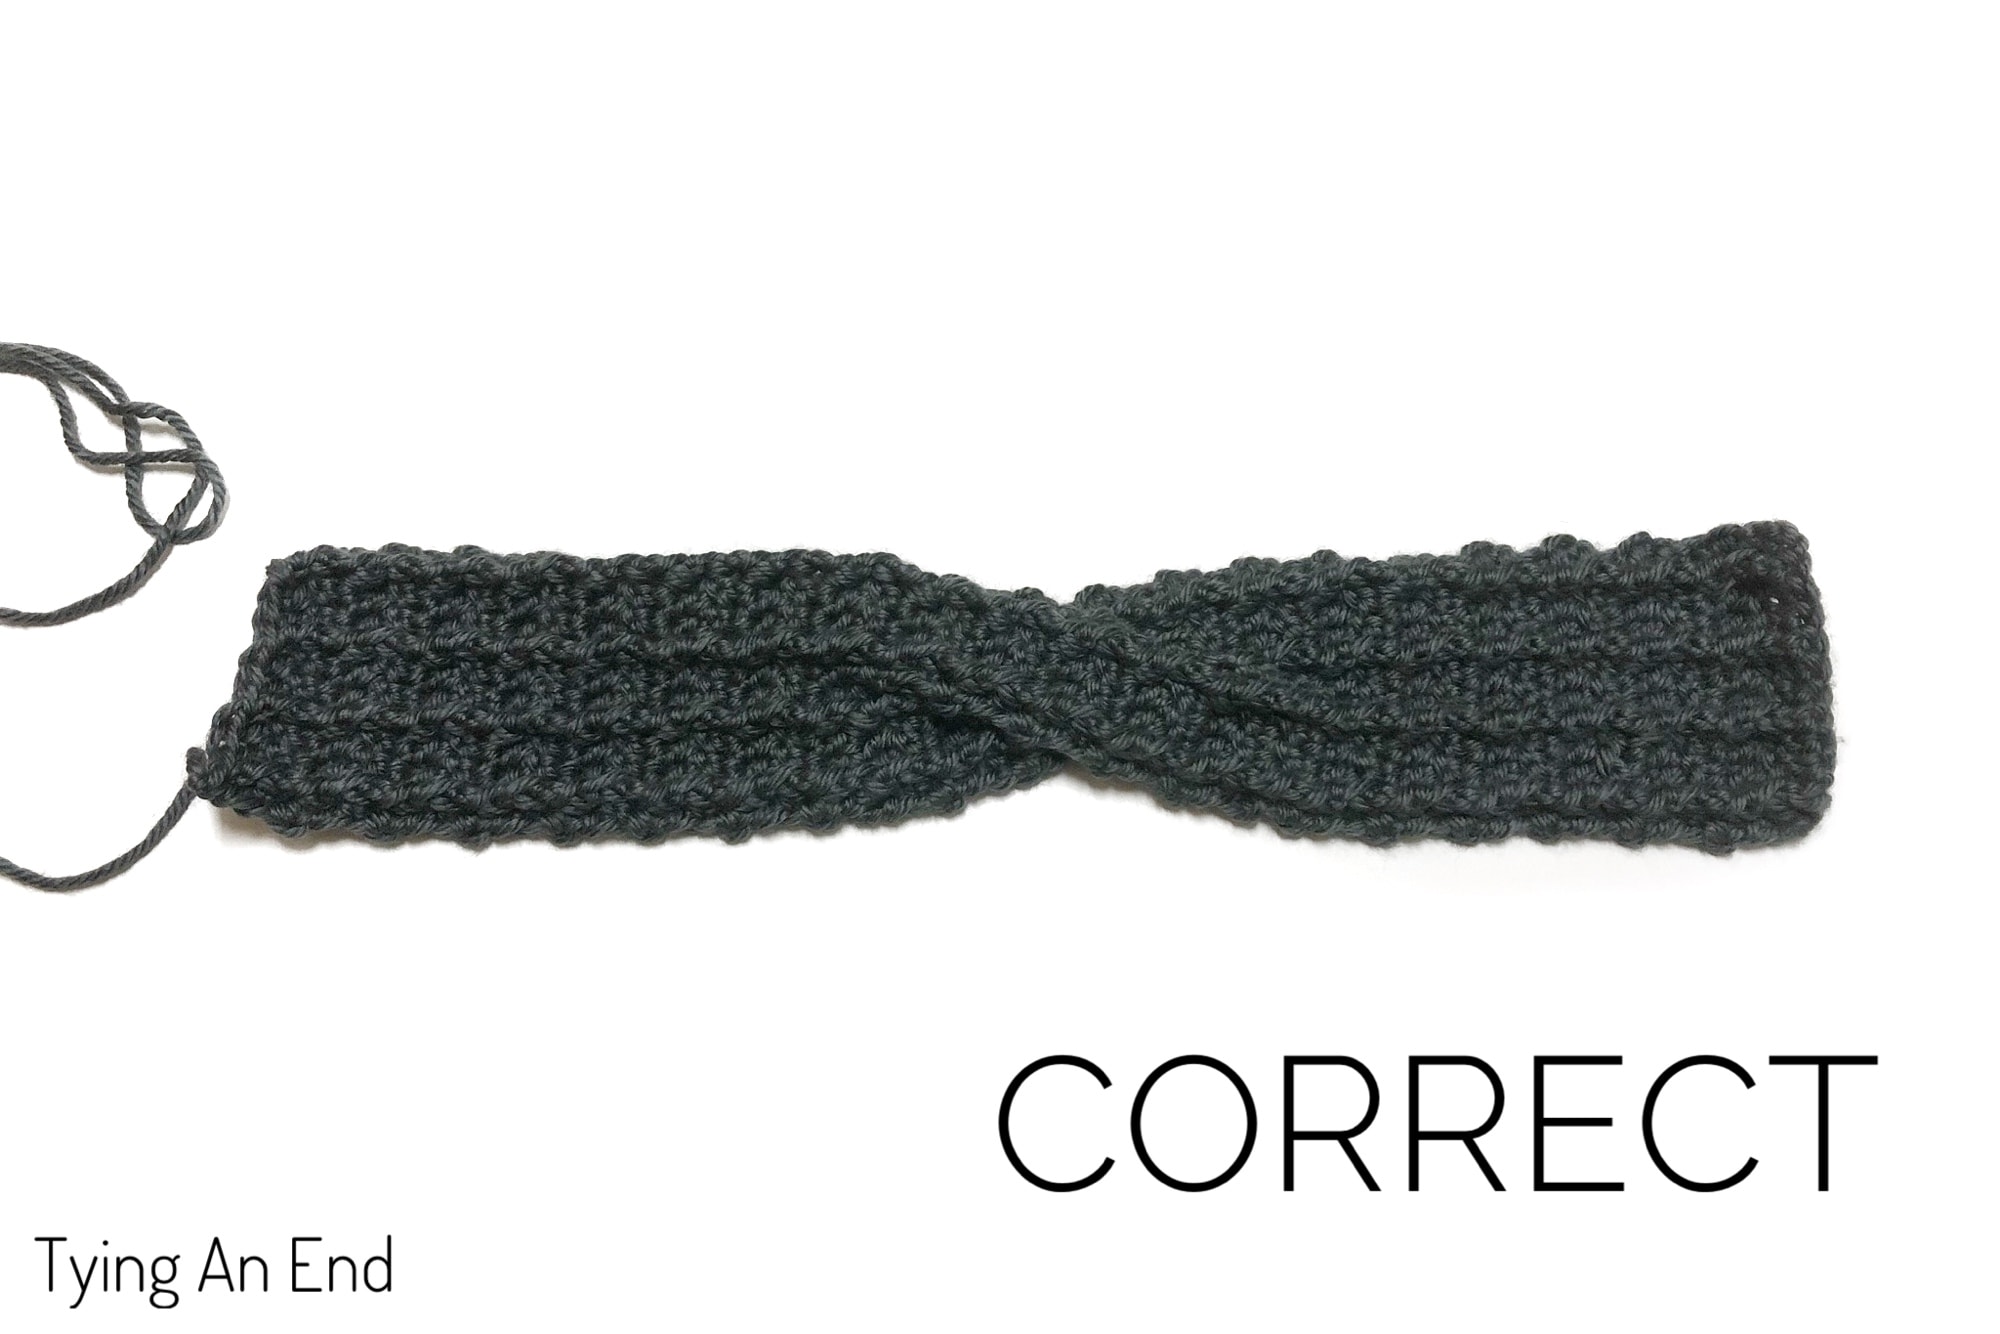

Weave in all the yarn ends.
I can’t wait to see your Nadia Twisted Headband! Please tag me @tyinganend and use hashtag #tyinganend & #NadiaTwistedHeadband on Instagram so I can see and share your beautiful headband!
Happy crocheting!
This pattern is an original pattern by Tae of Tying An End. Please do not claim this pattern as your own. If you wish to share this pattern, please link to this pattern and do not copy and paste it on to your site. You may keep a copy for your own personal use but please do not sell the pattern or distribute it. Please see Disclosure & Terms of Use for more info.


![[Free Crochet Pattern] Eve Crochet Headband by Tying An End](https://www.tyinganend.com/wp-content/uploads/2018/01/IMG_5855.jpg)