
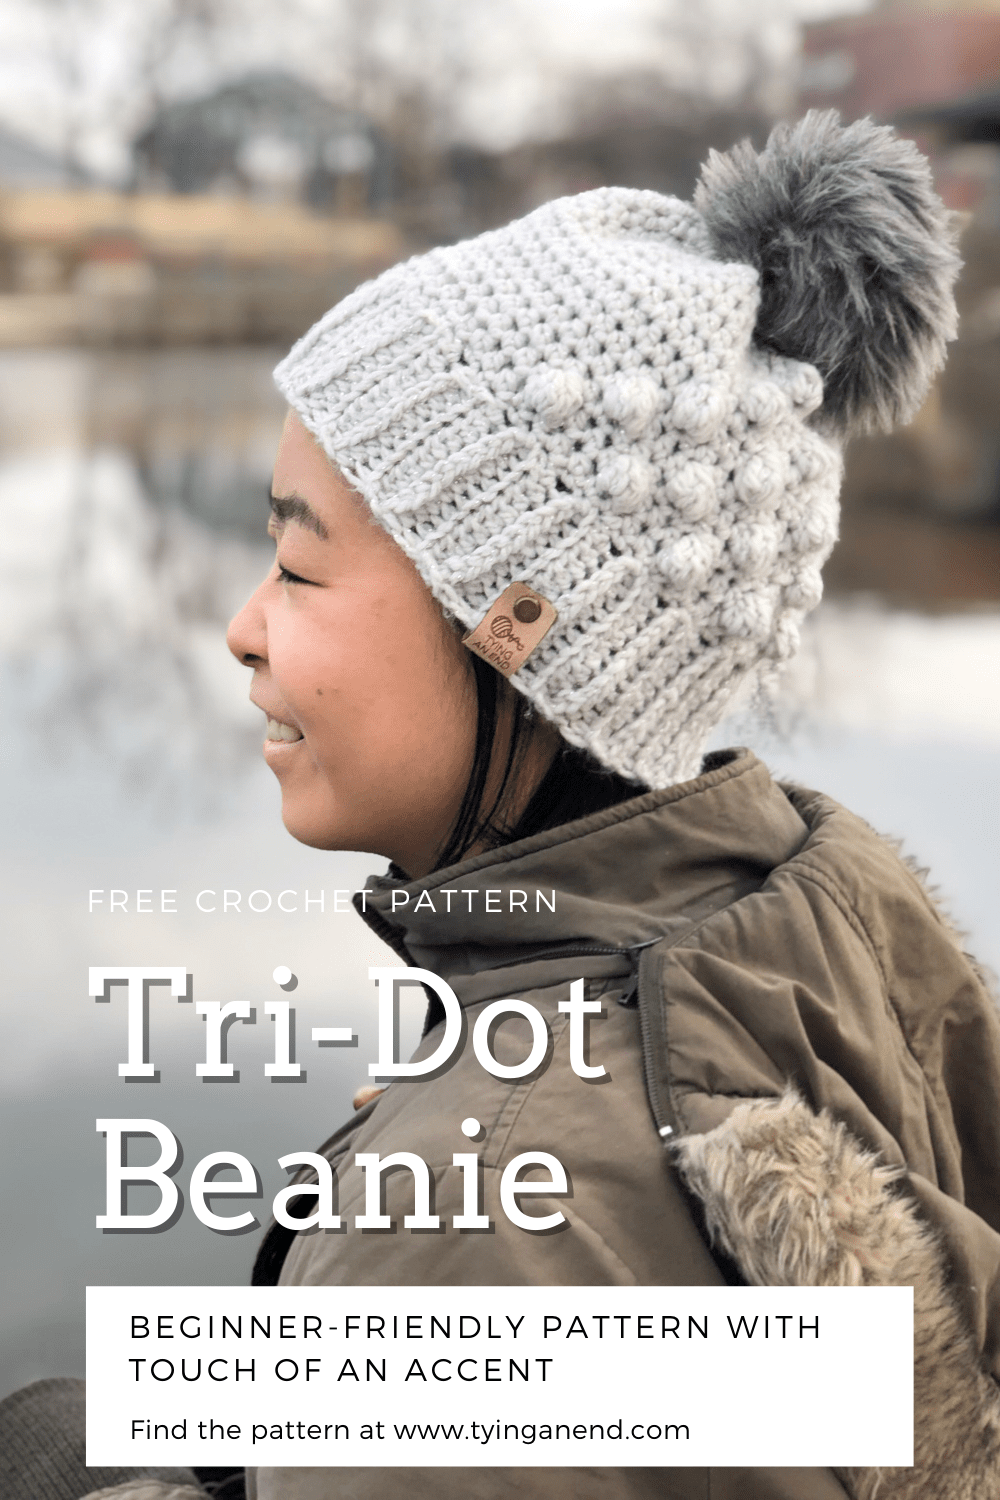
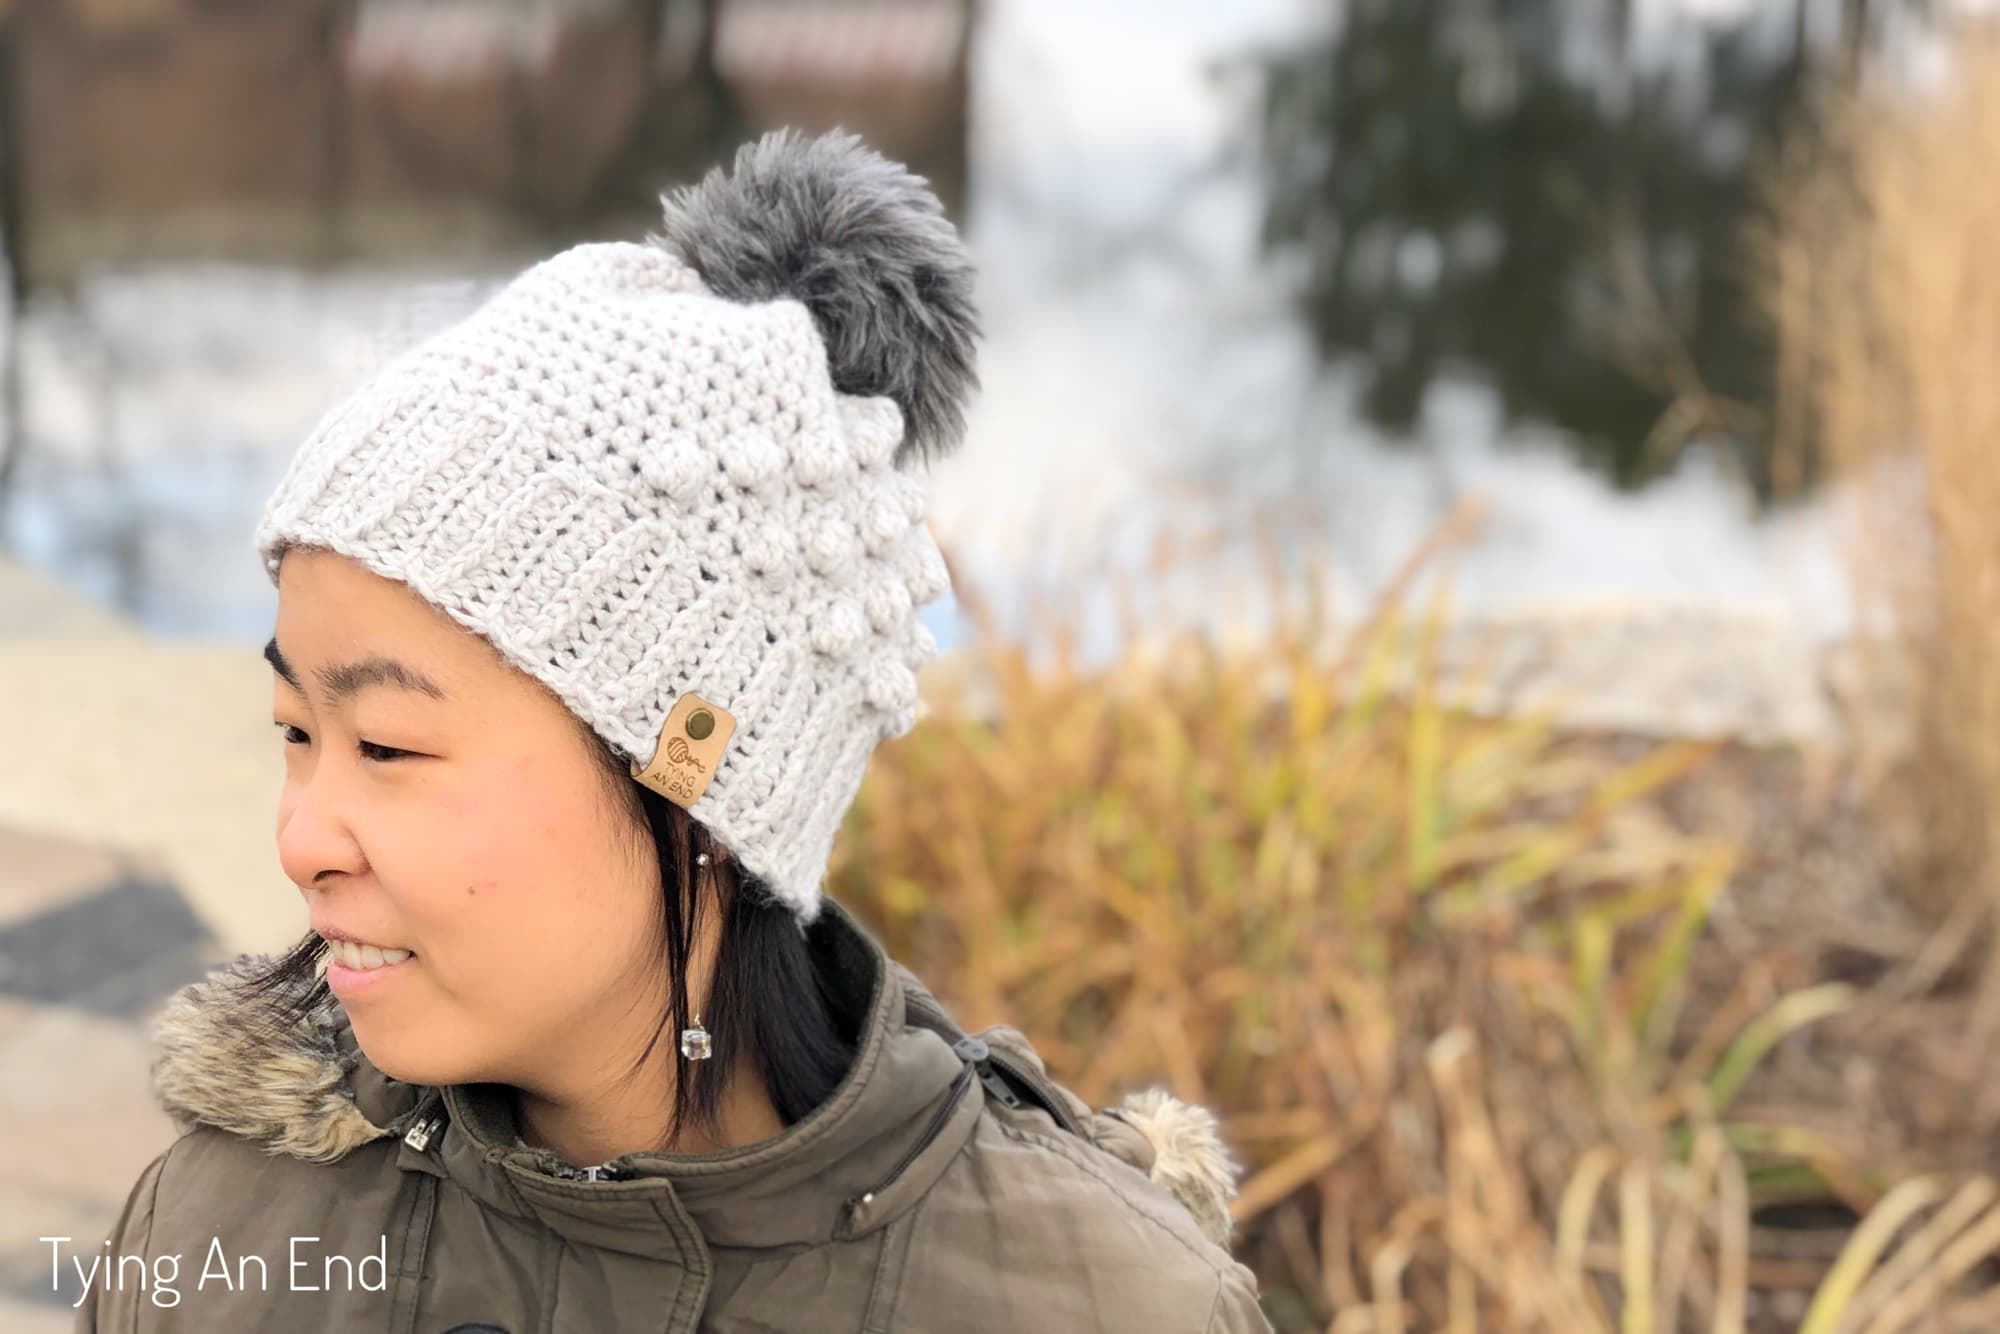
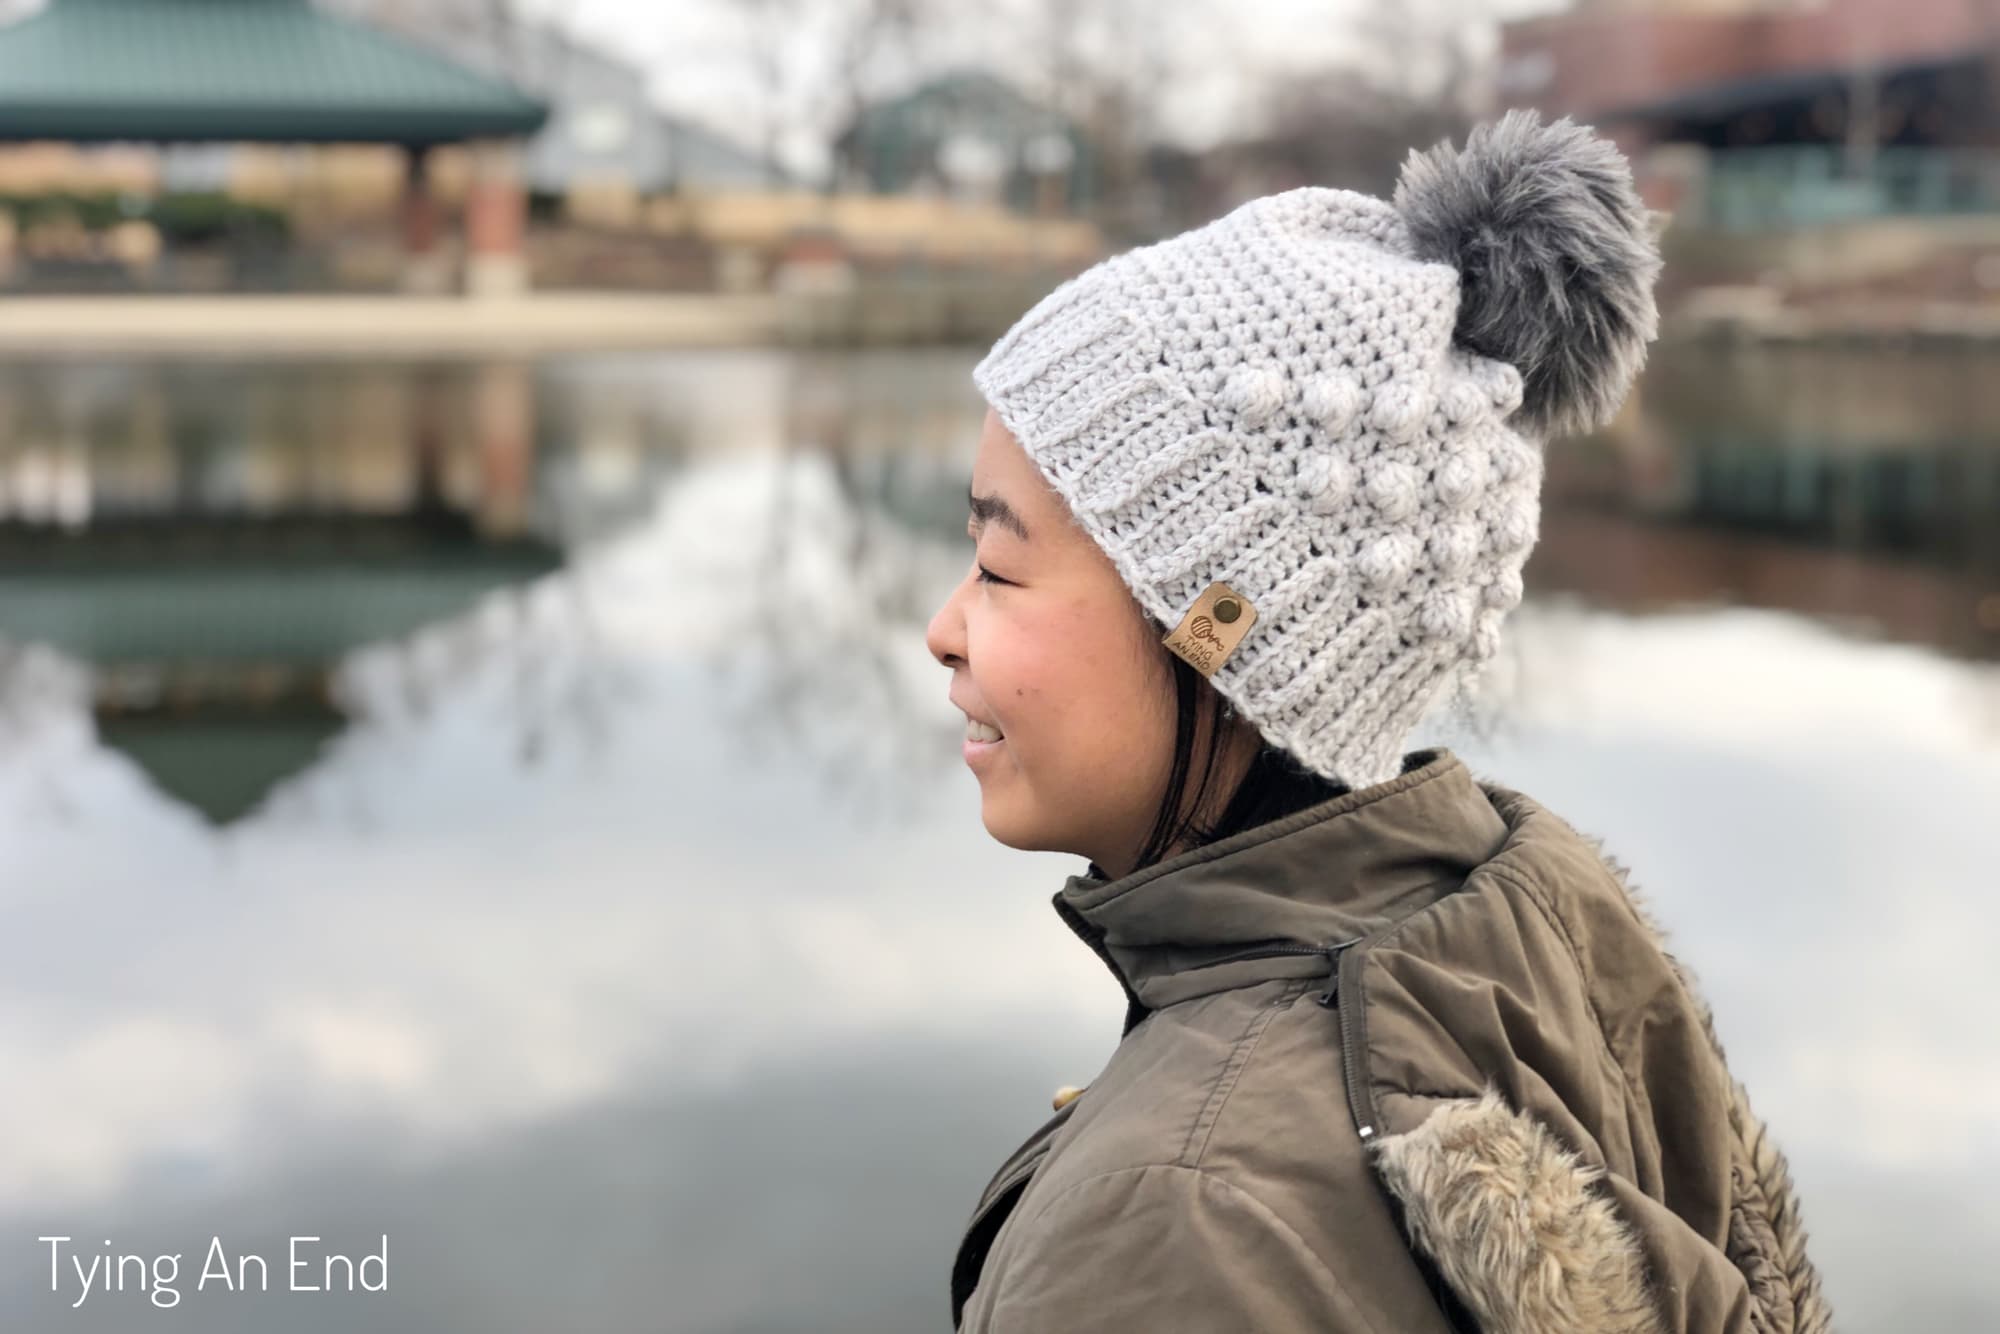
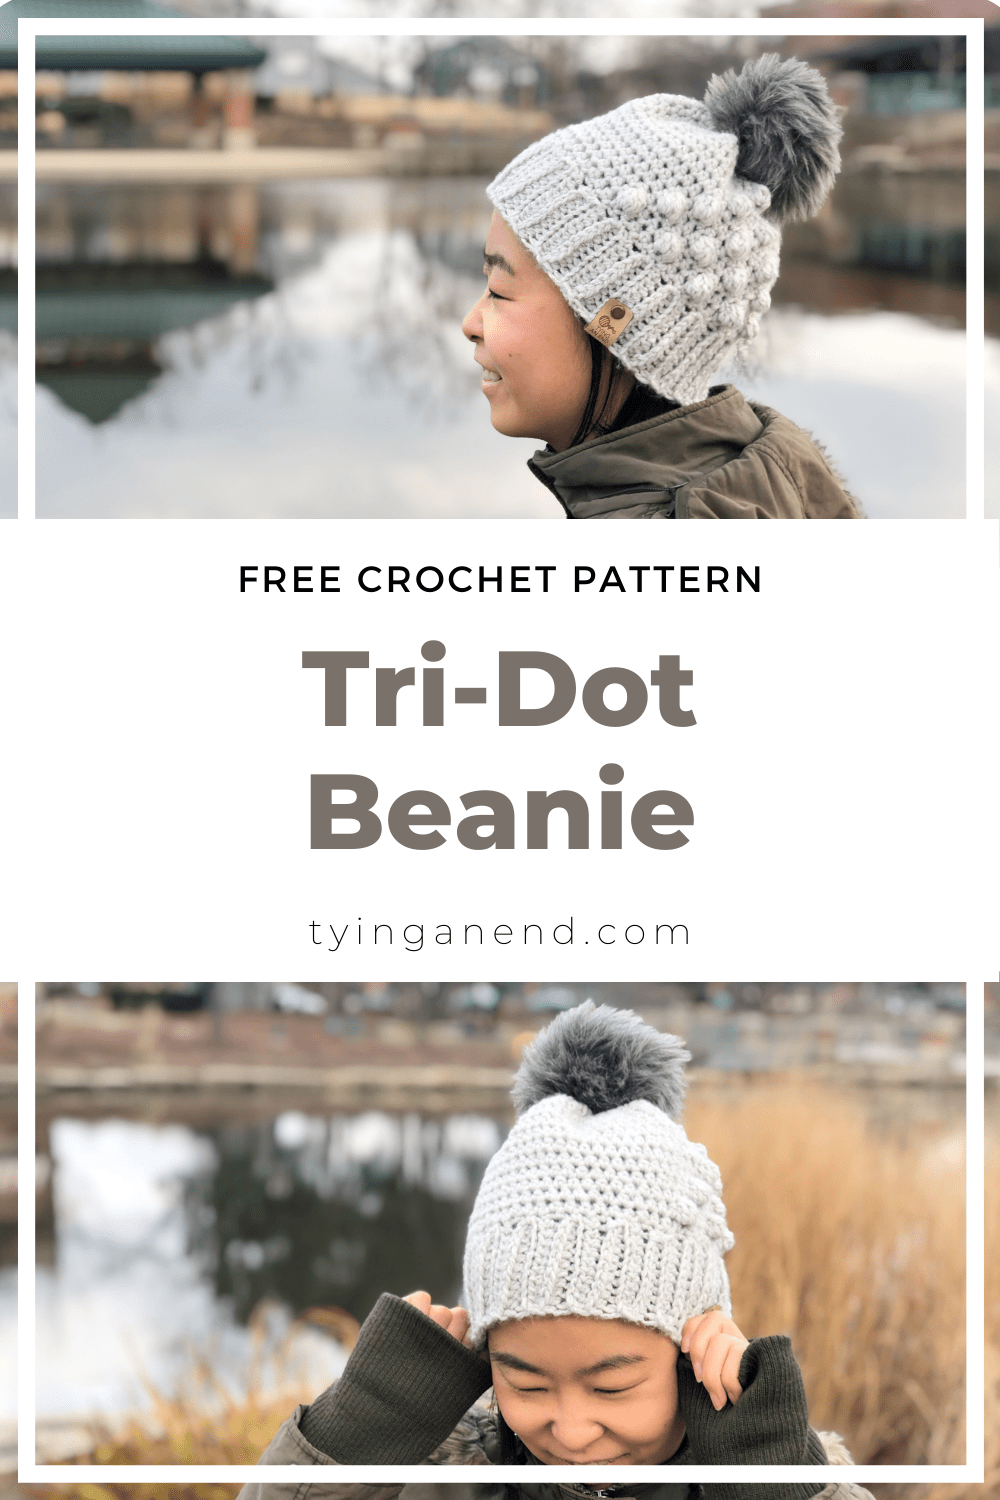
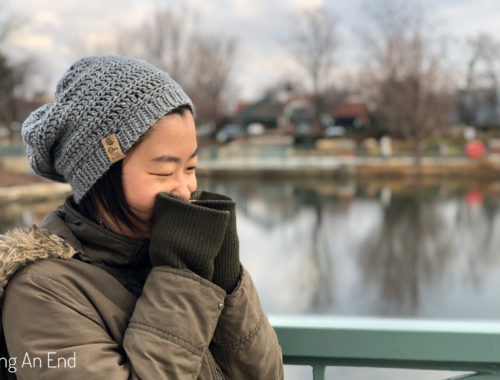
Tri-Dot Beanie
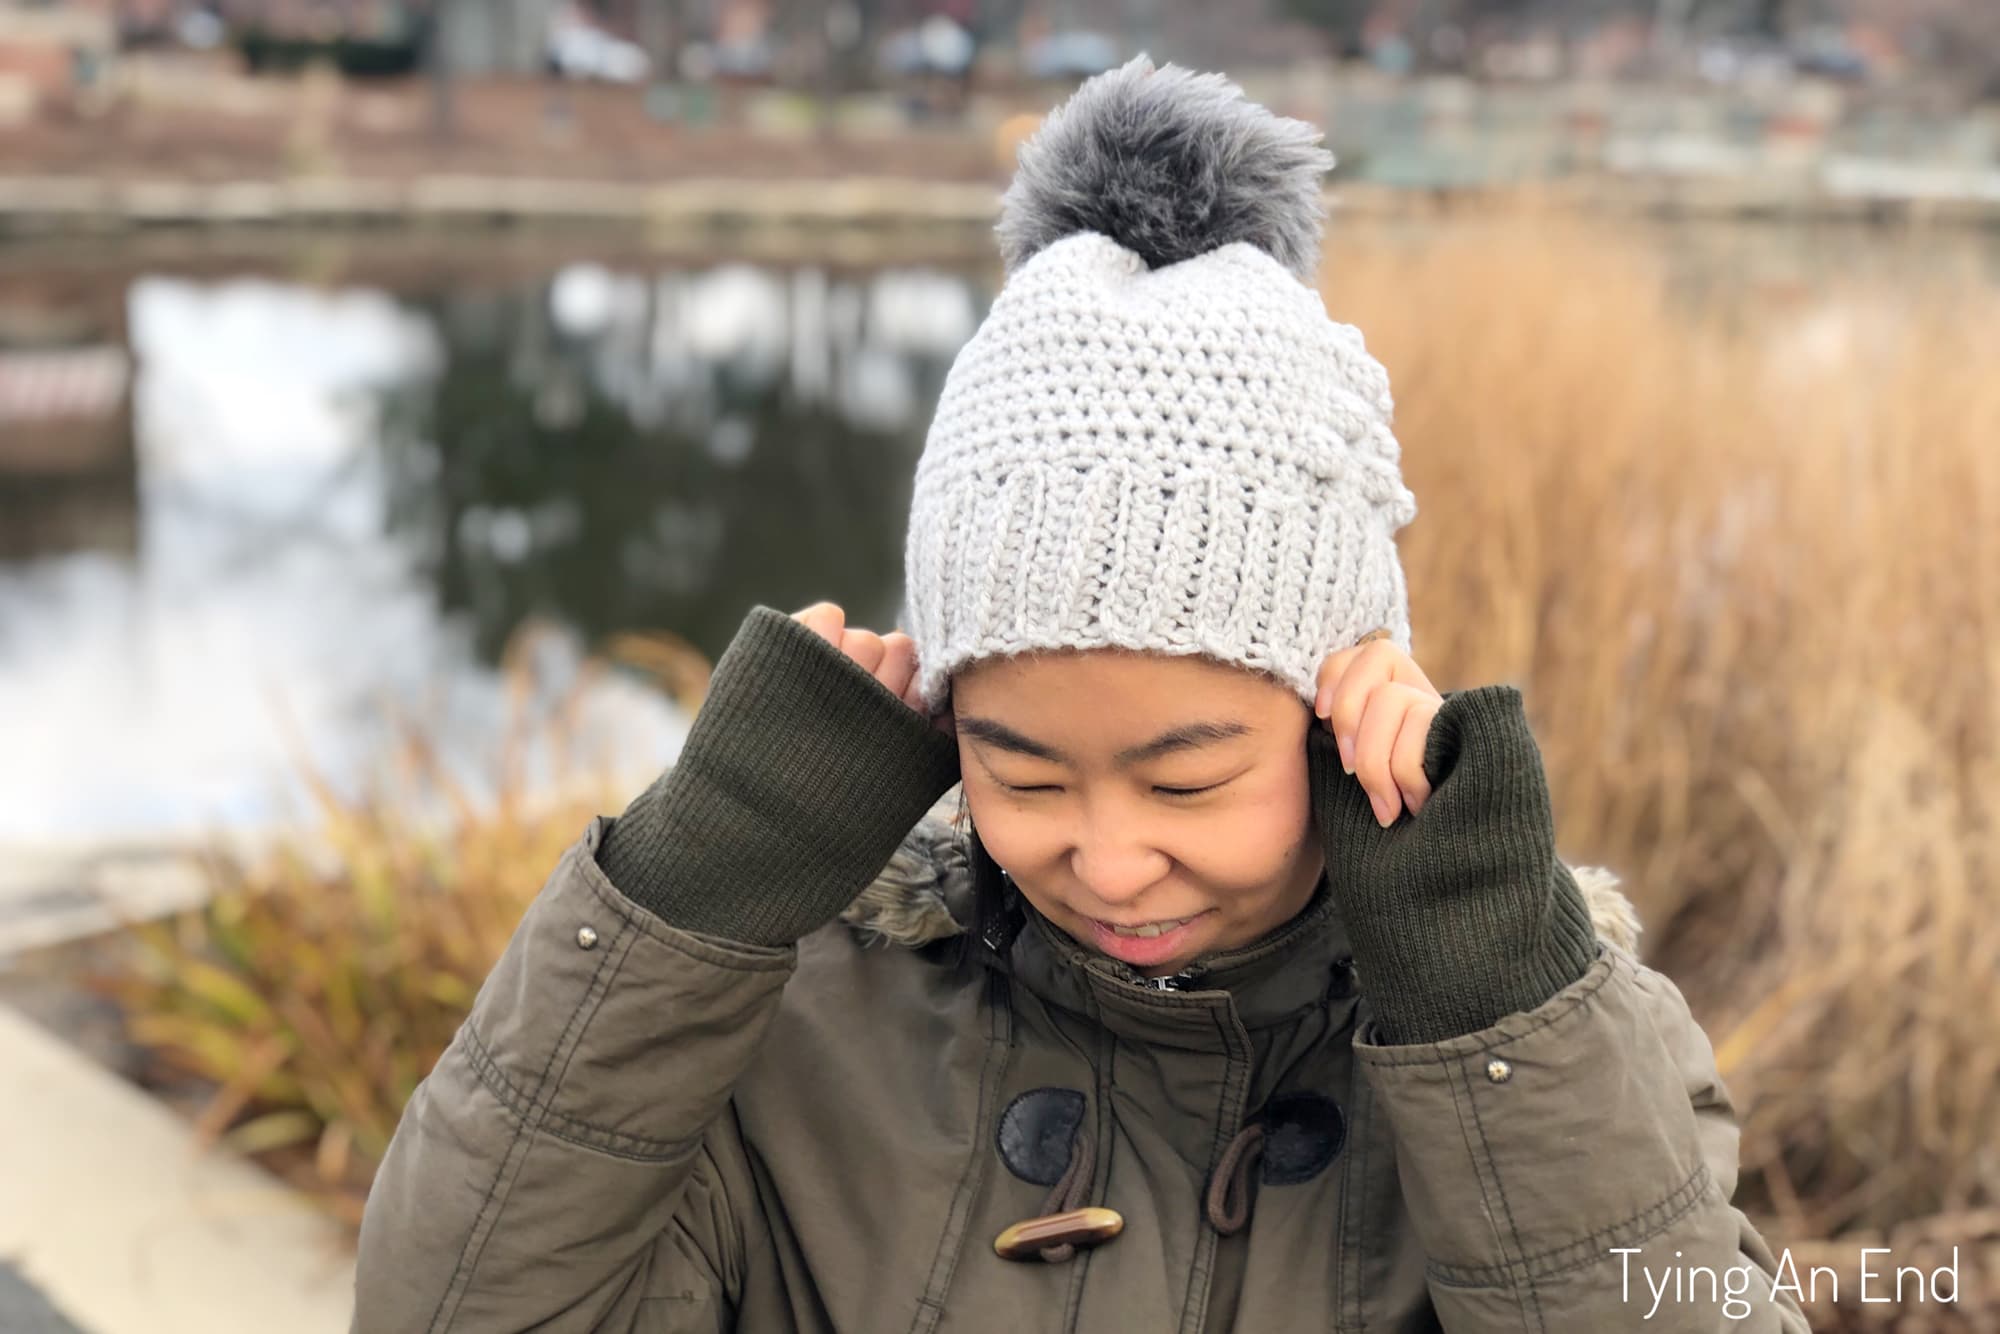
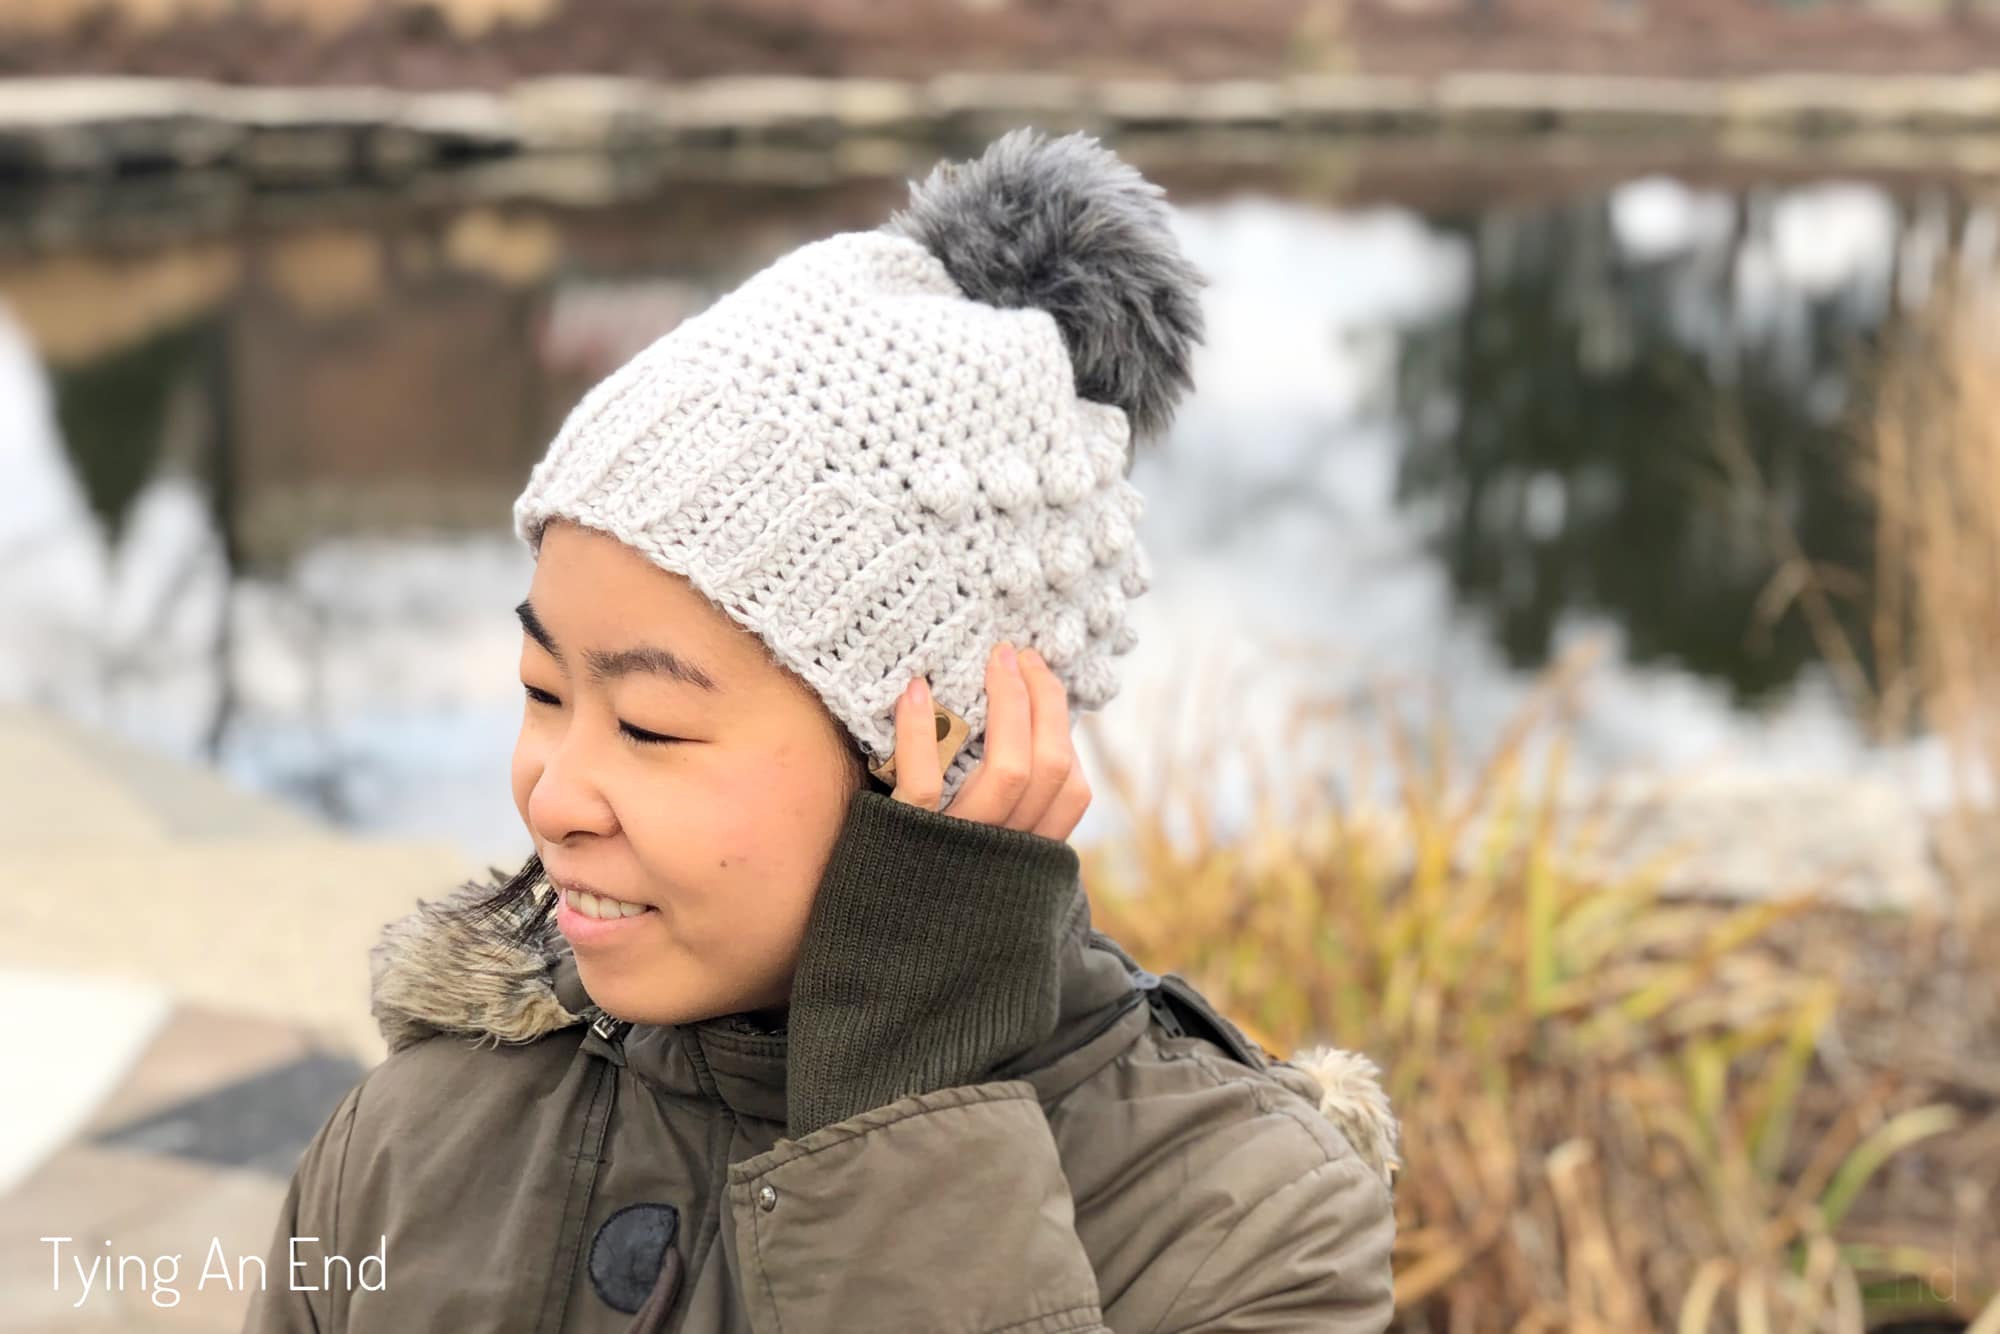
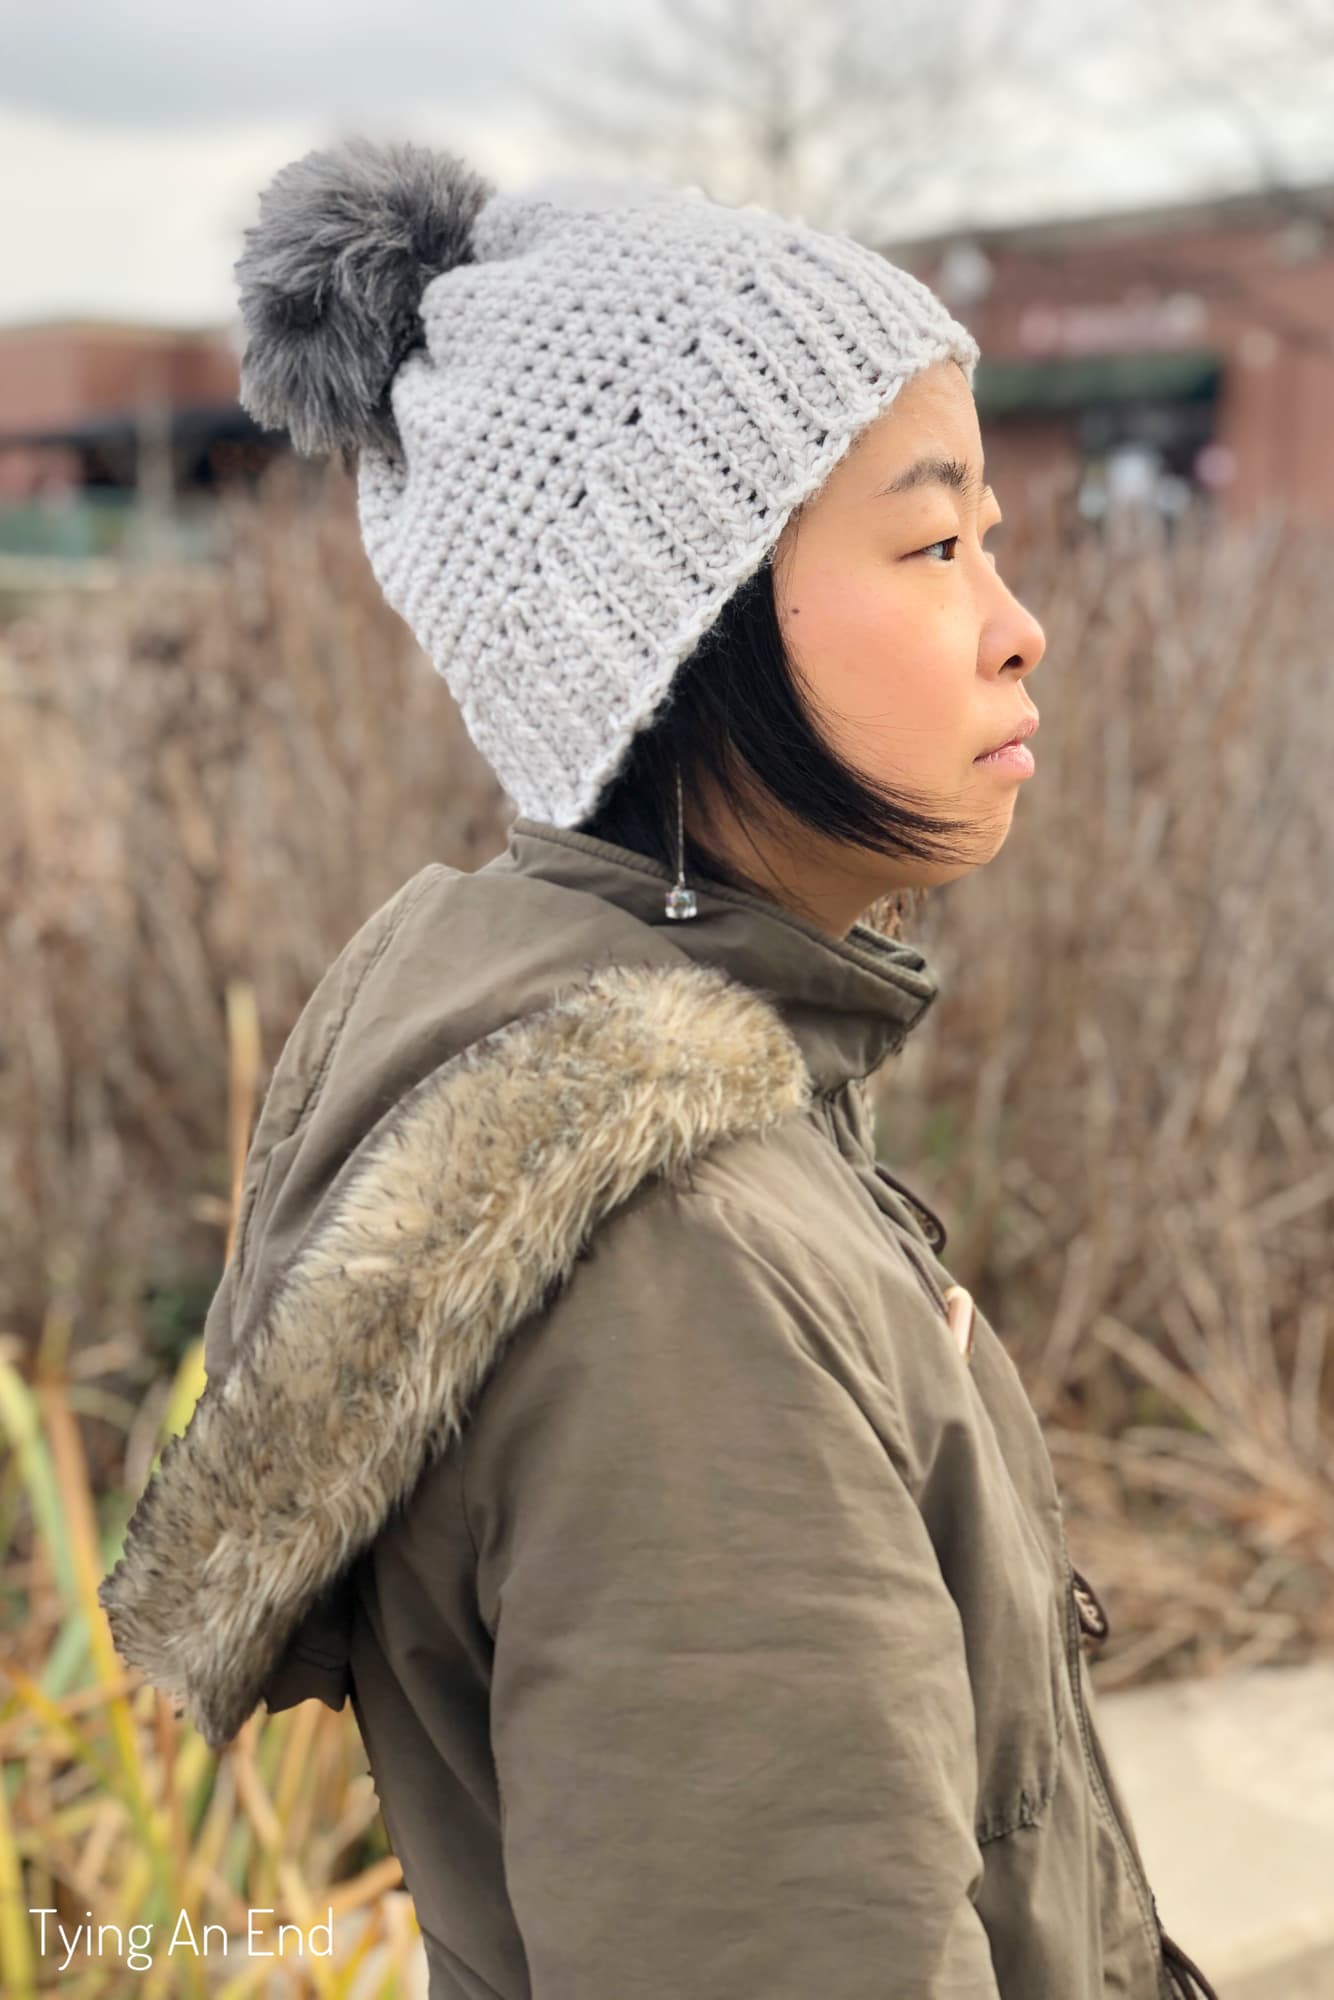
Calling out for an asymmetry lover! Triangle on one side and flat on the other side of the beanie. You don’t like asymmetry? That’s ok! You can face the triangle at the front when you wear your beanie, and you can showcase the fun detail that bobble stitch brings! Get the free Tri-Dot Beanie crochet pattern below or you can purchase ad-free, printable PDF on my Etsy, Lovecrafts, or Ravelry!
Disclosure: This post contains affiliate links. If you make a purchase through one of those links I receive a small commission. It’s an easy way to support this blog at no additional cost to you.
I actually made this beanie last year, along with my Darratt Slouchy Beanie, but didn’t put them into writing until now. I really like how it turned out, and hope you like it too!
Pin it now, crochet later
Inspiration
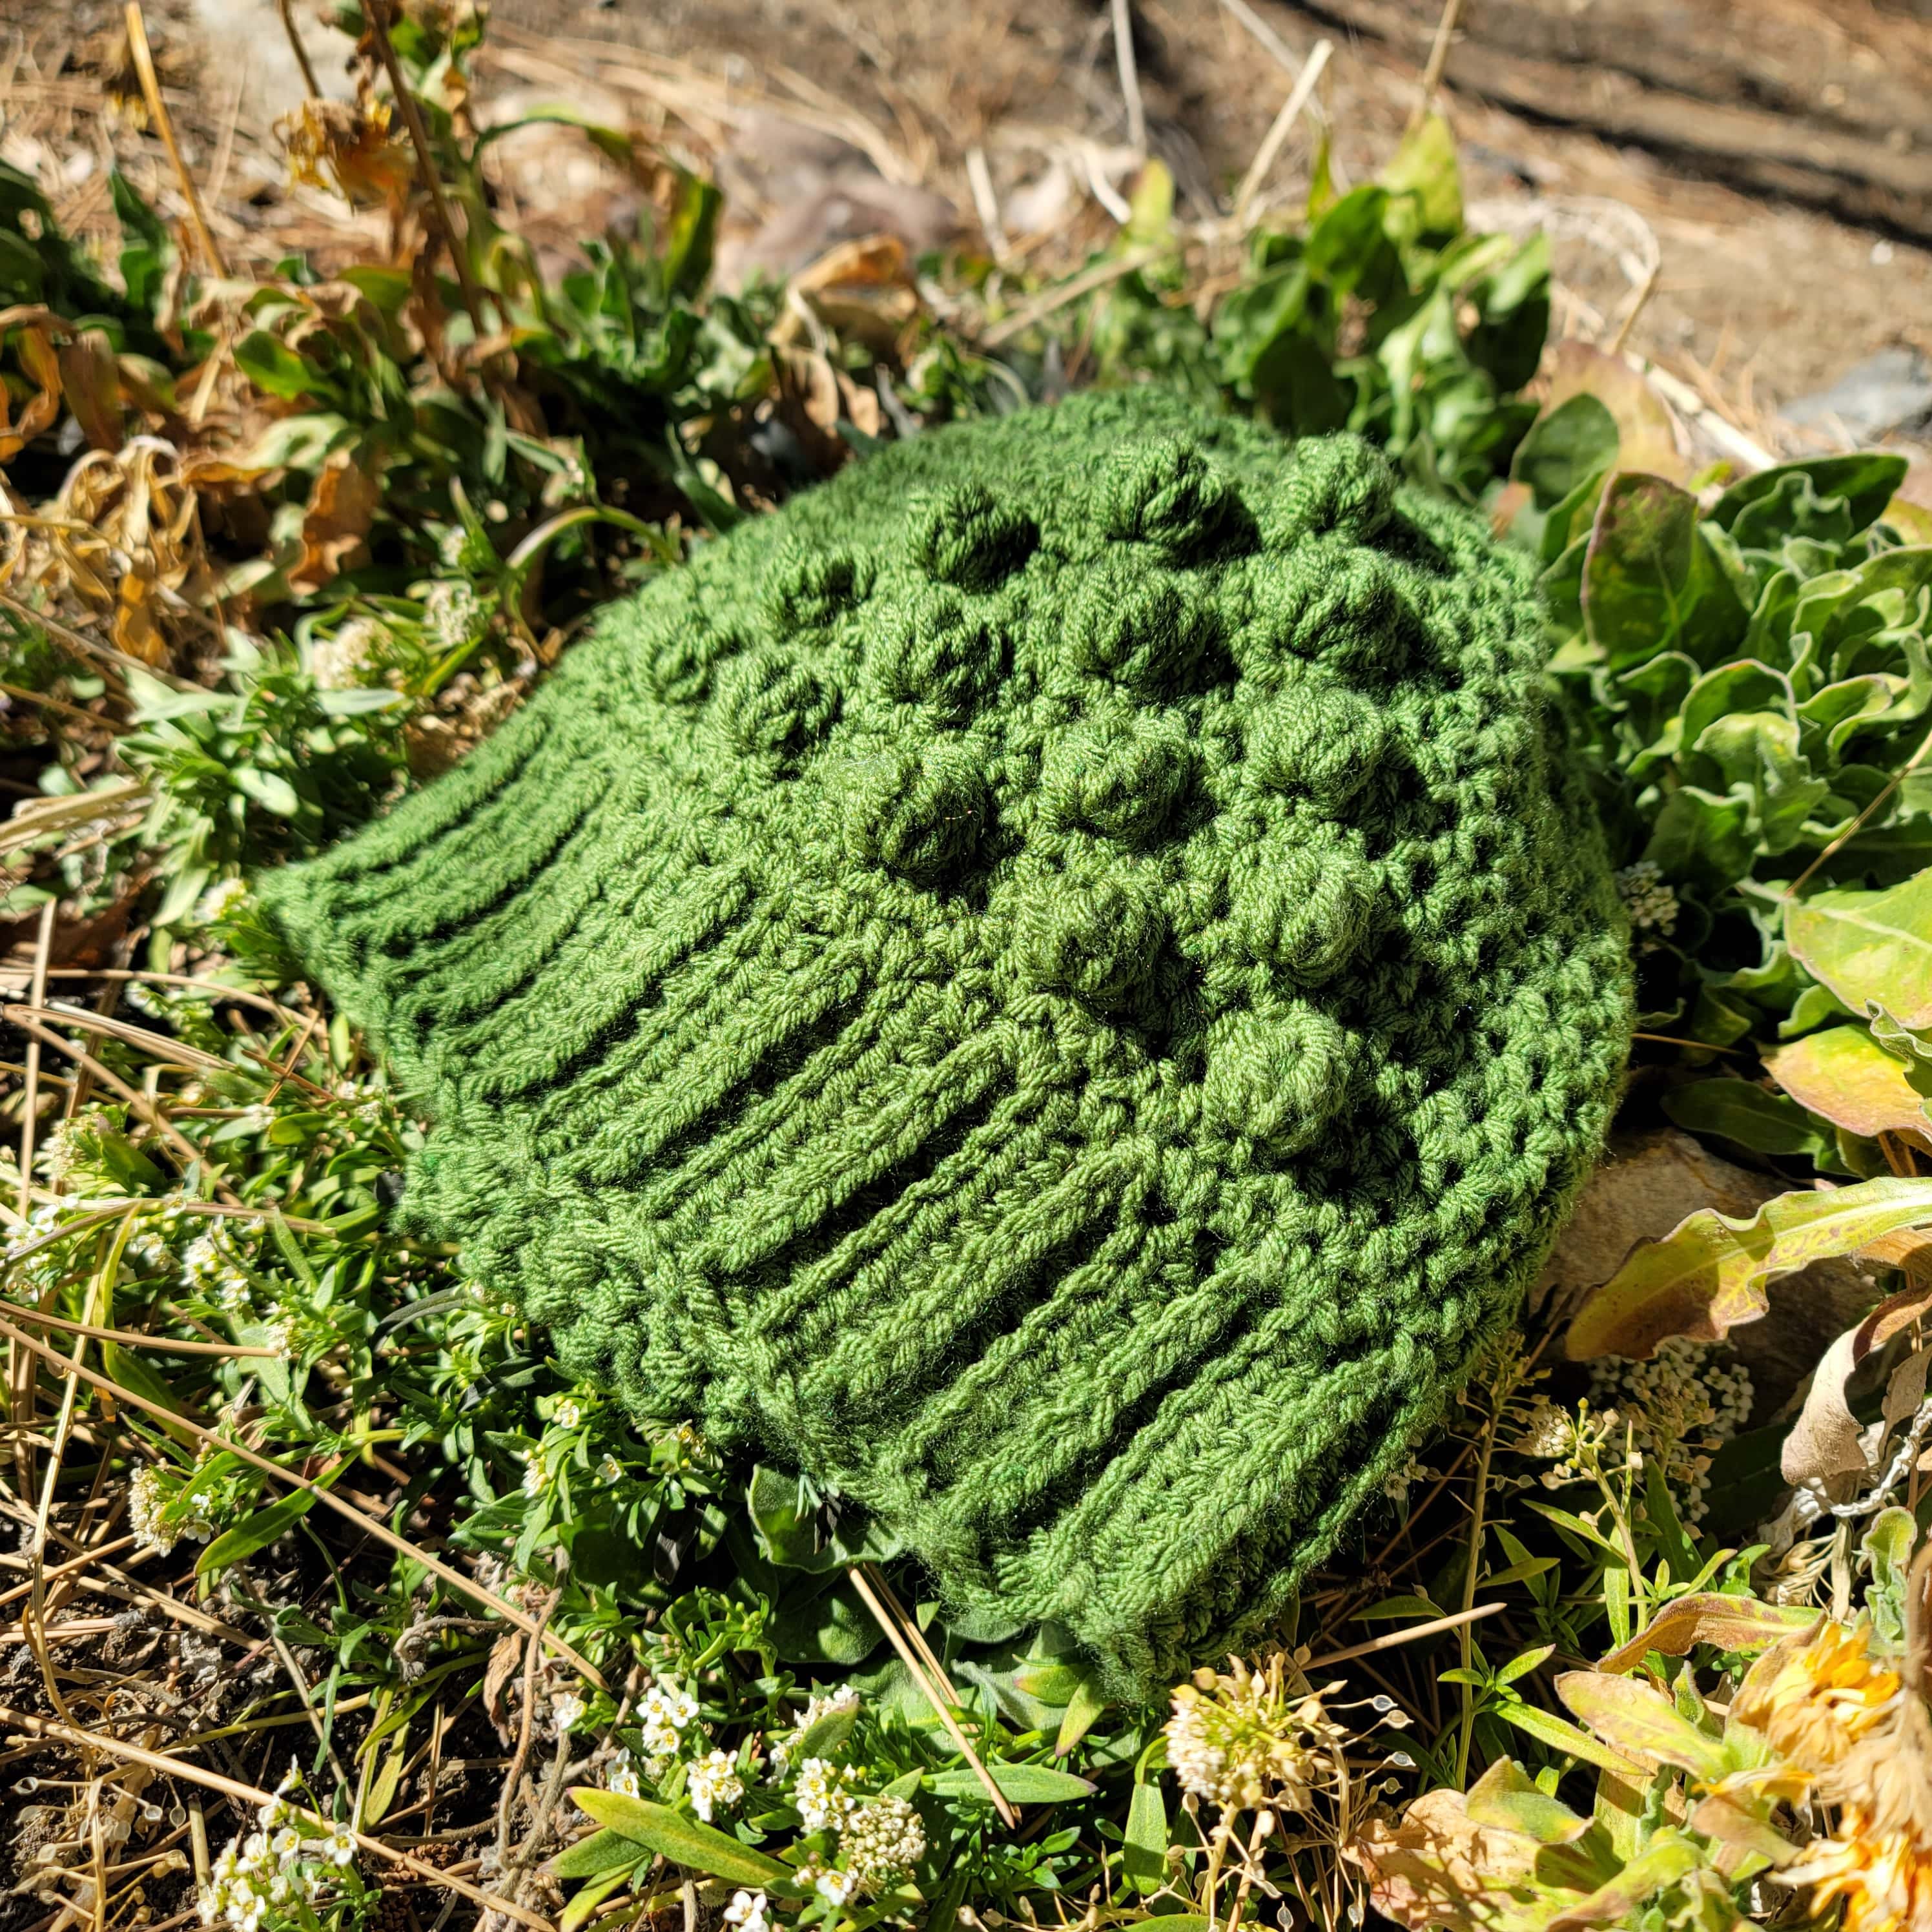
Last year, I saw multiple patterns using bobble stitch, and I really loved the look of it. I wanted to incorporate bobble stitch into a beanie, but not too extreme. I also thought it would be interesting to form some kind of geometric shape using bobble stitch, and I thought triangle would be cute on the beanie.
Wearable items are not my forte, so I wanted to challenge myself to design! This will be my second beanie item and third wearable item (check out my C2C Cocoon Shrug!) I want to make more beanie patterns for now, and next big goal would be to design a cardigan or simple pullover!
A Yarn I Used
I used a yarn called The Hook Nook Yummy Yarn. This is a special yarn made by Jessica Carey! Her yarns were sold in JO-ANN back in 2019, and sadly taken off from the shelves in…I say early 2021. You can still buy all of her yarns from her website, but it was sad to see them go.
I hoped this yarn would be easily accessible, but since it’s not now, I needed to find something more affordable and easily accessible. THK Yummy is categorized as weight #5 bulky yarn, but it is much thinner compared to other bulky yarns. It can be easily substitute with weight #4 aran/worsted yarn. I used Red Heart Soft for a substitution, and it worked perfectly! The color I had in my stash was navy blue. Because it’s pretty dark color, it’s kind of hard to see the bobble stitch details on the beanie.
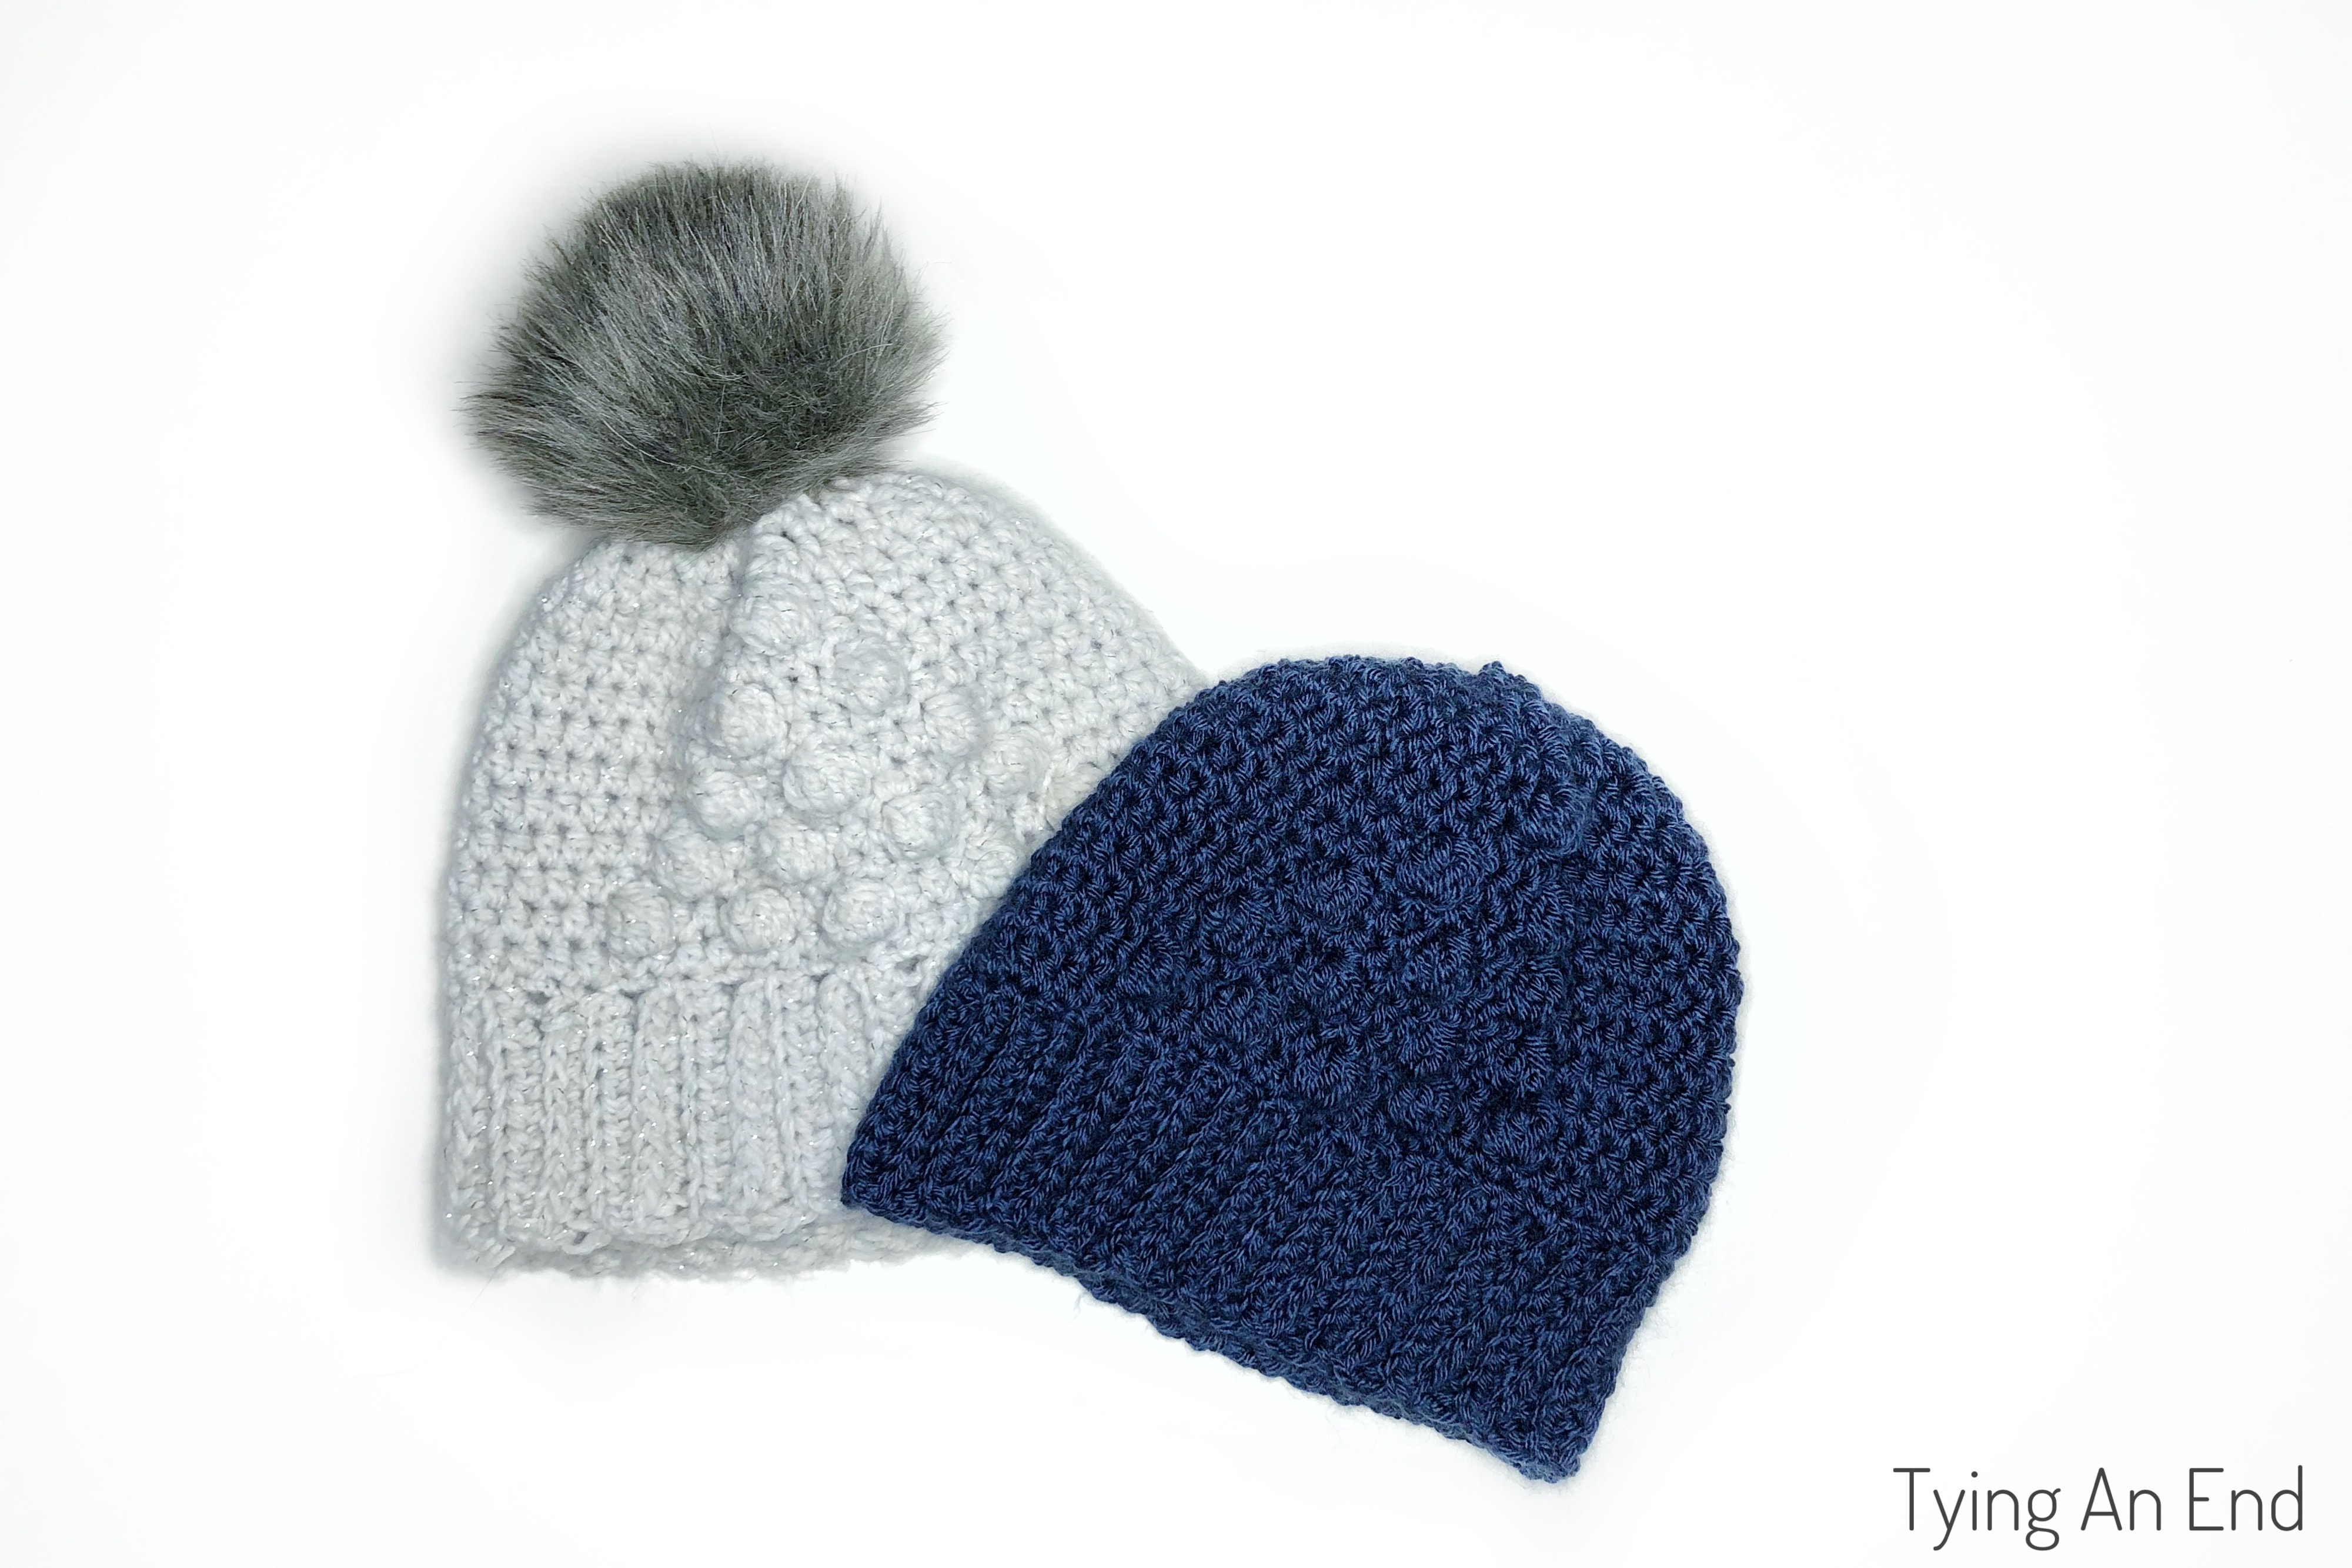
When you’re substituting, I wouldn’t recommend using one of those “value” yarns because they are usually stiff and it doesn’t stretch as much. Examples would be Red Heart Super Saver and Big Twist Value. One of my testers tried with cotton yarn, and that didn’t work so well either. She said she used cotton yarn for making beanies many times, but that was with slip stitch (SL ST) brim (like the one I used for Darratt Slouchy Beanie). I think a nature of the structure for HDC 3rd loop brim doesn’t stretch compared to the SL ST brim.
The Look
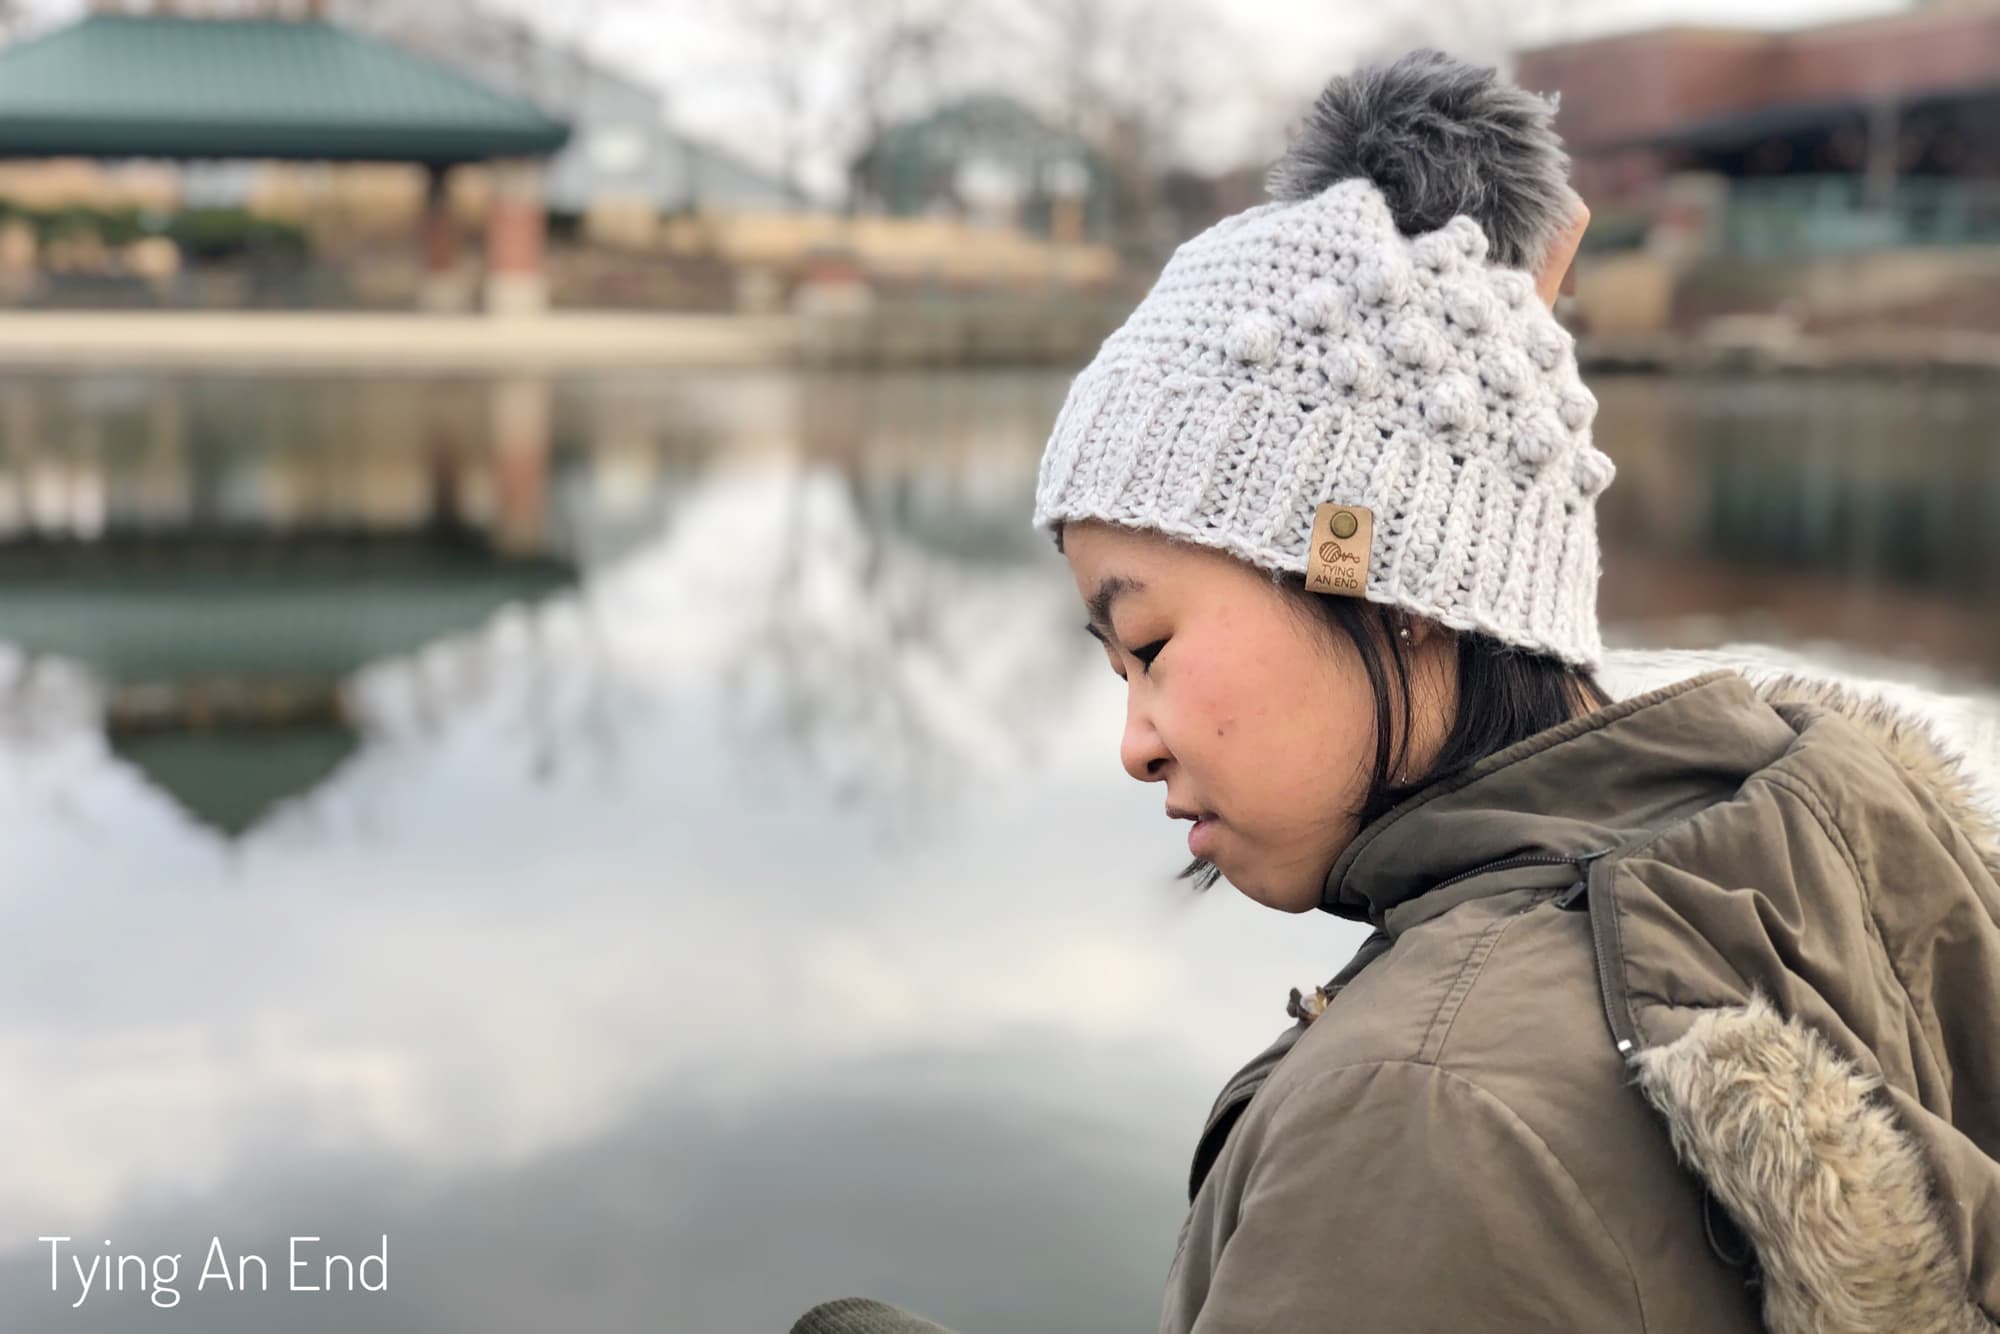
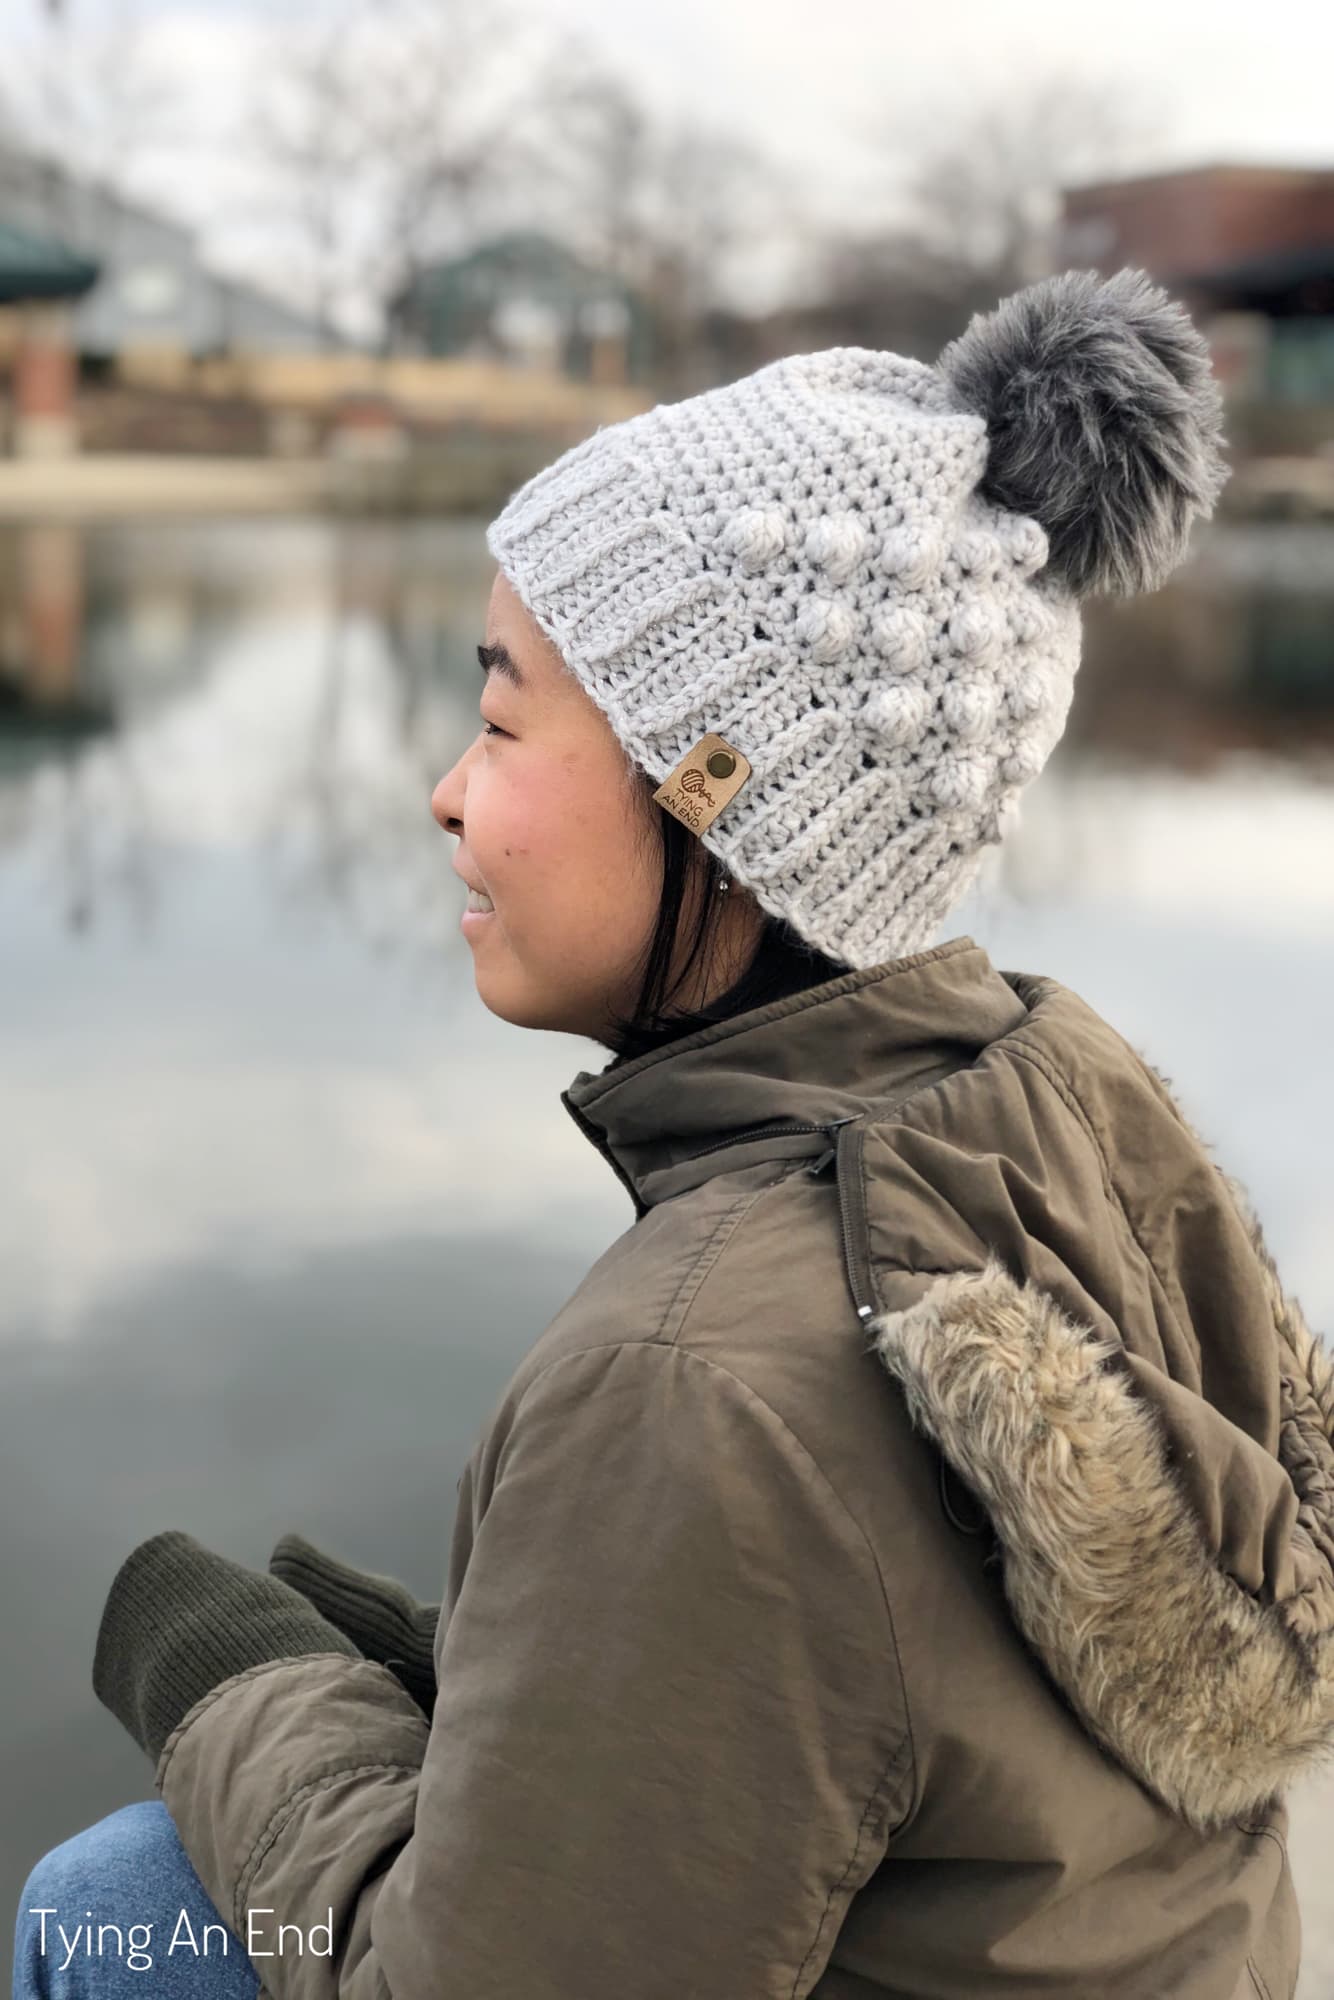
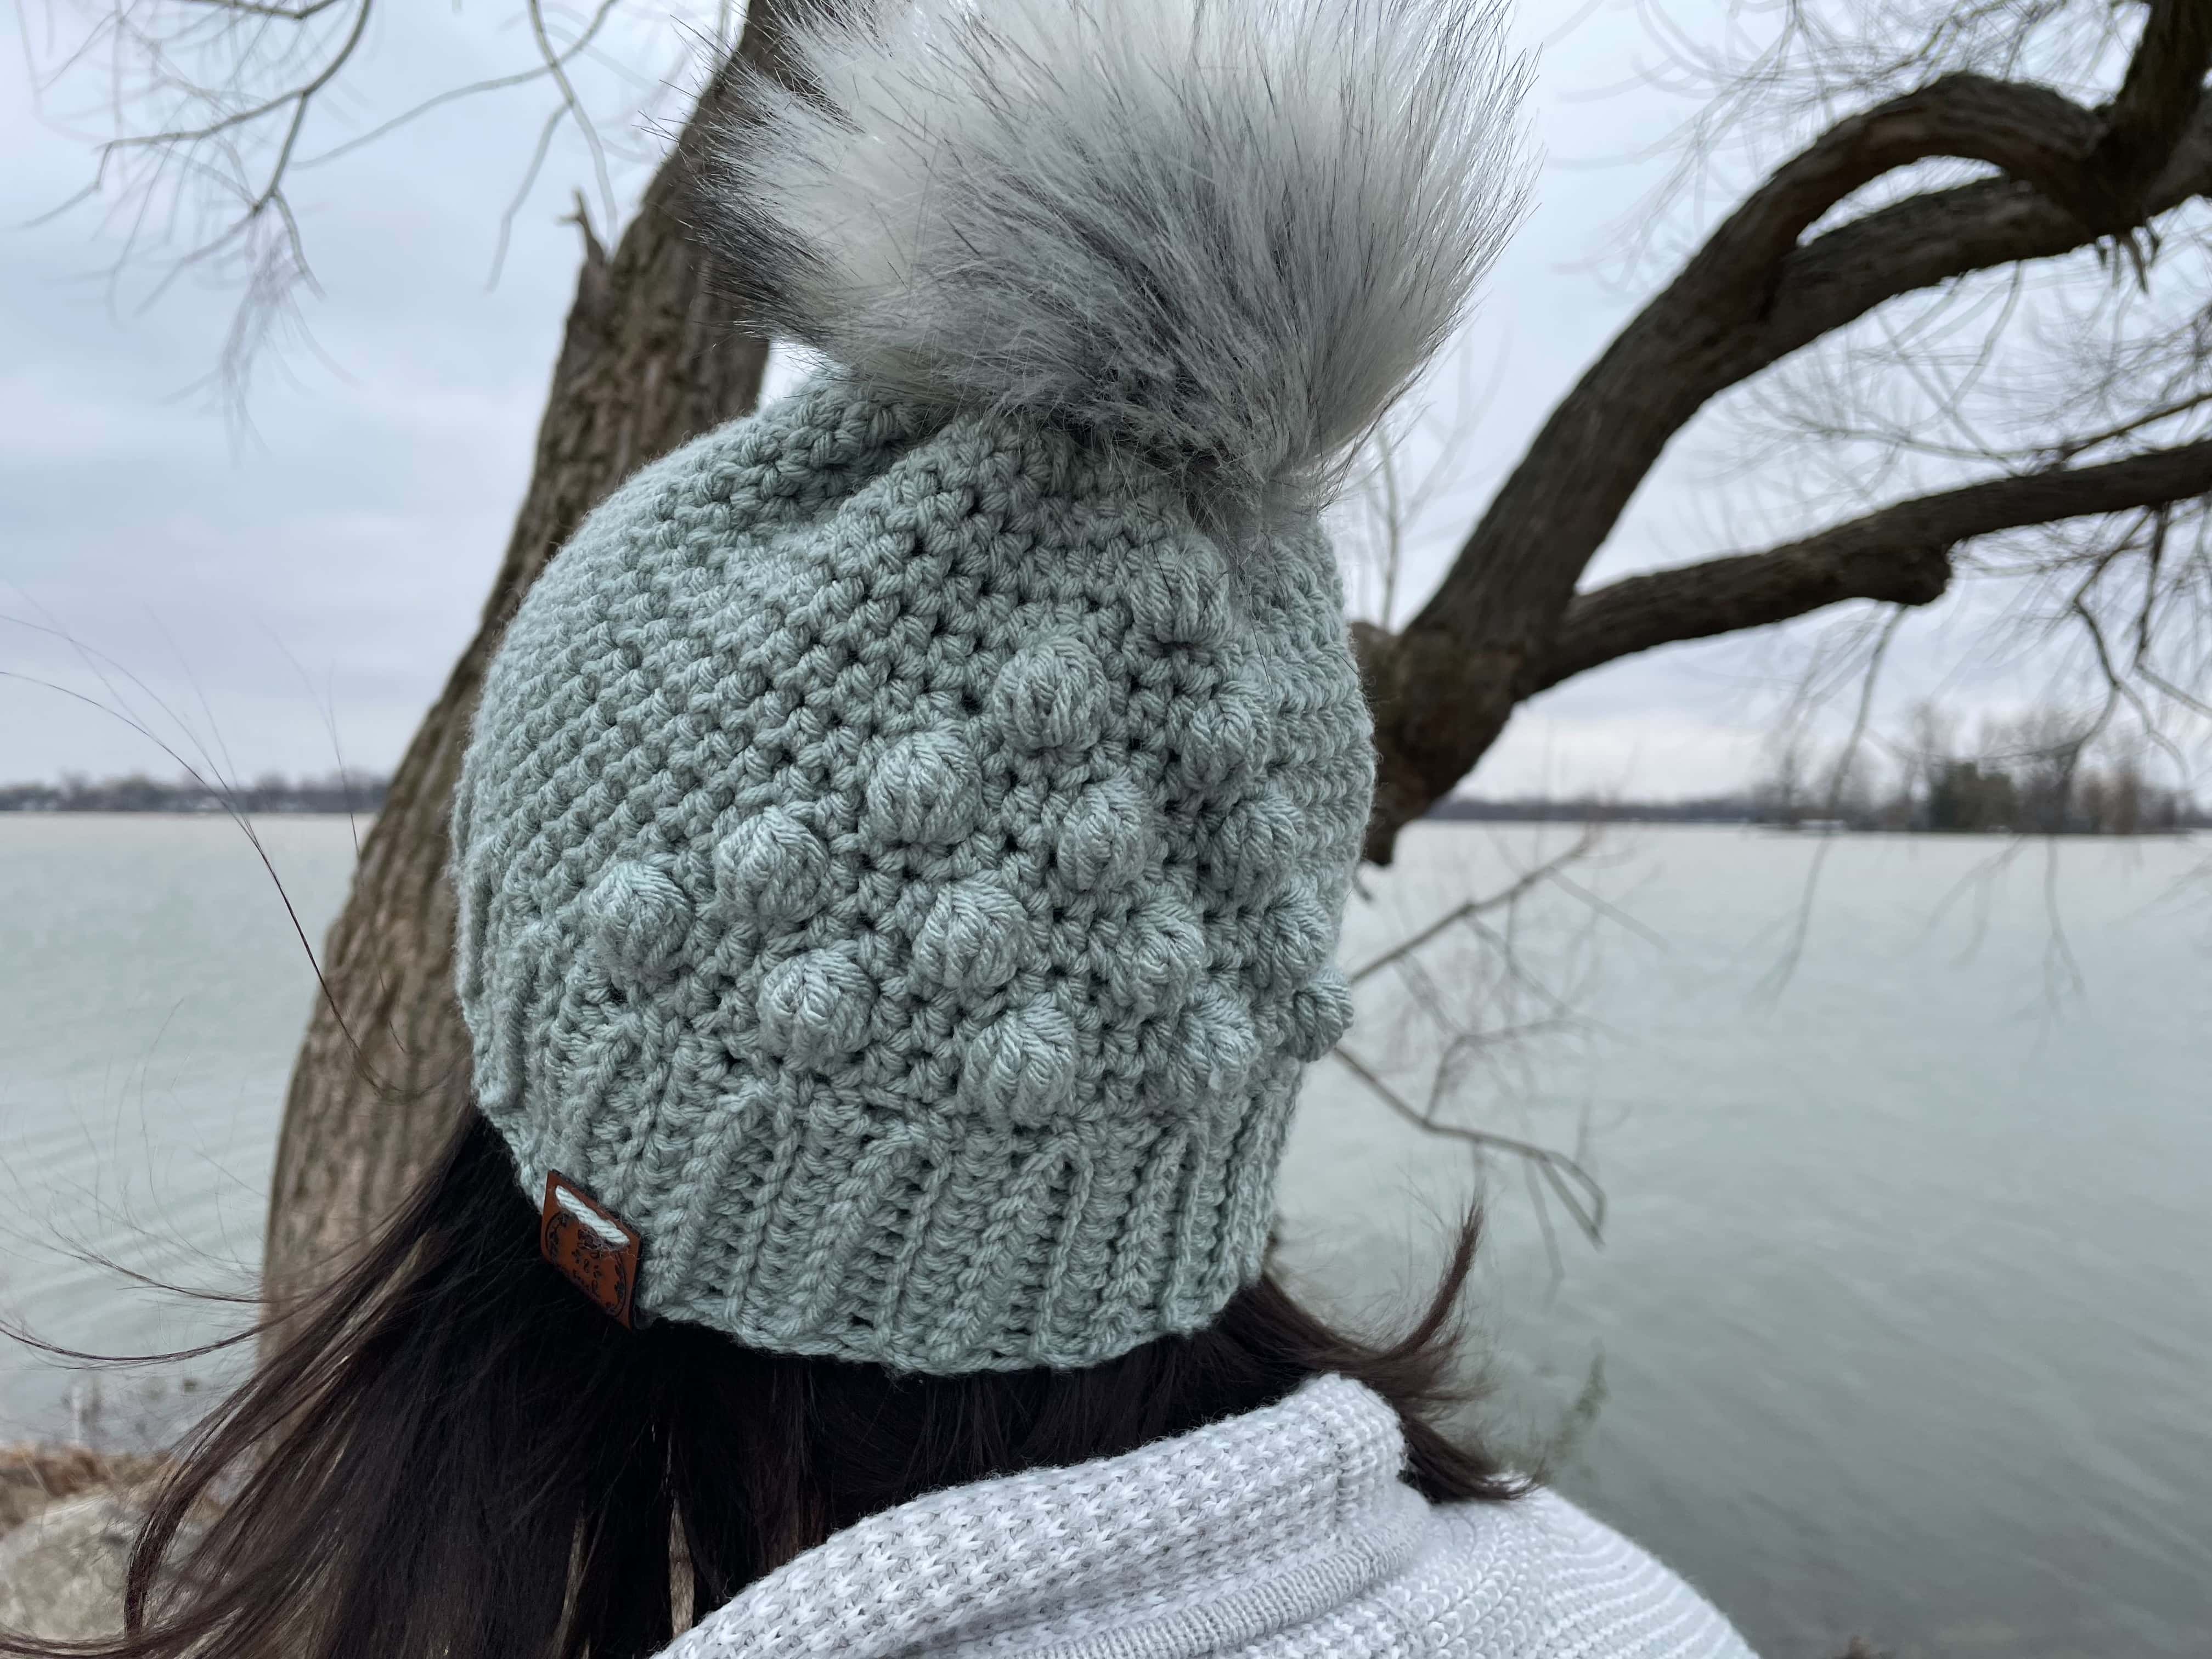
Depending on the angle and the shadow, the bobble stitch doesn’t stand out as much on the beanie. Also, if you choose dark color yarn, that plays a roll too. (For example, black yarn may not define the triangle so much)
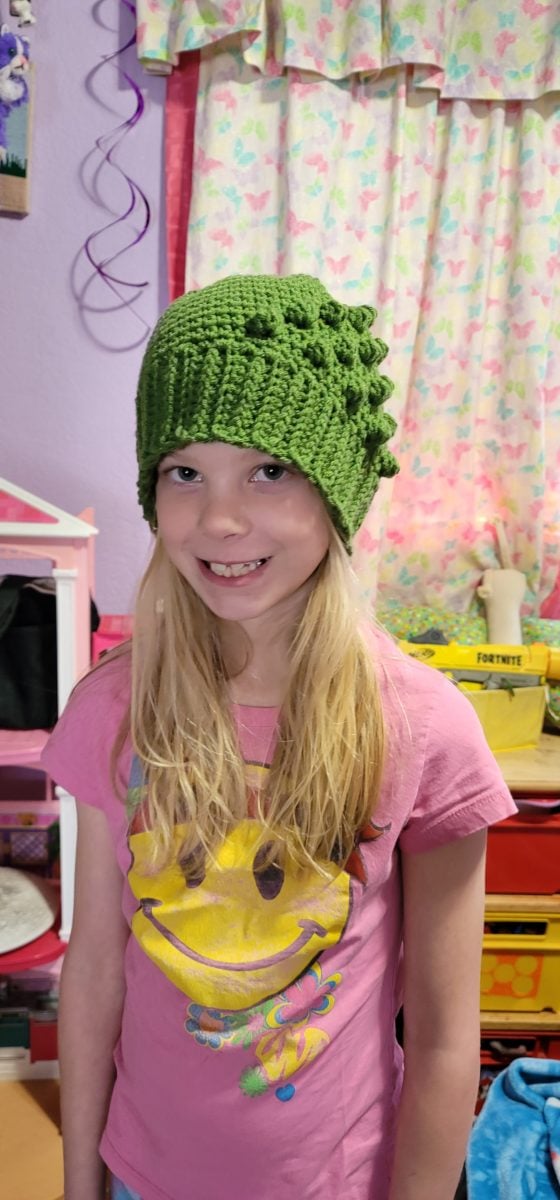
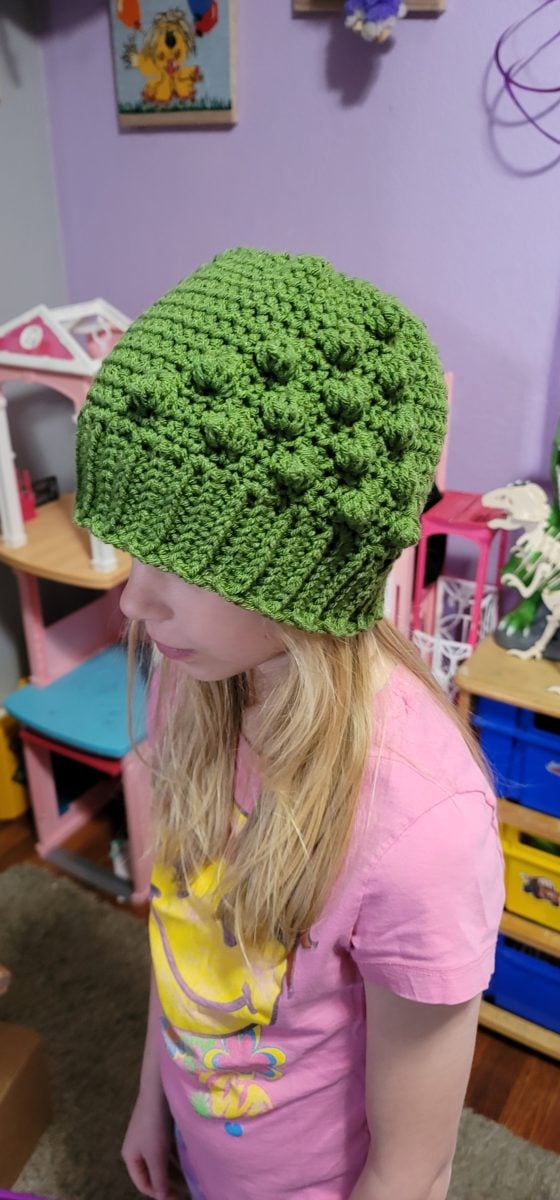
You can wear your beanie however you like! You can face the triangle on the side, like I did in the photos, so that one side is just simple beanie look. That’ll gives an asymmetry look. You can definitely face the triangle towards the front so not only you showcase your accomplished beanie, but the fun bobble stitch texture as well!

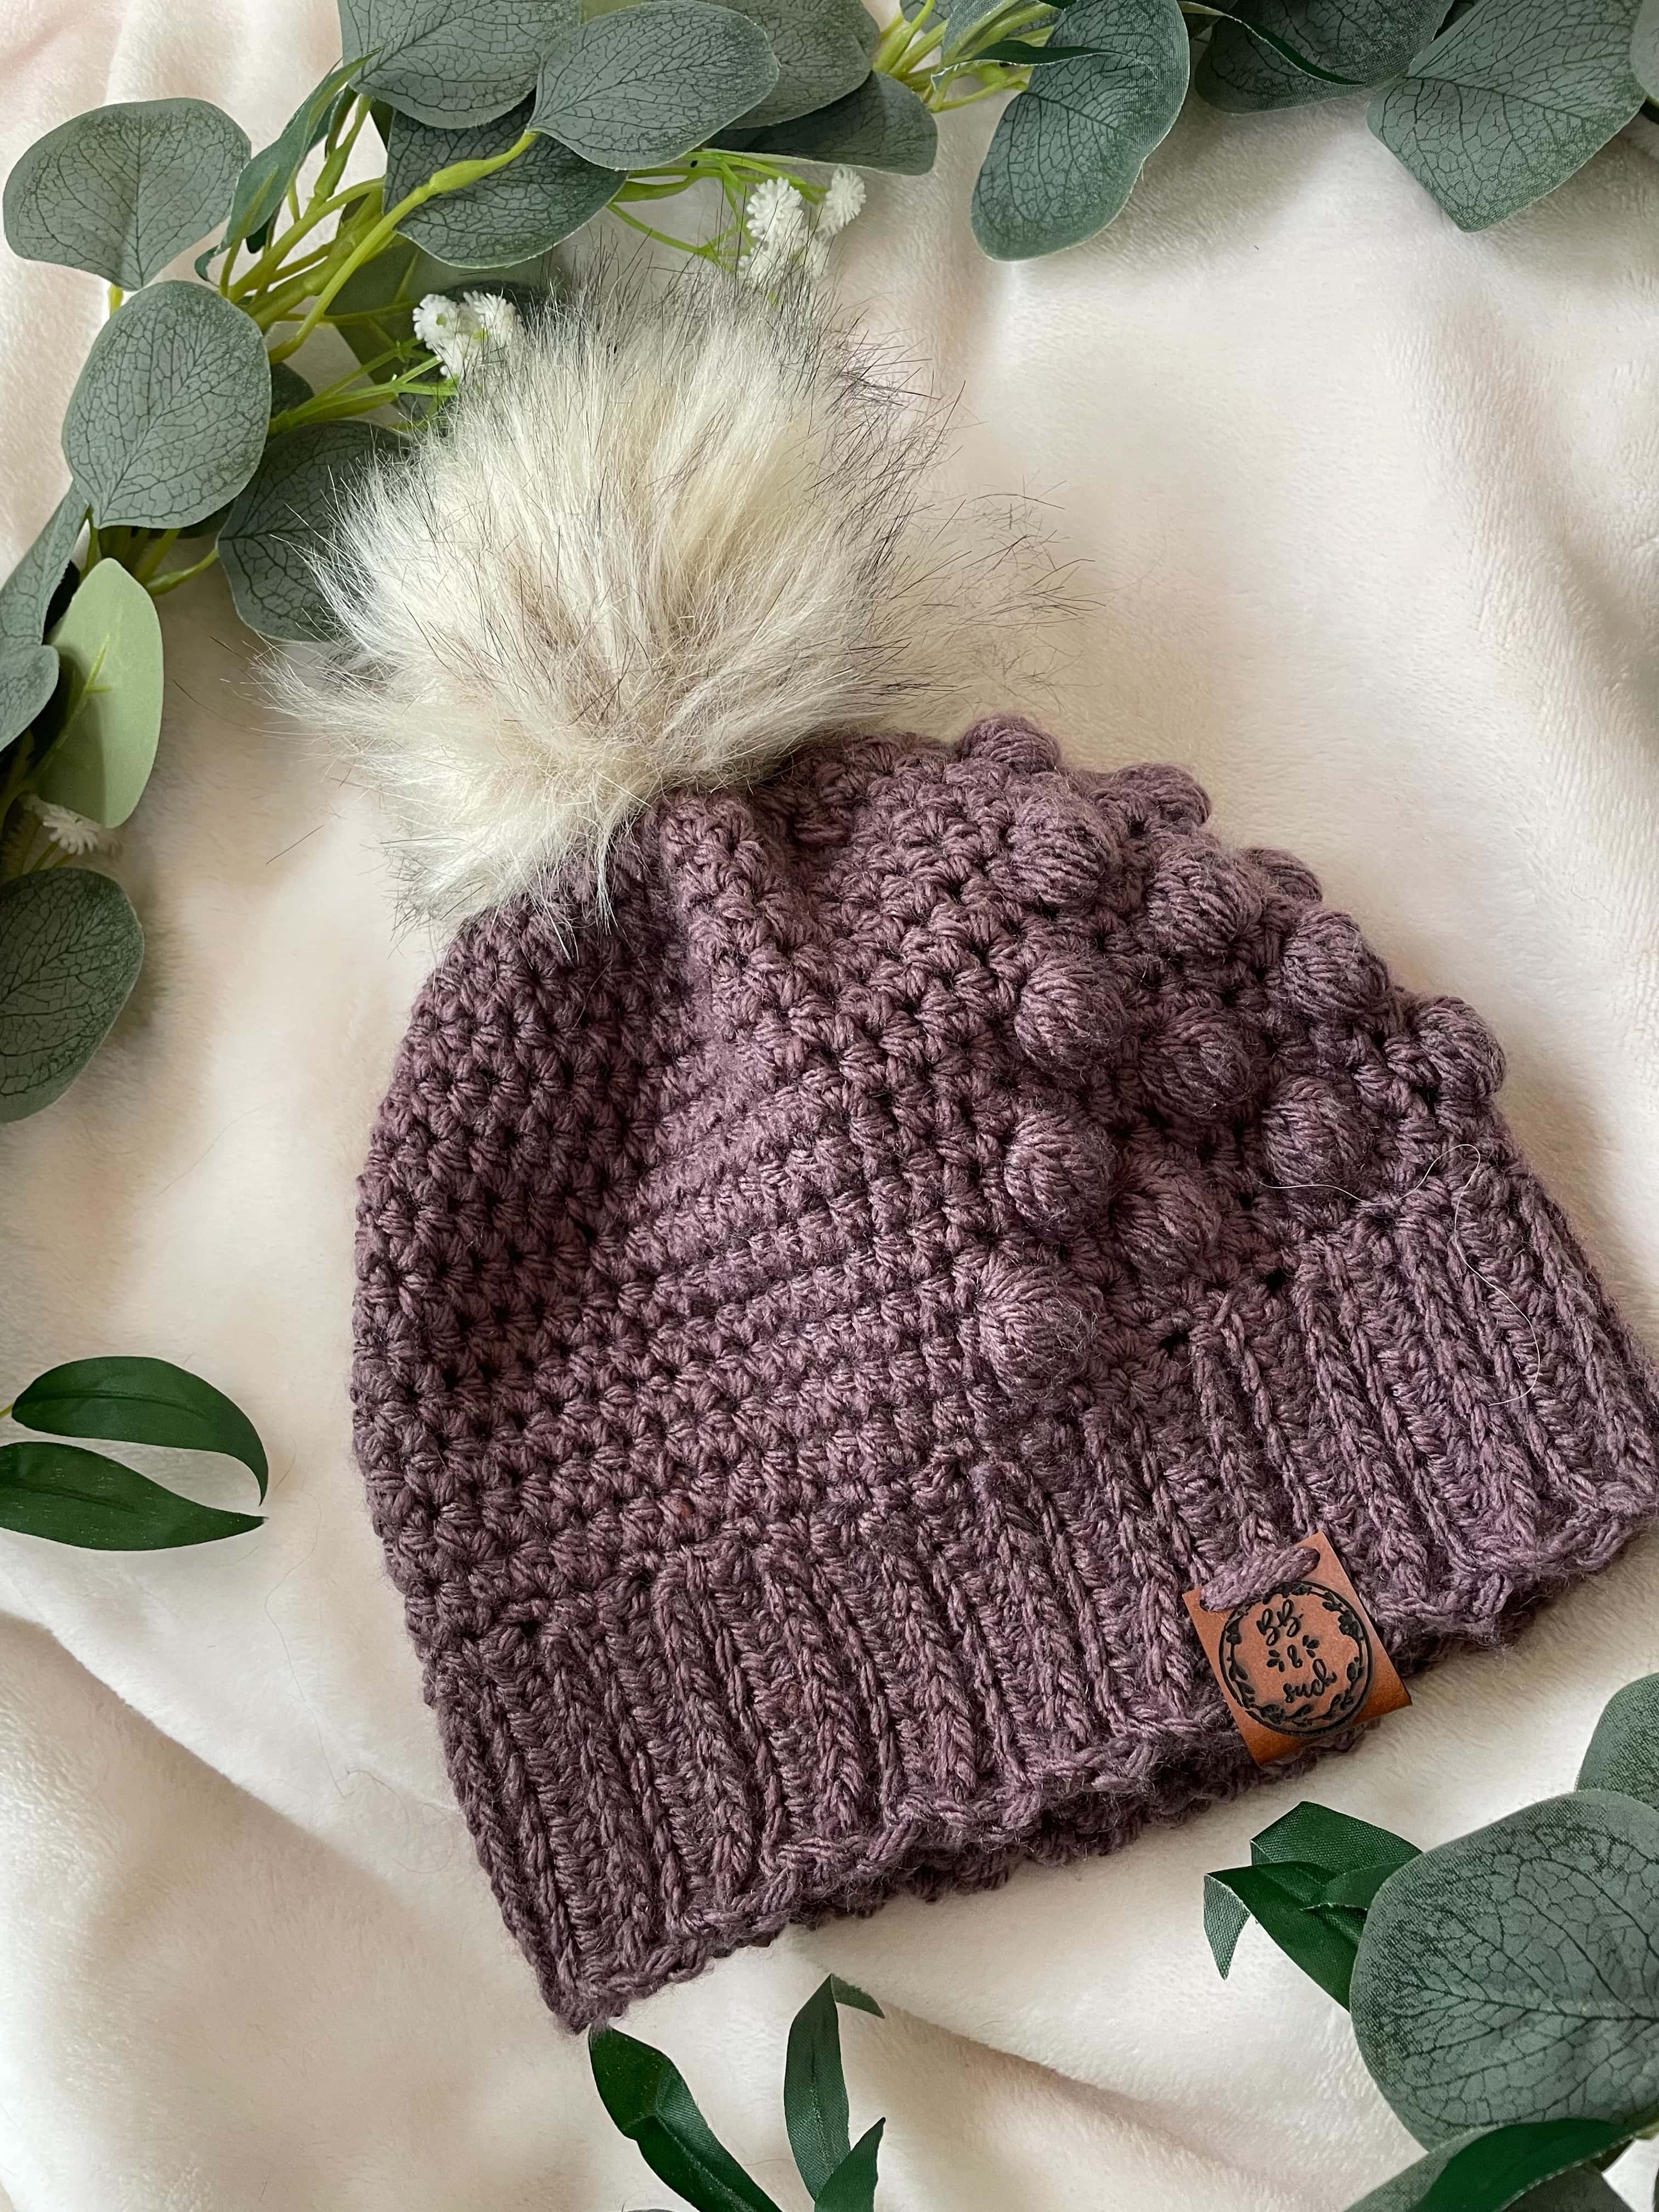
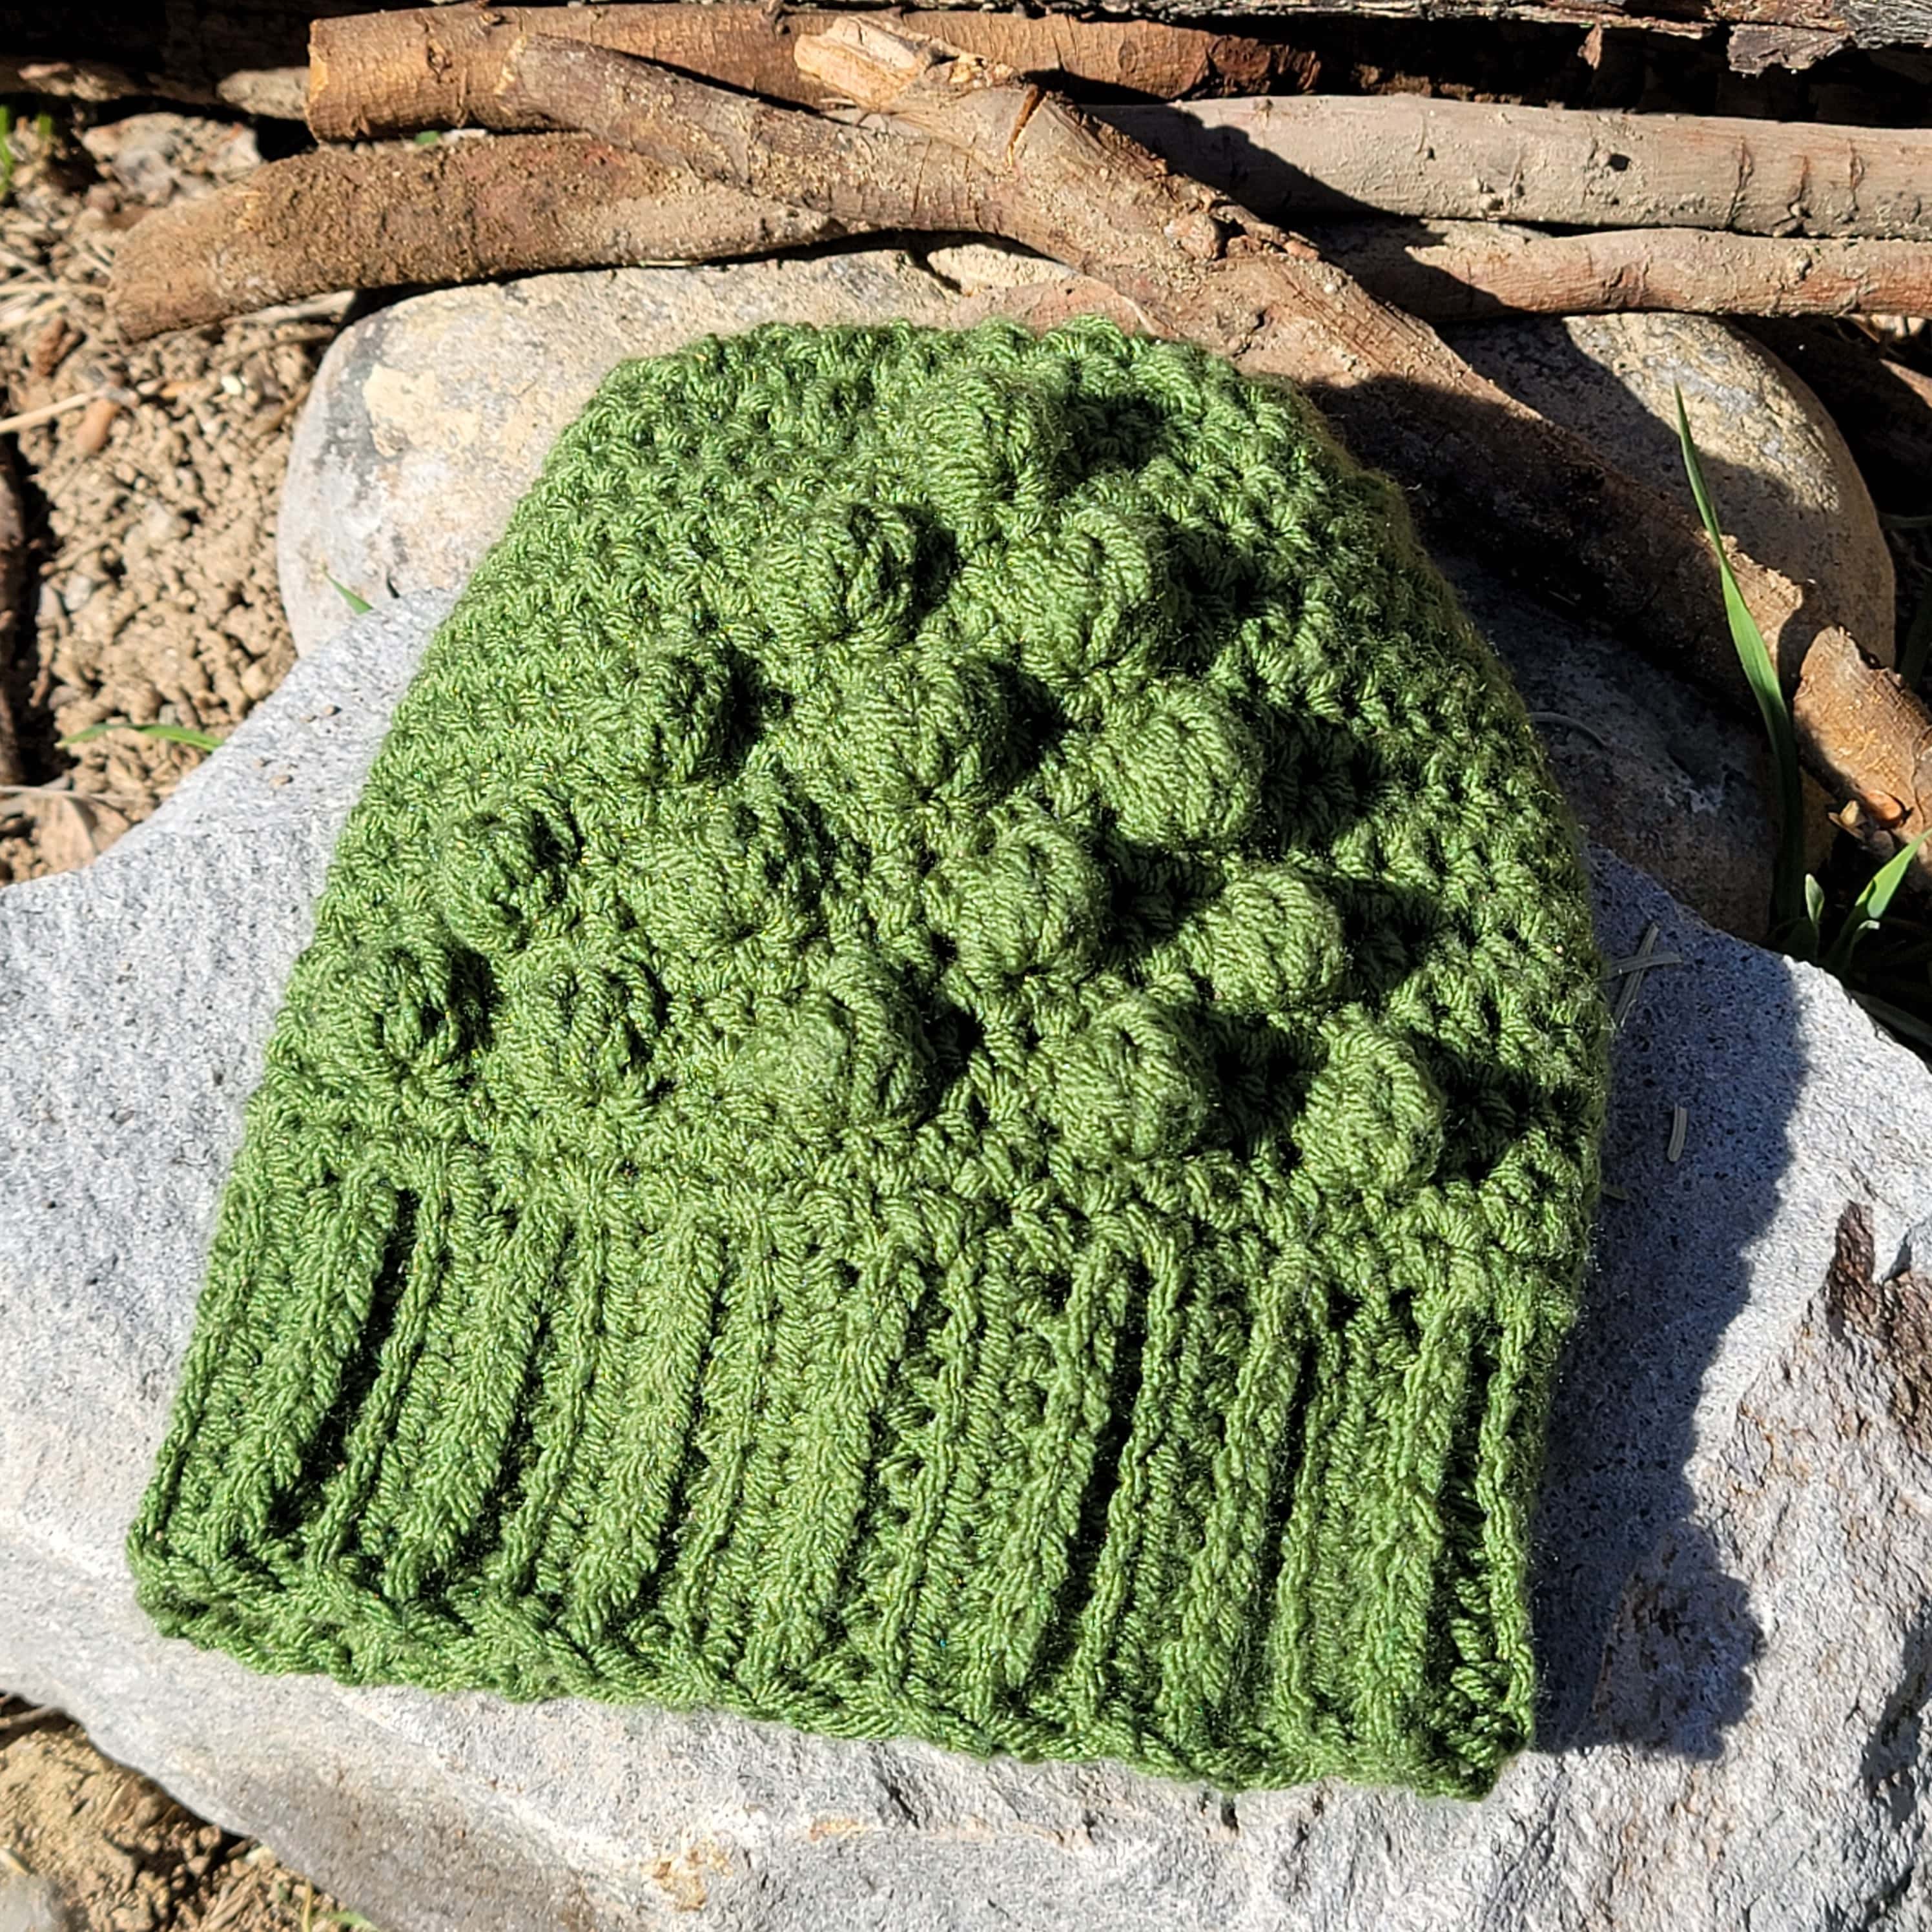
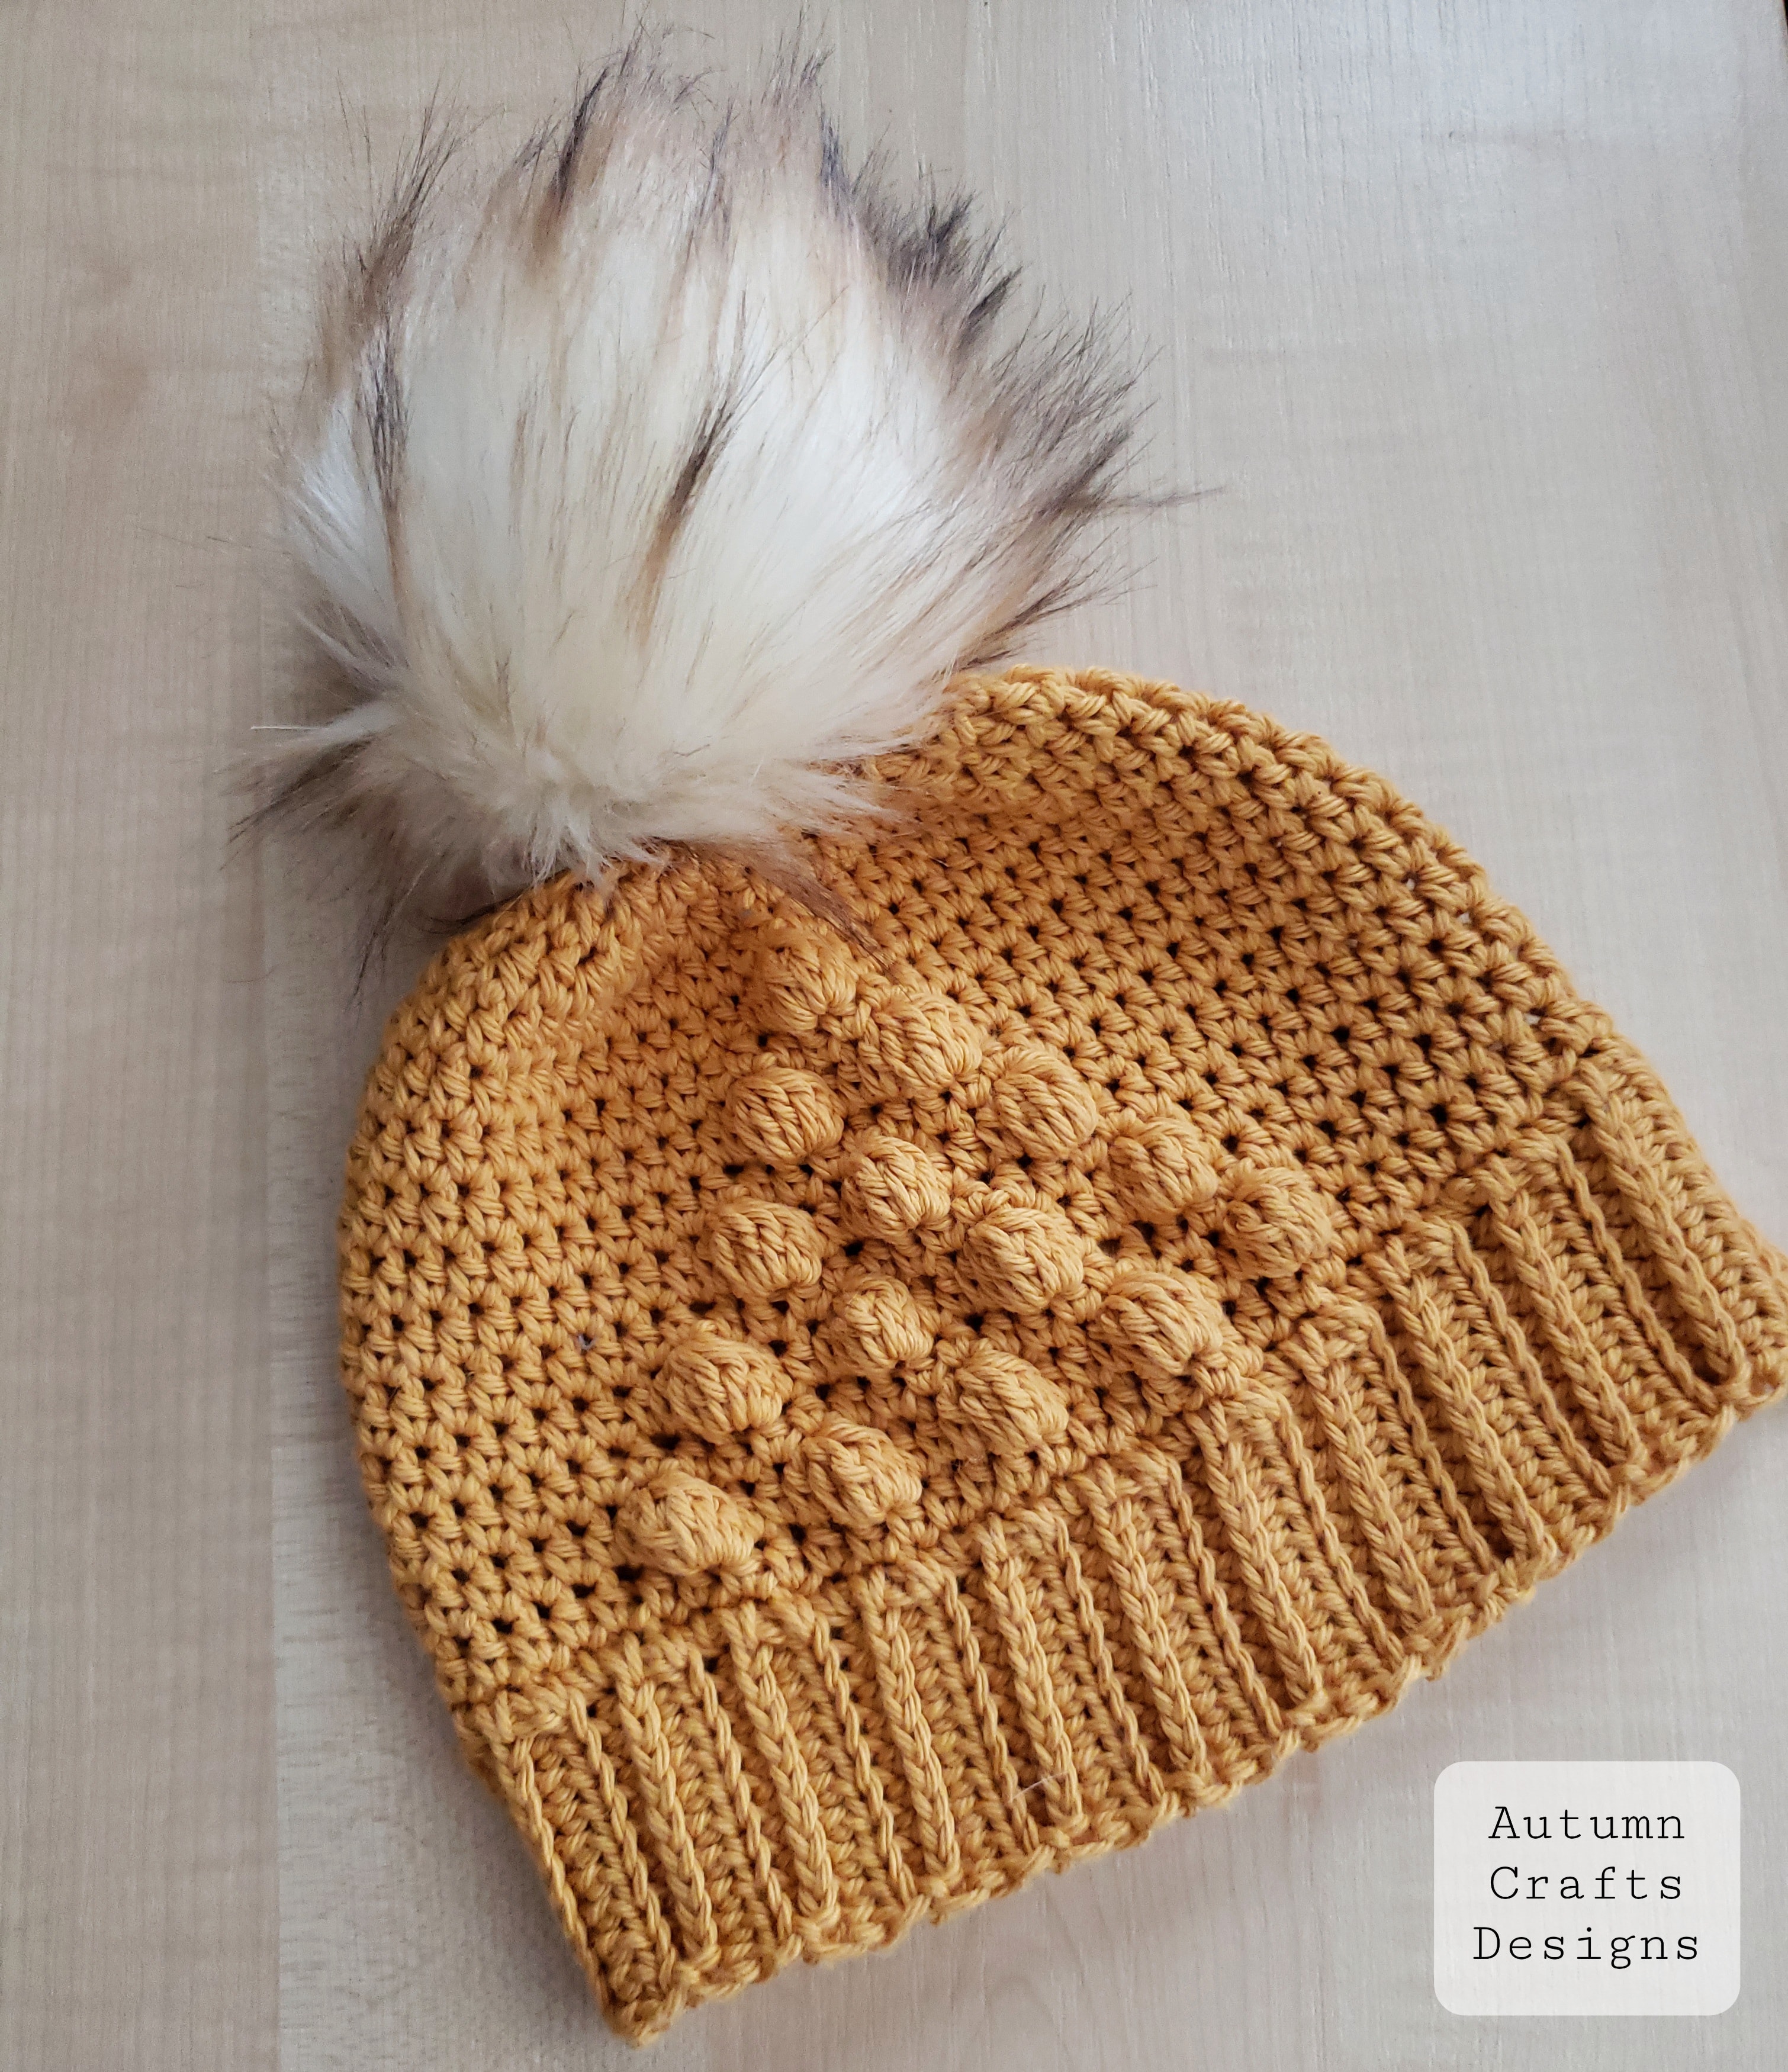
Testers’ Tri-Dot Beanie
The colors that my testers chose are all so lovely! The size for this pattern is meant for an adult, so it’ll be big for a child’s head. As you can see in 2 of the photos below, it looks slightly big on the girl’s head. However, the pattern is easily adjustable so you can make it for a child as well! (Child’s size is not included in the pattern, but you can do less chains for the foundation chain, less rows for the brim and less rounds for the body to make it small!)
Yarns my testers used:
- Yarn Bee Soft & Sleek
- Yarn Bee Soft & Sleek Chunky
- I Love This Cotton
- Red Heart Hygge Charm
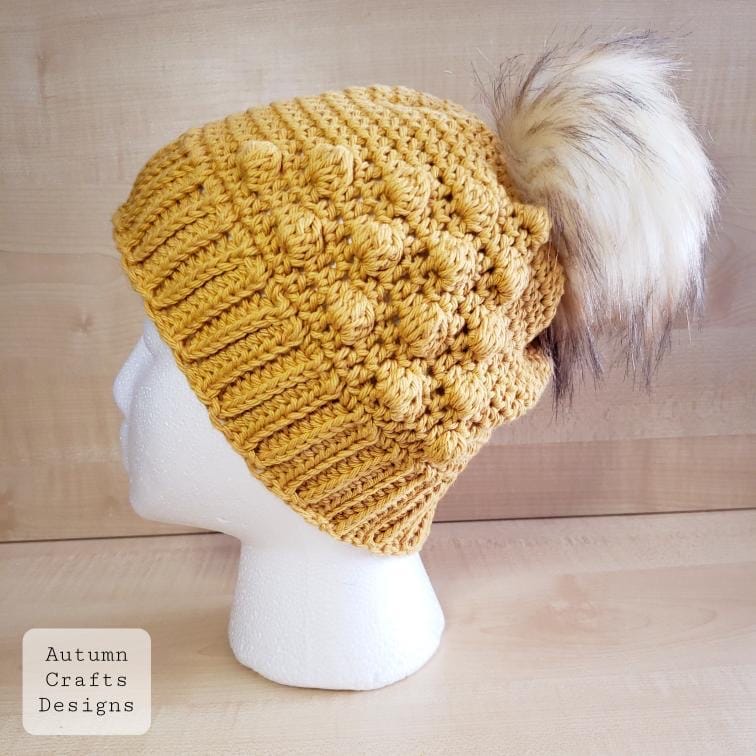
(Thanks to my testers: Terrin @burtsbonnetsandsuch, Kristina @farmdistrictcrafts, Crystal @jolieknotscrochet, Vonda @autumncraftsdsgns)

Grab an Ad-Free PDF
I’ve created nicely formatted PDF, and you can grab yours from my online shops! You can print them out and work on the couch, take notes, work offline, whatever you like!
My Recommended Materials and Tools


TRI-DOT BEANIE
CROCHET PATTERN
MATERIALS:
- The Hook Nook Yummy Luxe [1 skein = 185yd/169m, 3.5oz/100g, category 5 bulky weight]
- 1 skein (used approximately 118yd/108m) of any color (photo shown: “Silver Lining”)
- Though the yarn I used is category 5 bulky weight, it is more on the thinner end. (9 wpi) When substituting, aran or heavy worsted weight yarn would work as well.
- Depending on the yarn you choose, the brim does not stretch as much even when you have the correct gauge. Please try it on after Round 1 of the body to see if it fits to your liking.
- Suggested yarn substitution:
- Red Heart Soft [category 4 medium weight]
- Yarn Bee Soft and Sleek [category 4 medium weight]
SIZE:
- Brim – approximately 16.25″ (42cm) long/circumference when unstretched, 2.25” (6cm) tall, approximately 8.25” (21cm) when laid flat.
- Body – approximately 8” (20cm) in height from bottom of the brim to top of body, approximately 9” in width at the widest part when laid flat
- Beanie stretches to fit 21” ~ 24” (53cm ~ 61cm) head circumference
GAUGE:
Make sure to check your gauge! Please use any other hook size if you do not get the same gauge using the provided hook size.
- Brim – 15 stitches x 11 rows in brim pattern = 4” x 4” (using US K/ 6.5mm crochet hook)
- Body – 14 stitches x 10 rows in HDC = 4″ x 4” (using 7mm crochet hook)
PATTERN NOTES:
- Number in [ ] indicates the number of stitches in each row/round.
- Starting CH 1 of each row DOES NOT count as a stitch throughout the pattern.
- ”#(type of stitch)” means to make an indicated number of stitches into the same stitch.
- Example: if the pattern calls out for “2SC”, make 2 SC into the same stitch.
- ” (type of a stitch) #” means to make an indicated stitch into the next indicated number of stitches.
- Example: if the pattern calls out for “HDC 4”, make 1 HDC in the next 4 stitches.
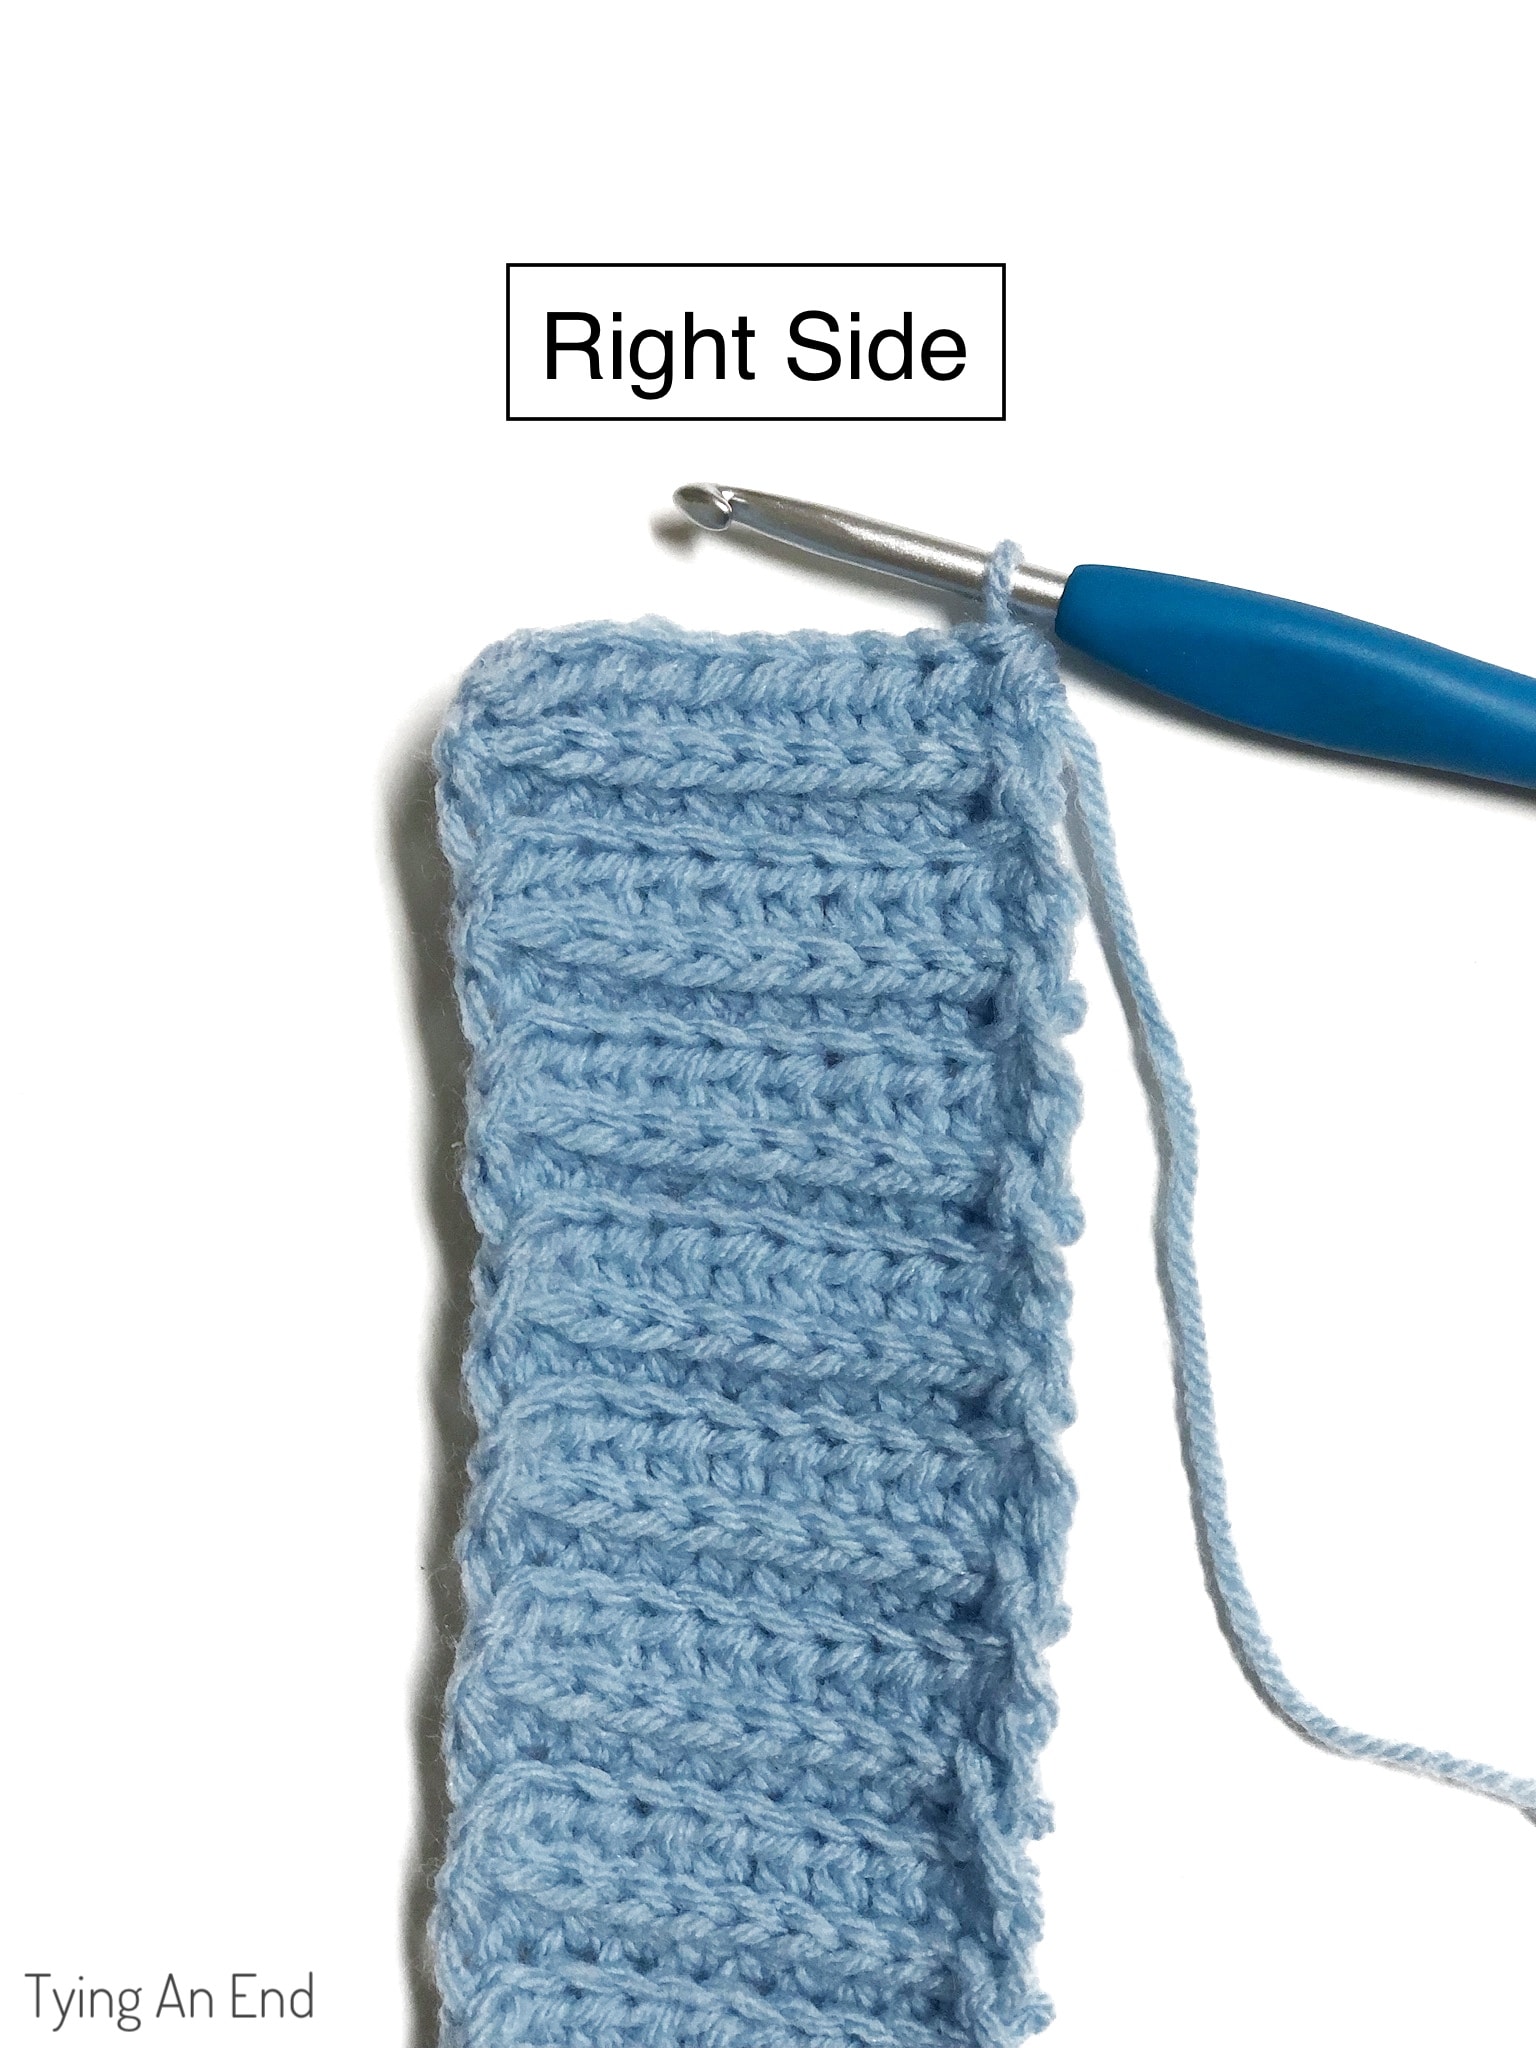
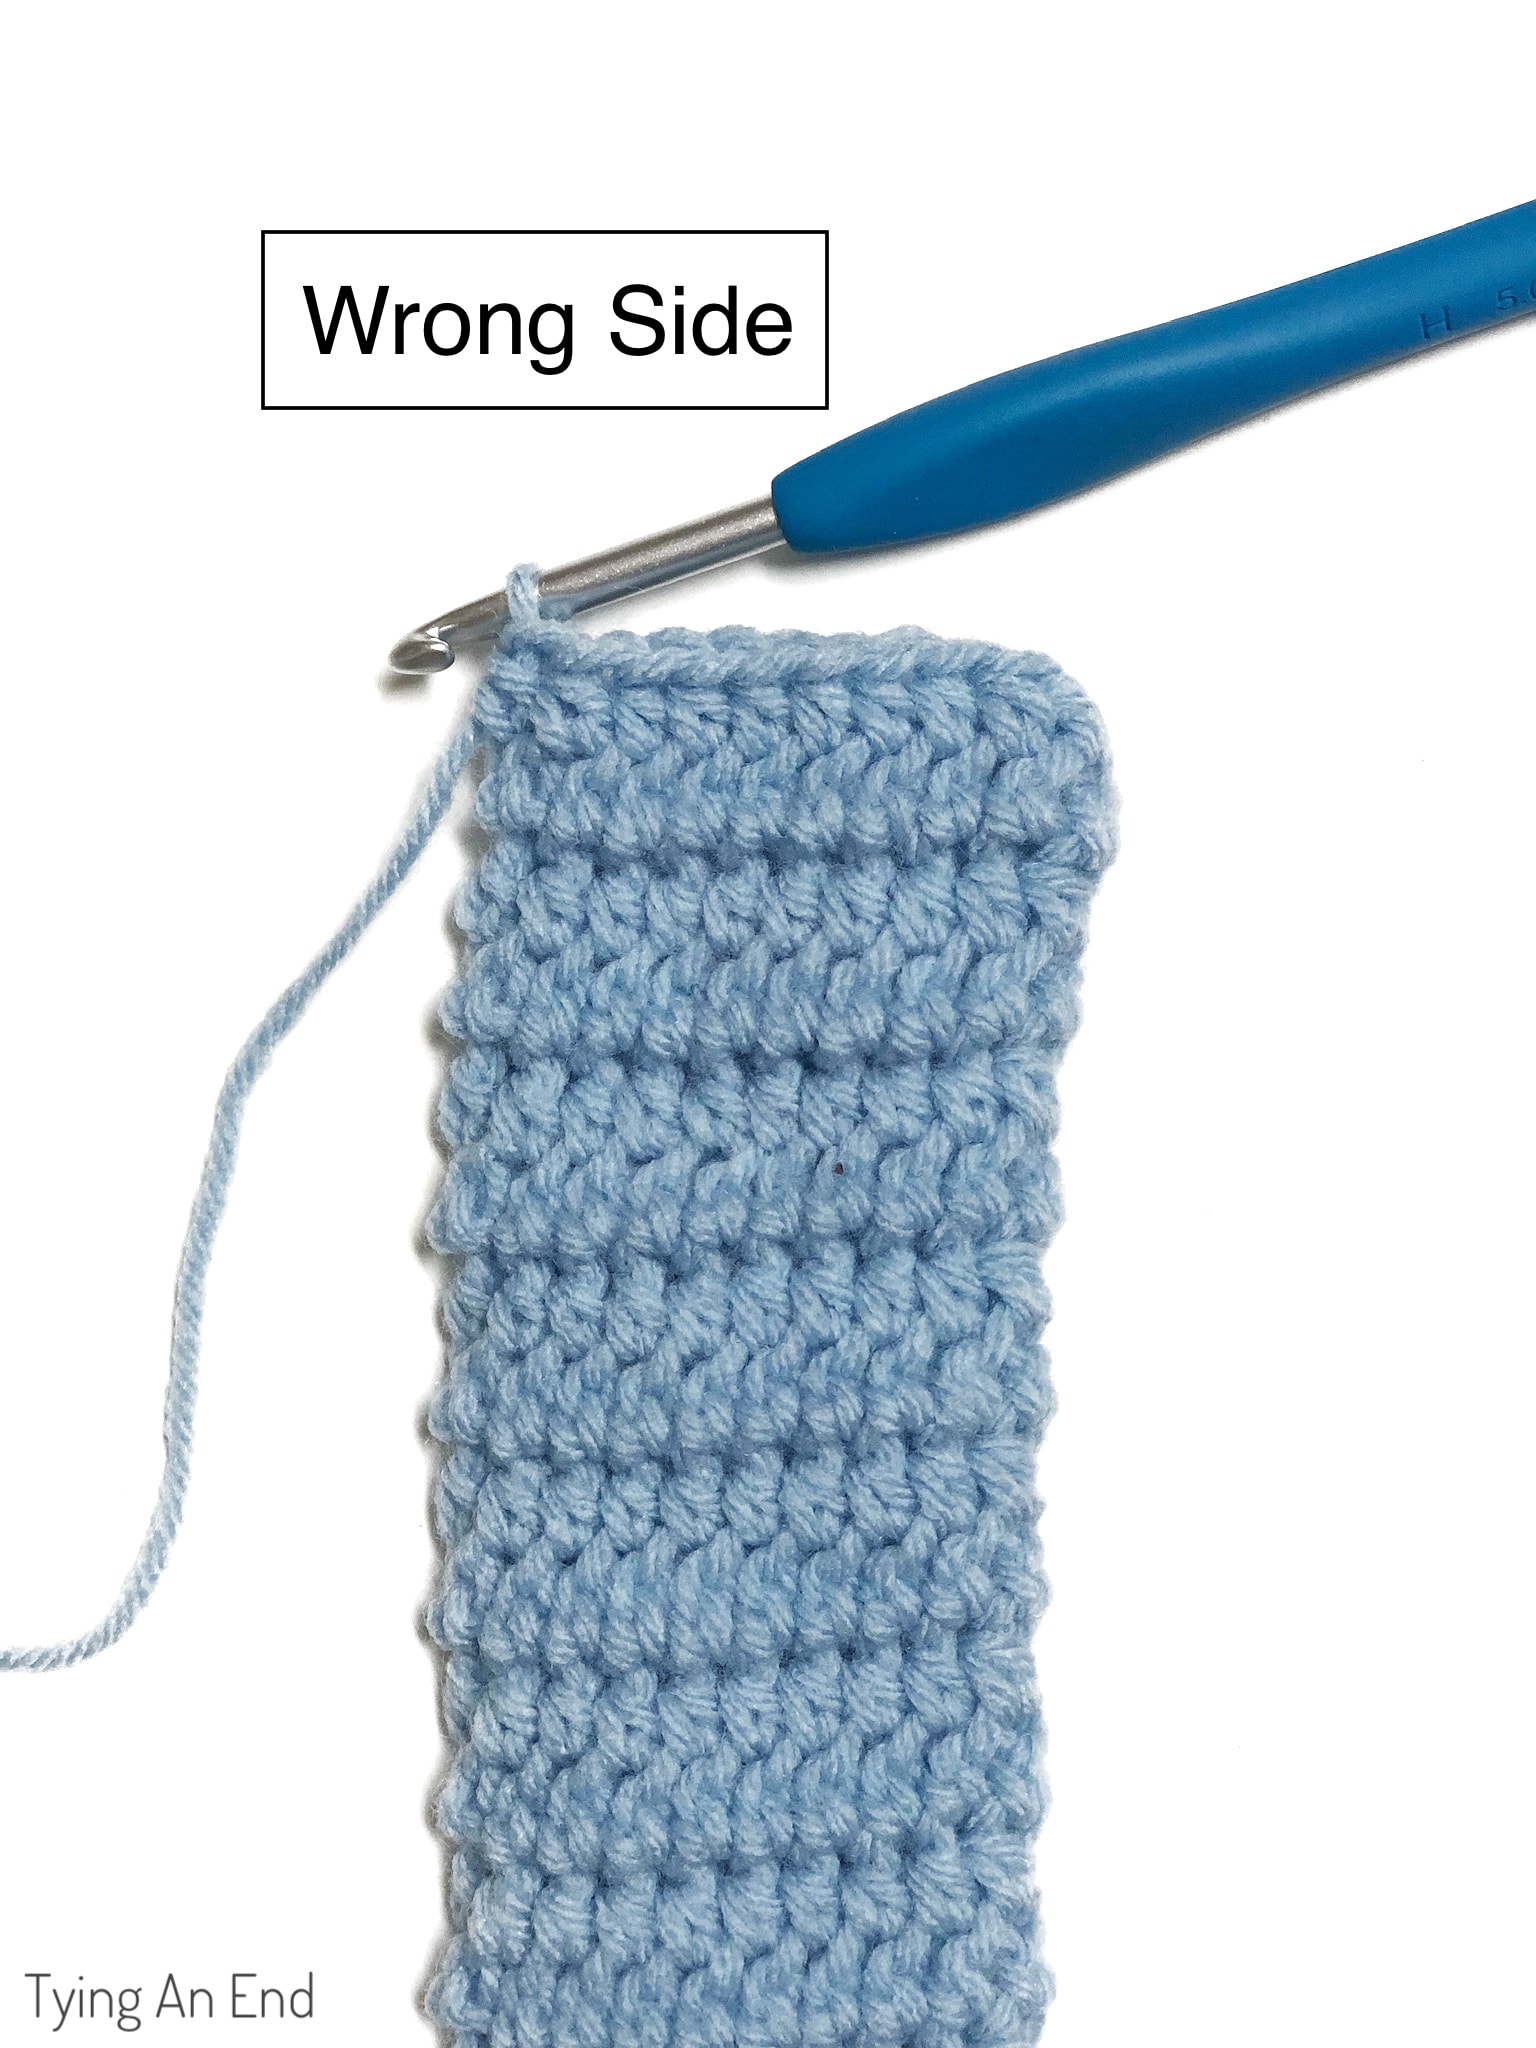
- For brim: odd number rows are the right side. Even number rows are the wrong side.
ABBREVIATIONS (US TERMS):
- CH – chain stitch
- SC – single crochet
- HDC – half double crochet
- SC2TOG – single crochet 2 stitches together
- HDC2TOG – half double crochet 2 stitches together
- SL ST – slip stitch
- BLO – back loop only
- BO – bobble stitch
How to crochet BO (bobble stitch):
- Yarn over. Insert a hook into a stitch and pull up a loop. You have 3 loops on a hook now. Yarn over. Pull through 2 loops. Now you have 2 loops on a hook.
- Repeat step 1 until you have a total of 6 loops on a hook.
- Yarn over. Pull through all 6 loops.
INSTRUCTIONS:
– BRIM –
With 6.5mm hook, CH 11
Row 1 – HDC in 2nd CH from hook. HDC across. Turn. [10]
Row 2 – CH 1. HDC in 3rd loop across. Turn. [10]

Row 3 – CH 1. HDC BLO across. Turn. [10]
Rows 4-43 – Repeat Rows 2-3. [10]
Rows 44 – Repeat Rows 2. [10]
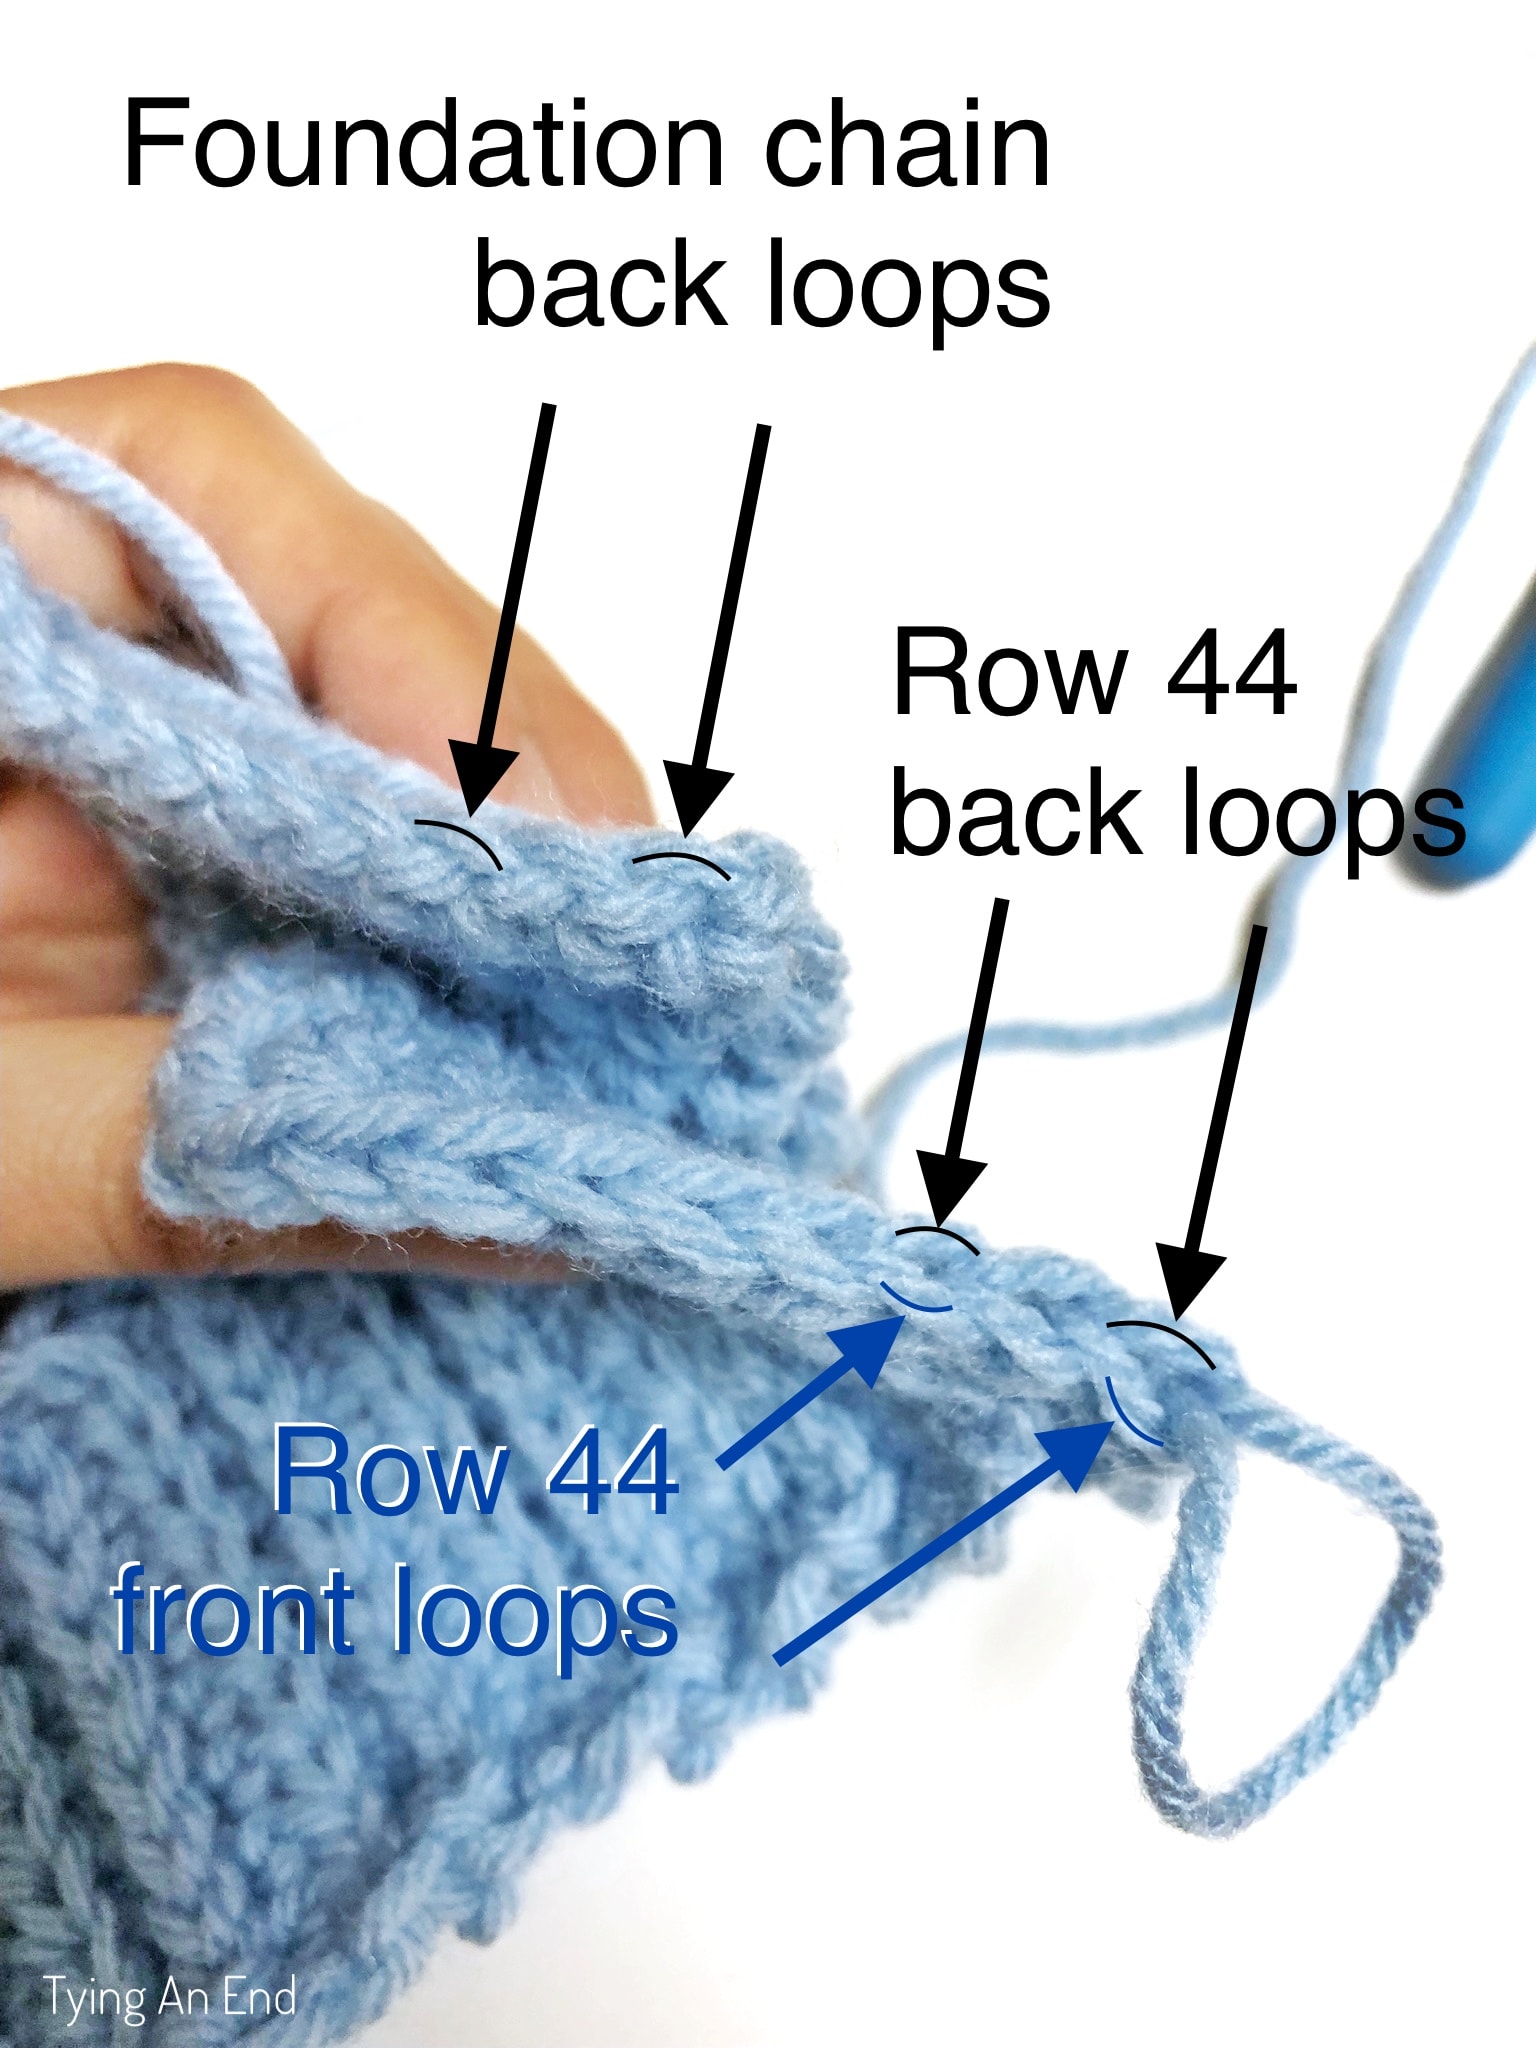
The brim should be about 16” (40.5 cm) long at this point.
Join the ends together with SL ST (make sure the right side is facing toward you), going through the BLO on the 44th row and back loop of the foundation chain. Rotate the brim to work on the row ends.
– BODY –
Switch to 7mm hook
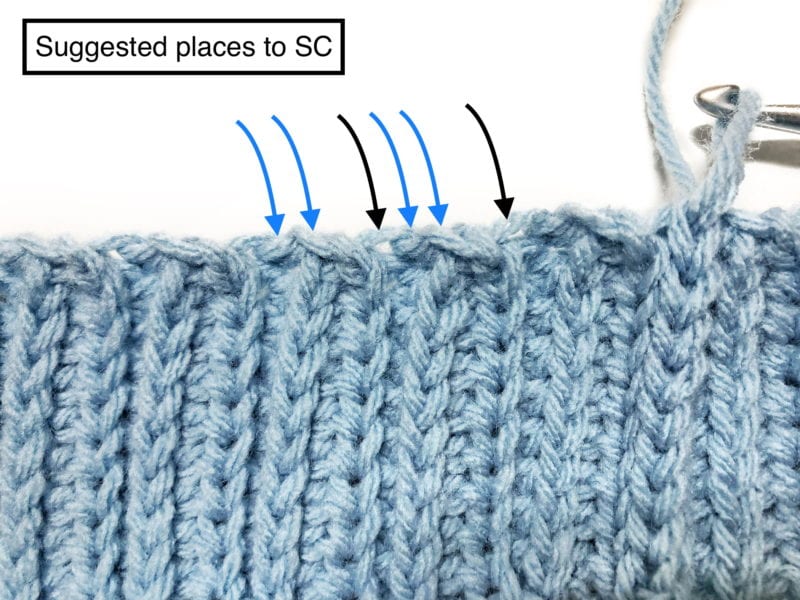
Round 1 – CH 1. (SC in first row end, 2SC in next end)*. Repeat * around. SL ST to 1st SC. [66]
Try it on and see if it’s comfortable. If it’s tight/loose, add/reduce brim rows until it meets your comfortable fit.
Round 2 – CH 1. HDC around. SL ST to 1st HDC. [66]
Round 3 – CH 1. HDC 7. (HDC 3, BO 1)*. Repeat * 4 more times. HDC around the rest. SL ST to 1st HDC. [66]
Round 4 – CH 1. HDC around. SL ST to 1st HDC. [66]
Round 5 – CH 1. HDC 10. (HDC 3, BO 1)*. Repeat * 3 more times. HDC around the rest. SL ST to 1st HDC. [66]
Round 6 – CH 1. HDC around. SL ST to 1st HDC. [66]
Round 7 – CH 1. HDC 13. (HDC 3, BO 1)*. Repeat * 2 more times. HDC around the rest. SL ST to 1st HDC. [66]
Round 8 – CH 1. HDC around. SL ST to 1st HDC. [66]
Round 9 – CH 1. HDC 16. (HDC 3, BO 1)*. Repeat * 1 more time. HDC around the rest. SL ST to 1st HDC. [66]
Round 10 – CH 1. HDC around. SL ST to 1st HDC. [66]
Round 11 – CH 1. HDC 22. BO 1. HDC around until the last 4 stitches. HDC2TOG 2. SL ST to 1st HDC. [64]
Round 12 – CH 1. (HDC 2, HDC2TOG)*. Repeat * around. SL ST to 1st HDC. [48]
Round 13 – CH 1. (HDC, HDC2TOG)*. Repeat * around. SL ST to 1st HDC. [32]
Round 14 – CH 1. HDC2TOG around. SL ST to 1st HDC. [16]
Round 15 – CH 1. SC2TOG around. SL ST to 1st SC. [8]
Fasten off and leave a long tail for seaming. Weave through each stitch and cinch the top.
Using the remainder of the yan tail, weave in criss cross directions for tighter finish.
Attach a pompom if you like, and voilà! You completed the Tri-Dot Beanie!
I can’t wait to see your Tri-Dot Beanie! Please tag me @tyinganend and use hashtag #tyinganend & #TriDotBeanie on Instagram so I can see and share your beautiful beanie!
Happy crocheting!
This pattern is an original pattern by Tae of Tying An End. Please do not claim this pattern as your own. If you wish to share this pattern, please link to this pattern and do not copy and paste it on to your site. You may keep a copy for your own personal use but please do not sell the pattern or distribute it. Please see Disclosure & Terms of Use for more info.


![[Free Crochet Pattern] Eve Crochet Headband by Tying An End](https://www.tyinganend.com/wp-content/uploads/2018/01/IMG_5855.jpg)